How to change the style of the mystery guitar man
Hello.
Im trying to edit a video for a compitetion, but it's hard! Its not like this kind of video. http://www.youtube.com/watch?v=rvuXnrjPfyM any help would be nice.
rjgolfer wrote:
Is there an easyer that way? I fell like a second-grade student who does not know how to cut, copy and paste. Laughing out loud
Sure... Just go and buy this camera Canon Lens new 36. You will also need 36 Flash cards. Then rent 36 people so you can push all the buttons to record at the same time. Then import you clips into the Canon of 36-to-1 software. This will give you a perfect film of the 26 cases unique...
All joking aside... How could it be any easier than just import your movies in AE, scale them, prune and export.
easier to wipe your own Donkey after taking a dump ;-)))
Tags: After Effects
Similar Questions
-
How to change the style of picture frame
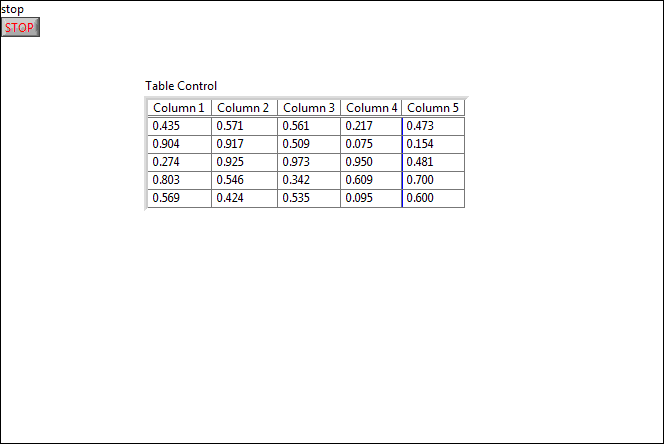
I would like to know how to change the style of table on the front. For the example below, I would like to remove the covered framework of gray color.
I could not find the table style editor.
First option: use the table on the classic controls palette, which has no border.
Second option-
- Select the painting tool.
- Right click on the border.
- With open color dialog box, click the space bar. This toggles the color picker to work on color FG, the background color, or both. It is also described at the bottom of the color picker.
- When the two have been selected, you can make the frame completely transparent by selecting the color of T.
-
How to change the parameter default slot 'Style layer'-'Stroke '?
Whenever I use "Layer Style"-> "Stroke", the default value is always red for 'Color' and 3.0 for the 'size '. I would like to change the size and the color by default, so that I don't have the change of these parameters each time that I use "Style of layer"-> "Stroke". Anyone know how to change the default settings? Thanks in advance.
Preset animations are the way to go. I have a library of more than 200 that I created to speed to the top of my work. Learn how to create them and use them by typing "create a preset" in the search help field in the upper right corner of the AE and dig through the resources you will find. The first link will get you started: using After Effects | Animation and effects presets overview
-
How to change the color of the Apple Watch pointer?
How to change the color of the Apple Watch pointer? In the style of color Apple Watch ca change you the color of the masince, complication, brands, etc. However, the needle of the hours and minutes remains white and red dark second pointer. Is there a way to set the pointers to become Gold?
Hello
It is not currently possible to customize the color of the hand or the second on the color dial hand.
If a customization option is not specified for any feature of any particular face watch, then it cannot be customized.
More information:
-
How to change the color of the Outline tab
How to change the color of the Outline tab? I want to use a black style on my test program but the functionality of the tab have a white edge on the top and left sides in an attempt to give a 3d look. I tried to play in the windows style but had no success. Does anyone know how to remove it or change the color? The closest I got so far is to put a basic theme of windows 7, which removes the 3d aspect. However, this gives a white background on the tab pages that I just can't find a way to change CVI or windows. Any suggestions?
Thank you
Ok. Thanks for the help.
-
How to change the color of the ball in Acrobat Pro ms
In a previous discussion (How to change the color of a ball), I saw that I should go to the character Styles palette and create a new style of character and then go to the paragraph Styles palette and create a new paragraph style. However, I do not see where to open the character Styles palette or paragraph in Acrobat Pro ms. Styles is there an Edit menu advanced hidden somewhere in Acrobat Pro ms? Or is it possible to change the colors of ball in Acrobat Pro MS new ' simplified friendly '?
This discussion on InDesign, Acrobat was not wearing.
In Acrobat, the only way it can be done (if you can do it at all) is with the text tool to edit and Images.
-
How to change the color of form fields
I don't know how to change the color of form fields. They default to gray, but I don't know how to make a different color.
Gray does not match the color scheme of my landing page!
Thank you!
I think you have two options when you are working on a landing page with an embedded format:
- You can change the background color of the entire form field set by selecting the shape, and then clicking on the Toolbox. In the window that opens go to the second (on a paint brush icon) and select the background color you want.
- You can change the background color of the actual fields in the form by adding CSS styles. Select the Toolbox, go to the last tab (Tools Extract page) and in the middle of this window, you will see "head | CSS | JS"- select this average CSS tab and enter the style code to get the color you want. Here is an example of code you can put in it. Note that #000000 is the color code for black. Here is more information about the code: css - background in the input fields and text color? - stack overflow
-
Hello
Happy New Year to ALL
On the Login area:
I would like to know how to change the size of the region of Login and its place.
For example: Login area should have a = 600 height and width = 100 and should be on the right side, not in the center of the screen.
This problem concerns oracle12, apex 4.2 and html5 theme.
Ziut
Ziut wrote:
Hello
for example: apex.oracle.com
workspace: tb2, tb2/tb2
App = 23705
My comp (for example):

style = "height: 600px;" Width: 100px; »
This is only an example. Theme 26.
Ziut
Ziut,
This is the closest I could come to your comp. The simplest implementation, I found was:
- A region has added to the Information
- Place the Login area in a Sidebar area model
- Kept the two regions in the same Point on the screen and the same grid.

I have attempted to substitute the CSS for the Login region but made very little progress and make a slurry in a perspective of support. You should always keep in mind that another person will have to support your claim, a day, and play the more you with him, it may be more difficult to maintain if it is not well documented.
Here's my demo:
Username and password are all two - demo
https://Apex.Oracle.com/pls/Apex/f?p=11956:101
Jeff
-
How to change the color of the navigation bar based on other
I need to change the color of my navigation bar, on my page. I already did on my other three pages. With the help of http://work.smarchal.com/twbscolor/scss/9b59b68e44adecf0f1ecdbff0 , but now I have made a new page I don't know how to change the color of the navigation bar to match exactly the three other pages. Please help.
Bootstrap CSS is read-only and should never be changed.
Creating CSS code on each web page is redundant & can cause inconsistent styles. Use rather a stylesheet external called custom.css including all your HTML files are linked. In this way, when you make changes to your custom.css file, these styles will automatically apply to all pages of the site.
Both inside the
Tag under the Bootstrap CSS code, add a link to your custom.css file.Nancy O.
-
When checkboxing 'Use as Button' - how to change the color of overview?
Smart form with the text: when checkboxing 'Use as Button' - how to change the color of overview?
In the button shape properties panel, you will find a 'Normal' field, if you open the drop-down list you see the other two States, select and change the Fill/Color/Character...whatever you want.

If you want to use the States for this button several times, I recommend to save the style or to create styles in the object Style Manager where you can also modify built-in three States: Normal, rollover and down.
-
How to change the Spry CSS tab
I like to use these old screens provided with the former DW Spry tab. I just looked in DW CC and it looks like they aren't there and more. But anyway, I made one for my client. Now, they want to get one of the tabs on the far right of the margin. See the image below:

I don't know yet if it's possible to do and if someone has done this before, can you tell me what code I need to change in the CSS? I would have joined the CSS file, but it seems that you cannot attach files in this forum, so I've copied below.
Please offer any means to change the color of the tabs, etc. - I just need to know how - or at all - this tab can be moved to the right.
Thanks, Guy deaf
PS I'm sorry that the CSS code does not correctly appear in this forum. When I type this message, looks like it will display line-by-line, but it's not. I'm sorry.
---------------------------------------------
@charset "UTF-8"; /* SpryTabbedPanels.css - version 0.6 - Spry Pre-Release 1.6.1 */ /* Copyright (c) 2006. Adobe Systems Incorporated. All rights reserved. */ /* Horizontal Tabbed Panels * * The default style for a TabbedPanels widget places all tab buttons * (left aligned) above the content panel. */ /* This is the selector for the main TabbedPanels container. For our * default style, this container does not contribute anything visually, * but it is floated left to make sure that any floating or clearing done * with any of its child elements are contained completely within the * TabbedPanels container, to minimize any impact or undesireable * interaction with other floated elements on the page that may be used * for layout. * * If you want to constrain the width of the TabbedPanels widget, set a * width on the TabbedPanels container. By default, the TabbedPanels widget * expands horizontally to fill up available space. * * The name of the class ("TabbedPanels") used in this selector is not * necessary to make the widget function. You can use any class name you * want to style the TabbedPanels container. */ .TabbedPanels { overflow: hidden; margin: 0px; padding: 0px; clear: none; width: 100%; /* IE Hack to force proper layout when preceded by a paragraph. (hasLayout Bug)*/ } /* This is the selector for the TabGroup. The TabGroup container houses * all of the tab buttons for each tabbed panel in the widget. This container * does not contribute anything visually to the look of the widget for our * default style. * * The name of the class ("TabbedPanelsTabGroup") used in this selector is not * necessary to make the widget function. You can use any class name you * want to style the TabGroup container. */ .TabbedPanelsTabGroup { margin: 0px; padding: 0px; } /* This is the selector for the TabbedPanelsTab. This container houses * the title for the panel. This is also the tab "button" that the user clicks * on to activate the corresponding content panel so that it appears on top * of the other tabbed panels contained in the widget. * * For our default style, each tab is positioned relatively 1 pixel down from * where it wold normally render. This allows each tab to overlap the content * panel that renders below it. Each tab is rendered with a 1 pixel bottom * border that has a color that matches the top border of the current content * panel. This gives the appearance that the tab is being drawn behind the * content panel. * * The name of the class ("TabbedPanelsTab") used in this selector is not * necessary to make the widget function. You can use any class name you want * to style this tab container. */ .TabbedPanelsTab { position: relative; top: 1px; float: left; padding: 5px 20px; margin: 0px 1px 0px 0px; font: bold 12px sans-serif; background-color: #f1c185; list-style: none; border-left: solid 1px #CCC; border-bottom: solid 1px #999; border-top: solid 1px #999; border-right: solid 1px #999; border-radius: 5px 5px 0px 0px; -moz-user-select: none; -khtml-user-select: none; cursor: pointer; } /* This selector is an example of how to change the appearnce of a tab button * container as the mouse enters it. The class "TabbedPanelsTabHover" is * programatically added and removed from the tab element as the mouse enters * and exits the container. */ .TabbedPanelsTabHover { background-color: #ffd197; } /* This selector is an example of how to change the appearance of a tab button * container after the user has clicked on it to activate a content panel. * The class "TabbedPanelsTabSelected" is programatically added and removed * from the tab element as the user clicks on the tab button containers in * the widget. * * As mentioned above, for our default style, tab buttons are positioned * 1 pixel down from where it would normally render. When the tab button is * selected, we change its bottom border to match the background color of the * content panel so that it looks like the tab is part of the content panel. */ .TabbedPanelsTabSelected { background-color: #ffe9cd; border-bottom: 1px solid #EEE; } /* This selector is an example of how to make a link inside of a tab button * look like normal text. Users may want to use links inside of a tab button * so that when it gets focus, the text *inside* the tab button gets a focus * ring around it, instead of the focus ring around the entire tab. */ .TabbedPanelsTab a { color: black; text-decoration: none; } /* This is the selector for the ContentGroup. The ContentGroup container houses * all of the content panels for each tabbed panel in the widget. For our * default style, this container provides the background color and borders that * surround the content. * * The name of the class ("TabbedPanelsContentGroup") used in this selector is * not necessary to make the widget function. You can use any class name you * want to style the ContentGroup container. */ .TabbedPanelsContentGroup { clear: both; border-top: solid 1px #999; background-color: #FFF; } /* This is the selector for the Content panel. The Content panel holds the * content for a single tabbed panel. For our default style, this container * provides some padding, so that the content is not pushed up against the * widget borders. * * The name of the class ("TabbedPanelsContent") used in this selector is * not necessary to make the widget function. You can use any class name you * want to style the Content container. */ .TabbedPanelsContent { overflow: hidden; padding: 4px; } /* This selector is an example of how to change the appearnce of the currently * active container panel. The class "TabbedPanelsContentVisible" is * programatically added and removed from the content element as the panel * is activated/deactivated. */ .TabbedPanelsContentVisible { } /* Vertical Tabbed Panels * * The following rules override some of the default rules above so that the * TabbedPanels widget renders with its tab buttons along the left side of * the currently active content panel. * * With the rules defined below, the only change that will have to be made * to switch a horizontal tabbed panels widget to a vertical tabbed panels * widget, is to use the "VTabbedPanels" class on the top-level widget * container element, instead of "TabbedPanels". */ .VTabbedPanels { overflow: hidden; zoom: 1; } /* This selector floats the TabGroup so that the tab buttons it contains * render to the left of the active content panel. A border is drawn around * the group container to make it look like a list container. */ .VTabbedPanels .TabbedPanelsTabGroup { float: left; width: 10em; height: 20em; background-color: #EEE; position: relative; border-top: solid 1px #999; border-right: solid 1px #999; border-left: solid 1px #CCC; border-bottom: solid 1px #CCC; } /* This selector disables the float property that is placed on each tab button * by the default TabbedPanelsTab selector rule above. It also draws a bottom * border for the tab. The tab button will get its left and right border from * the TabGroup, and its top border from the TabGroup or tab button above it. */ .VTabbedPanels .TabbedPanelsTab { float: none; margin: 0px; border-top: none; border-left: none; border-right: none; } /* This selector disables the float property that is placed on each tab button * by the default TabbedPanelsTab selector rule above. It also draws a bottom * border for the tab. The tab button will get its left and right border from * the TabGroup, and its top border from the TabGroup or tab button above it. */ .VTabbedPanels .TabbedPanelsTabSelected { background-color: #EEE; border-bottom: solid 1px #999; } /* This selector floats the content panels for the widget so that they * render to the right of the tabbed buttons. */ .VTabbedPanels .TabbedPanelsContentGroup { clear: none; float: left; padding: 0px; width: 30em; height: 20em; } /* Styles for Printing */ @media print { .TabbedPanels { overflow: visible !important; } .TabbedPanelsContentGroup { display: block !important; overflow: visible !important; height: auto !important; } .TabbedPanelsContent { overflow: visible !important; display: block !important; clear:both !important; } .TabbedPanelsTab { overflow: visible !important; display: block !important; clear:both !important; } }!-[CodeBlockStart:dffe5525-a787-4a98-a87f-f24554b12141]-->@charset 'UTF-8'; / * SpryTabbedPanels.css - 0.6 - pre-release Spry 1.6.1 version * / / * Copyright (c) 2006] Adobe Systems Incorporated. All rights reserved. * / / * Horizontal tabbed panels * the default style for a TabbedPanels widget puts all the tab buttons * (stalled left) above the content panel. * / / * This is the selector for the main container of TabbedPanels. For our * style by default, this container does not contribute anything visually, * but it is floated to the left to ensure that all floating or compensation done * with any which of her children the elements lie entirely within the limits the * TabbedPanels container, in order to minimize any impact or unwanted * interaction with other floating elements on the page which may be used * for page layout. * If you want to limit the width of the widget TabbedPanels, define a * width of the container TabbedPanels. By default, the widget TabbedPanels * extends horizontally to fill the available space. * The name of the class ("TabbedPanels") used in this selector is not * necessary to make the widget service. You can use a class name, you * want to style the TabbedPanels container. */ . TabbedPanels {overflow: hidden;} margin: 0px; padding: 0px; Clear: none; Width: 100%; / * Hack IE to force the layout correct when preceded by a paragraph. (hasLayout bug) * /} / * this is the selector for the TabGroup. The container of TabGroup houses * all buttons on the tab for each tabs in the widget panel. This container * does not contribute to what both visually in the appearance of the widget for our * default style. * The name of the class ("TabbedPanelsTabGroup") used in this selector is not * necessary to make the widget service. You can use a class name, you * want to style the TabGroup container. */ . TabbedPanelsTabGroup {margin: 0px;} padding: 0px; } / * This is the selector for the TabbedPanelsTab. This container houses * the title of the Panel. It is also tab 'button' that the user clicks on * to activate the corresponding content panel so that it appears on top * of the other tabs in the widget panels. * For our style by default, each tab is positioned relatively 1 pixel down from * where it would normally. This allows each tab overlap content * panel that renders underneath. Each tab is rendered with a background of 1 pixel * border which has a color that corresponds to the upper edge of the current content * panel. This gives the appearance that the tab is drawn behind the * content panel. * The name of the class ("TabbedPanelsTab") used in this selector is not * necessary to make the widget service. You can use any class name you want * to style the tab container. */ . TabbedPanelsTab {position: relative;} Top: 1px; float: left; padding: 5px 20px; margin: 0px 1px 0px 0px; Police: bold 12px without serif. background-color: #f1c185; list-style: none; border-left: 1px solid #CCC; border-bottom: 1px solid #999; border-top: 1px solid #999; border-right: 1px solid #999; border-radius: 5px 0px 5px 0px; -moz-user-select: none; -khtml-user-select: none; cursor: pointer; } / * This selector is an example how to change the appearance of a button in the tab * container as the mouse enters in the it. The class is "TabbedPanelsTabHover" * programatically add and remove the element tab as the mouse between in * in and out of the container. */ . TabbedPanelsTabHover {background-color: #ffd197 ;} / * this selector is an example how to do to change the appearance of a button in the tab * container after the user has clicked on it to activate a content panel.} * The 'TabbedPanelsTabSelected' class is programmatically added and removed * the tab element as long as the user clicks button tab containers in * the widget. * As mentioned above, for our style by default, the tab buttons are positioned * 1 pixel down where he would normally. What is the tab key * selected, we change its bottom border to match the background color of the * content panel so that it looks like the tab is the content panel. */ . TabbedPanelsTabSelected {background-color: #ffe9cd;} border-bottom: 1px solid #EEE; } / * This selector is an example of how to make a link inside a tab button * look like normal text. Users may want to use the links within a tab button * so that when it gets the focus, the text * inside * the tab button gets a focus * ring around it, instead of the ring around the whole tab. * /. TabbedPanelsTab a {color: black;} text-decoration: none; } / * This is the selector for the ContentGroup. The ContentGroup container houses * all panels of content for each tabs in the widget panel. For our * style by default, this container provides the background color and borders that * surround content. * The name of the class ("TabbedPanelsContentGroup") used in this selector is * not necessary to make the widget function. You can use a class name, you * want to style the ContentGroup container. */ . TabbedPanelsContentGroup {clear: both;} border-top: 1px solid #999; background-color: #FFF; } / * This is the selector for the content panel. The content panel contains the * content for a single panel tabs. For our default style, this container * provides some padding, so that content is not pushed upward against the * widget borders. * The name of the class ("TabbedPanelsContent") used in this selector is * not necessary to make the widget function. You can use a class name, you * want to style the content container. */ . TabbedPanelsContent {overflow: hidden;} padding: 4px; } / * This selector is an example of how to change the appearance of the currently * active panel container. The class is "TabbedPanelsContentVisible" * programatically added and removed from the content as the Panel item * is enabled/disabled. */ . TabbedPanelsContentVisible {} / * vertical tabbed panels * following rules override some of the default rules above so that the * TabbedPanels widget is rendered with its buttons on the tab on the left of * the active content panel. * With the rules defined below, the only change that will be made * to move a widget panels to horizontal tabs to vertical tabbed panels * widget, is to use the 'VTabbedPanels' class on the top-level widget * element container, instead of "TabbedPanels. */ . VTabbedPanels {overflow: hidden;} Zoom: 1; } / * This selector floats the TabGroup so that the tab buttons it contains * make left of active content panel. A border is drawn around * the group container to make it look like a container from the list. */ . VTabbedPanels. TabbedPanelsTabGroup {float: left;} Width: 10em; height: 20em; background-color: #EEE; position: relative; border-top: 1px solid #999; border-right: 1px solid #999; border-left: 1px solid #CCC; border-bottom: 1px solid #CCC; } / * This selector disables the float property that is placed on each button of the tab * by the rule above TabbedPanelsTab default selector. He also draws a background * border for the tab. The tab button will get his left and right border of * the TabGroup and its superior border of the tab above it or button TabGroup. */ . VTabbedPanels. TabbedPanelsTab {float: none;} margin: 0px; border-top: none; border-left: none; border-right: none; } / * This selector disables the float property that is placed on each button of the tab * by the rule above TabbedPanelsTab default selector. He also draws a background * border for the tab. The tab button will get his left and right border of * the TabGroup and its superior border of the tab above it or button TabGroup. */ . VTabbedPanels. TabbedPanelsTabSelected {background-color: #EEE;} border-bottom: 1px solid #999; } / * This selector fleet contained signs of the widget while they * make it to the right of the tabs buttons. */ . VTabbedPanels. TabbedPanelsContentGroup {clear: none;} float: left; padding: 0px; Width: 30em; height: 20em; } / * Printing styles * / @media print {.} TabbedPanels {overflow: visible! important;}. TabbedPanelsContentGroup {display: block! important;} overflow: visible! important; height: auto! important; } . TabbedPanelsContent {overflow: visible! important;} display: block! important; clear: both! important; } . TabbedPanelsTab {overflow: visible! important;} display: block! important; clear: both! important; } }
Add the class like below:
- Open Ocean
-
Dreamweaver CC: How to change the color of the selected text
Maybe a stupid question, but I can't seem to figure it out, even with searches on the web. I want to change the color of a single word in my HTML document. Can anyone offer advice?
I can change some styles of the selected text (bold, italic, etc.), but do not understand the color.
Also, I know how to change the color of the different elements using CSS. But for the selected text in an element, CSS here the simplest solution?
Thanks in advance.
carlg79335635 wrote:
Thank you for that. But I don't have a color option in my menu format. It ends at some CSS Styles. I have to allow him anywhere? I use Dreamweaver CC.
Yes. I checked it and in CC DW, there is not a way to do as I suggested previously. I was watching DW CS6 and he got it.
Looks like you'll need to teach how them to manually code. This will make them think about what they are doing and so concentrate better.
-
How to change the colors of the ADF calendar from different suppliers?
Hello again once I use JDeveloper, 11.1.2.3.0,
This might be the third question I ask here on this subject, and until now, I didn't get any answer.
CAN SOMEONE PLEASE PROVIDE AN EXAMPLE OR A TUTORIAL ON HOW TO CHANGE THE COLORS OF THE ADF CALENDAR ITEM?
Sorry for asking again, but I find it very cool that nobody answers to these questions. Y at - it a bug or nobody knows really how to customize the calendar component?
Hi user,
Here a few steps:
(1) create a bean
(2) create a variable with the hash table data type, for example:
private HashMap activityStyles = new HashMap<>
, InstanceStyles > (); (3) create a method where you load the desired styles, for example:
public void loadactivityStyles() {}
try {}
HashSet setconf = new HashSet
(); HashSet setnoconf = new HashSet
(); HashSet setadm = new HashSet
(); setconf. Add ("STATUS 1");
setnoconf. Add ("SITUATION 2");
setadm. Add ("STATUS 3");
activityStyles.put (setconf, CalendarActivityRamp.getActivityRamp (CalendarActivityRamp.RampKey.GREEN));
activityStyles.put (setnoconf, CalendarActivityRamp.getActivityRamp (CalendarActivityRamp.RampKey.ORANGE));
activityStyles.put (setadm, CalendarActivityRamp.getActivityRamp (CalendarActivityRamp.RampKey.BLUE));
}
{(4) set the activityStyles variable in the calendar component property "activityStyles = #{myBean.activityStyles"}
(5) set your field of Tag calendar (located in the Wizard) the field of the VO that contain the values configured in the method (1 STATE, STATE 2, STATE 3, etc.). It allows to to correspond with the activityStyles variable when running.
(6) run and see the colors.
Good luck.
Jhon Carrillo
-
How to change the background color of selection of the selected item in the drop-down box of choice?
How to change the background color of selection of the selected item in the drop-down box of choice?
By default, the selection background color like 'blue', but if I want it to be "yellow" for example, how should I do?
Thank you
The id is applied by (I think) the skin of the ChoiceBox class. You don't need to define.
You must apply the css in an external style sheet. You can apply the external style sheet to any parent of the box of your choice, or on-site (the most usual way to do it).
Example:
import java.util.ArrayList; import java.util.List; import javafx.application.Application; import javafx.scene.Scene; import javafx.scene.control.ChoiceBox; import javafx.scene.layout.VBox; import javafx.stage.Stage; public class ChoiceBoxTest extends Application { @Override public void start(Stage primaryStage) throws Exception { primaryStage.setTitle("Example 2"); final ChoiceBoxchoiceBox = new ChoiceBox<>(); List tempResult = new ArrayList (); for (int i = 0; i < 10; i++) { tempResult.add("Item " + i); } choiceBox.getItems().setAll(tempResult); VBox root = new VBox(); root.getChildren().add(choiceBox); final Scene scene = new Scene(root, 300, 250); scene.getStylesheets().add("choiceBox.css"); primaryStage.setScene(scene); primaryStage.show(); } public static void main(String[] args) { launch(args); } } choiceBox.css:
@CHARSET "UTF-8";
#choice-box-menu-item:focused  {
 -fx-background-color: yellow ;
}
#choice-box-menu-item .label {
 -fx-text-fill: black ;
}
Post edited by: James_D
-
How to change the PCTFREE parameter for an existing table
How to change the PCTFREE parameter for an existing table?
Guys can you help me pleaseHello
Of course it is possible.
In this case you would export the table from the database (using old style exp)
Start the import with the index_file option to generate the table/index instructions
Modify the file created and updated the PCTFREE and remove any that need to be performed (default, if I remember correctly, he comments on the statements of the Index)
Run the file for the table and the index created
After that start the import with the option "ignore = yes".Make sure that you export only this particular table using "tables =
Also in importing the "ignore = yes" will also be important data that still exists.In my view, however, this is not what you want to do. It's more complex, sensitive failure and the table should be deleted, so users are affected unnecessarily long.
Success!
FJFranken


Delete the following in your css spry as file its in the ' query print media "and has no effect on the screen - have added you it to the wrong place."
{.alignRight}
position: relative;
Top: 1px;
float: right! important;
padding: 5px 20px;
margin: 0px 1px 0px 0px;
Police: bold 12px without serif.
background-color: #f1c185;
list-style: none;
border-left: 1px solid #CCC;
border-bottom: 1px solid #999;
border-top: 1px solid #999;
border-right: 1px solid #999;
border-radius: 5px 0px 5px 0px;
-moz-user-select: none;
-khtml-user-select: none;
cursor: pointer;
}
Add the below css just above the press query written:
{.alignRight}
float: right! important;
}
/ * Print styles * /.
@media print {}
Maybe you are looking for
-
HP 15-r002se Notebook PC: drivers for my HP laptop
After decommissioning of my HP 15-r002se Notebook PC from Windows 8 pre-installed .1 to Windows 7 I have common driver problems. Missing drivers are the following device drivers: BUS SMPCI\VEN_8086 & DEV_0F12 & SUBSYS_2213103C & REV_0CPCI\VEN_8086 &
-
I have all tried, resume, restart, turn printer... off Quebec continues to display this document with the status of delete, but it won't go away. Another thing, I then try to print gets in line behind it and will not be printed. any suggestions? I
-
Have a shared computer and need to find subfolders for all users.
I have a folder is located and told to right click on the 'My Computer' icon then choose Explore. Click the plus sign next to "My Computer" and then click the plus sign next to "drive C". Go to "Documents and Settings" user select Go to the "Local Se
-
Hello I wanted to reinstall windows on my computer. I formatted the entire disk and reinstallment began.When I was ready to write my product key I noticed that was missing in my windows cd cover. I have another sticker with "certificate of Authentici
-
CD drive icons disappeared after I installed the Norton Recovery tool
Original title: My CD drive icons disappeared after I installed the Norton Recovery tool I downloaded Norton Recovery tool, created the rebootable disc. Tested, everything OK. Then found all my readers of DVD disc including a player clone of Ebly, di