Making clips appearing as separate sequence tracks.
Normally, when I drag a multicam clip in a sequence, it comes as a video and an audio clip, I can choose the angles using normal multicam workflow.
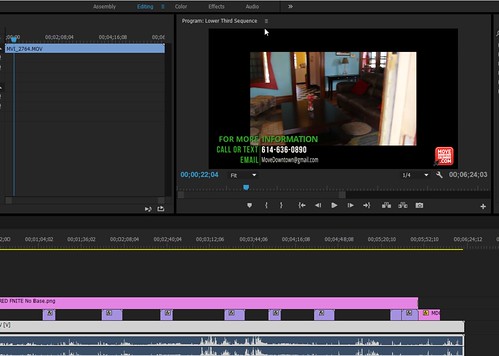
However, since yesterday whenever I try to drag a clip in a sequence multicam, he appears as clips separated on different tracks (as shown here - imgur)
I know that I can get around this by creating a nest for each import then delete the audio not desired, but I have a lot of clips to get through and I'm hoping to restore my previous workflow. Anyone has an idea why this has changed, and how can I change it back?
Thank you
G
Is this something to do with the ' insert and replace the sequence as nests or individual clips, top left corner of the pane sequence button?
Tags: Premiere
Similar Questions
-
Synchronization of a live video with audio digital SLR and a separate audio track
Hi, I have a problem with live video that I try to sync with a separate audio track. I have several clips that I want to include in the video, so I don't want to sync the audio frame video and separate framework, but I want to know the best possible way, please, I can sync the audio separated? So far I used markers of the waveforms to find the synchronization point, but so far it is not synchronization.
I hope someone can help?
Thank you
Joe.
Adjust the audio clip left or right of the track until it syncs to the top. In the context menu for the sequence, you can display Audio Units, if you need less than a precision of image.
-
First pro does not control the properties of the video clip to match the sequence
Hello
I have a sequence in my calendar set at 1920 x 1080 and based on my understanding of the video clips, I place in the timeline should automatically be adjusted in cadence, resolution etc. I looked in my settings to see if an option to do this automatically has been disabled, but can not find it and the timeline is always insert Staples into their native format 1280 x 720. can you tell me what I am doing wrong? You can see in the screenshot that the video is narrowed down, thank you!
This dialog box appears only when you place a clip in an empty sequence. This is to help you create a sequence quickly that meets (or not) your footage.
To do what you want, go to your Pro first preferences > general and select the check box for the default scale to the size of the image.
Click OK.
MtD
-
Adding a brand element, when the clip is in a sequence
Hello
It's something that I think should be easy enough, but I don't think it is.
I clip on my calendar that I want to add an element (not a sequence marker) mark I double click on the video and it opens in the source monitor, (I see the points of entry and the element in question).
I have ICT in order exactly to the place I want to add my brand of element. Is there a way I can take the ICT in the source monitor to the same place ICT in the sequence i can add the brand of the item?
Hope that isn't confusing
Thank you very much
Gary
Maybe it's a bug. It works as you want if the clip is not already loaded in the Source monitor, but if the clip is loaded, it simply opens to the last frame that was seen.
A solution would be to delete the list of the images in the Source monitor; Click on the drop down menu to the top where it says "Source:" and select all close. Double click works as you like then.
Note that you can also add a brand element to an element in a sequence. You must have the clip selected, but it will add a brand element to the clamp to the ICT in the sequence. Track targeting any here. If it does not already exist, you can add a shortcut key for this. Also note that this only affect the occurrence of clip used in the sequence; It will not add a marker to the main element.
I have filed a bug report on the behavior you mentioned, however: Adobe feature request/Bug Report Form
-
All Clip Moves are by default track 4, and Transitions do not work on my calendar
After restarting Premiere Pro CC 2015 many times, I still have multiple issues with my editing and settings.
1. any clip I take on any track, it is default you want to move the clip to the 4 way (not even a selected or highlighted passage)
2. the transitions are not adjustable on my clips
3. while I am usually able to rub changes on items such as opacity or position, rubbing currently doesn't change anything.
I don't know what else to try for this project other than that of reboot, if anyone has any suggestions to fix that, it would be great thanks.
any advice you have would be helpful.
I agree, because my recommendation will almost certainly solve this and many other issues without introducing new ones. But... it cannot be loved.
My advice? Put yourself in Windows. It works better.
-
Why 16:9 clips appear as 4:3 as a prelude?
With the help of prelude CC on Mac with the Mavericks. Have a Sony hdr-xr500. When I connect the camera t and double-click the AVCHD file in prelude, the clips appear but they run all in format 4:3 (crushed). They were shot in 16:9, HQ and appear as 16:9 in the camera and they also appear in 16:9 if I open them in iMovie.
Captain salvation,
While trying this at my end, I ended up finding it quite interesting.
Actually, I take backup of all files XMP files to AVCHD shared by you and remove all these xmp files. Then I re-ingested all these media files and it worked fine.
Files are displayed in 16:9 only as expected.
You also try the same and share the results.
Very probably XMPs are not properly born. How were these xmp files created? Through which product?
I hope it helps.
Thank you
Mayjain
-
I have a 8 min long 4 k sequence where all the video clips are the same size k 4. I can warp stabilize just fun but when I go on change settings for the sequence to 1080 p and then right click on each clip to scale to the framework I get error "string stabilizer requires clip dimensions to match sequence settings try nesting" the reason why I want to warp stabilize the 4 k images rather than 1080 p images is because with 4 k I have a budget of high culture, I can get away with before I got to the bottom of the scale, string stabilizer settings I use are in the jpg I have attached. I tried visualization of nesting videos online and I can't find what I need. As the now the only viable option I must deform stabilize 4 k and export under 4 k and then open a new project and import the stabilized 4 k images exported and reduce the sequence to 1080 p. I'll do that if I have to, but it will take a lot of time coding without a doubt. Any help is greatly appreciated.

If the images do not match the sequence settings and you want to use the chain, you'll nest.
-
When I import .wmv files, only half of the clip appears
I really need help when I import .wmv files in adobe after effects creative of clouds that the bottom half of the clip appears (as I just installed quick time) here is a screenshot:

Thanks - Sleak
E-mail: [email protected]
Skype: Sleakk
Refer to this:
WMV files corrupt on import / export
Mylenium
-
How to split a Long Media Clip into separate sequences?
Hello:
I will treat a video clip that contains 5 speakers using Premiere Pro CS5. I used the razor tool to split the region into five separate clips. How can I move each of the four remaining clips to different sequences? I tried to copy one of the three clips and paste it into an empty sequence, but there is no option to paste.
Thanks for any help.
Kind regards
Rich Locus
Copy and paste as in ctrl + C > ctrl + V is not working?
-
So we struggled massively with the eternal problem of the creation to have several editors working on the same project using cloned disks. To say the sharing of sequences is a nightmare is placing in slightly. We are on a feature-length documentary and our projects are massive, so we are importers of each and other sequences pray to God whenever it works without duplicating the main elements. The previous workaround solution to this if I wanted to, say, import a B training sequence on one of a sequence of drive, would be dupe of the project folder of the drive B, open it on a drive with drive B disconnected, reconnect all media in the project to their counterparts in the a drive, save the project, open a disc project and import the sequence desired my B drive project to chip away at. So many headaches that was, at least he tended to work.
Now, I've duped the player project B, and to my surprise he relinked automatically to everything on a disk without even asking. Great, good! It now seems to ignore the top-level name difference (beyond the names of Player A and B, the structure of the drive is exactly the same) and is able to connect automatically without asking from the main directory to the top. Except when you import sequences of this project automatically reconnected, he dupes now all single item in the sequence. I was pulling my hair out trying to find a way around it, as it is effectively grind our project together to stop right now. At the automatic reconnection, a feature that has been added with an unexpected consequence? Did anyone else encounter this problem and have you found a way around it?
For all he has foibles, I really think first is a great platform, but presents a caveat of insisting that the elements in a sequence reference key items in the project Panel, rather than just directly referencing the clips on the drive is prohibitive to the point of madness.
Problem solved through Creative Cow - it's as simple that importation via browser media and not through the command import. Because they are apparently the same process, not sure why we work and not the other, but I'll take it!
-
Separate stereo tracks already on a timeline
I'm under CC 2014. I've saved all my audio using a stereo track - there is a LAV left and a right shotgun microphone. I need to be able to adjust the volume of channels independently.
My problem is that I imported all my images using the settings to 'use the file' in the Panel of audio preferences in first, and then I started to edit.
I know I should have imported images using the "mono" settings in the audio preferences panel, and when I import images in my project after changing my settings in mono, my audio comes in two separate tracks, which is what I want.
However, I can't find a way to separate stereo channels titles that I've already imported and started editing with. It is a huge problem, because I have already published a chronology of 30 minutes and won't start again.My question: is there a simple way to separate audio channels stereo of a song already on a timeline into two mono tracks?
If not, is there a reasonable solution that does not change things around on the timeline and replacing the clips one?
Thanks for your help.
Hi Mjshade,
Best practice is to change the configuration of the audio clips in the trash on channels until they reach the timeline. My guess would be: If you have not changed the I/O points on the item in the bin, just right-click on it, choose 'audio channels,' change the preset in "mono" and then alt-make slide the clip on the stereo clip in the timeline panel. When the green outline appears on the clip, take it and it should replace the stereo clip with mono clip with the same clip I/O and the same timeline I/O.
Good luck!
Eric D - CoralVision
-
The merged clips appear out-of-sync indicators while in sync
So I have this weird problem with merged clips showing out-of-sync indicators while in fact, the audio is synchronized.
Let me explain first the workflow for this feature;
-Set of 6 K RED footage gets converted to 1080 p Prores Proxy
-All the proxies and separate audio files are imported into a project file 'Master and Sync' (I use it to synchronize and merge clips as well as rename them)
-When everything is synchronized, merged and renamed, they are placed in their corresponding scene number folder
-J' I then open my project file 'Edit' and in the media browser, browse to the file "Master and Sync" project.
-J' have drag and drop clips/merged records newly created the 'Master Sync' in the mediabrowser, in my project 'change '.
-J' I change with them and everything works as expected.
The issue comes in when I try to import a sequence edited of my Deputy Editor-in-Chief.
-We work with the latest version of first
-We are working on our own systems at home, but both have local access to all the images that we work with.
-We have a record of sharing creative cloud where our editing projects are located and saved as well as the project "Master and Sync.
-When my assistant has completed a first Assembly of a scene I navigate to his project to change the media browser when changing my own project is open.
-J' I find the finished sequence and drag and drop it into my own project to change .
And at that time there almost every single clip shows the out-of-sync indicator, but when I play the sequence everything is synchronized. I checked with my assistend maybe if its sequence shows also these indicators, but it is not. So it only seems to happen when I import its sequences. I tried ' display indicator out of sync clips unrelated " in the preferences, but without success.

To add a comment to the audio to video synchronization. I had to make up for a lot of audio clips by a 1 or a couple of images manually because they turned with timecode jamming and not gen-lock. It is so true that technically the audio can be out of sync before their merger all but as you can see on the screenshot the indicators show a shift much larger than 1 or two images (I think the max lag that I got was 9 frames).
All suggestions are welcome and I really hope I'm overlooking something rather than finding a bug!
Thank you!
So, I just got a phone call from Adobe. Technology Adobe told me that he had tested this configuration to confirm that it is seeing the same thing I am. Unfortunately, it has been. He also told me that it is a limitation instead of bug. Is because my assistant and I are working on two different systems and no access don't not on the same physical hard disk and so do not have access to the "exact" same media.
It would be no problem if we worked on different systems, but to access media on the shared storage.
The shame if this is considered to be a limitation rather than a bug. Seems to me it is repairable but, Hey! I'm just a simple editor and no programmer so it might be more difficult.
-
Making clips come with the split titles
For the life of me I can't understand what is happening with my work multicam. I have two machines and I'm 99% sure that I do the same thing on both, but on machine 2, I can't multicam to work properly.
I create my multicam clip
I have 'create the clip sequence' do my multicam sequence.
I create another multicam clip and insert it in my sequence
On computer 1, all right. The video clip between the sequence as a lead single, green, indicating that it's multicam. And then I can always switch between the cameras.
But on machine 2, when I try and insert in my sequence it is as long as TWO tracks separated from the video, and both are BLUE, not green. So the only way to "switch" back between the cameras is to hide the look and V1 and V2, or vice versa.
Also, when I insert the multicam clip in the source window, I see two video tracks automatically highlighted for insertion in order, as I am presented with the option to choose if I want V1 or V2 to edit in the sequence. On computer 1, when I load the clip, I only can do V1.
Hi Geoff,
Plese check if on the timeline just below the time code, there is an icon for "insert and crushes as a nest or individual clips" icon.

Vinay
-
"Merge clips" give me too many tracks
Hello
I'm trying to merge a video clip with 8 audio tracks, selecting clips, right-click and selecting "merge Clips...". "However, the merged item gives me actually 64 audio tracks. I work in a sequence generated by plural eyes 3. Please help, do not know why this is happening.
Thank you
Lincoln
Hello
FYI, I got this kind of problems using Pluraleyes 3.5 and first CC 2015.
Given that I spend 4 PE, there all fine empty no track more...
-
Why the new clip appears in the browser to Zoom in waveform?
It's a case of heads cut and tails, I guess. Multitrack, I pointed out the bit at the end of a clip that I tried to cut and make the cut, no problem. Then I did the same thing at the beginning of the clip, no problem. Then I took the clip in the waveform display. It displays the edited properly clip, but the Zoom browser shows the original, unreleased clip. I see no reason to have that becomes available after I made my changes, do you think? So my question is: Y at - it a way to empty the bits I don't want, leaving only the edited clip? I mean, I have two long tracks of three minutes, and the session is 2.5 GB in size. Ridiculous.
Simple? Creation of two times more files than you need?
Do not know why you do all this in waveform at all. There is a tool perfectly well multitrack to create unique copies, without going anywhere...
And as for the rest - what on Earth you play at? If you want to separate the pairs of tracks at the same location, why not highlight both and try to put a split at this time there? Then, all you have to do is group of each pair of tracks within each division and you can do anything you want with them.
The best way to put a split into several tracks is to use the razor tool, by the way. Simply select all the tracks you want (Ctrl > mouse click), pick up the razor, click where you want to that, and it will put a split in all of them.
But emmrecs is correct - this will leave your original songs fully intact. Multitrack is essentially a non-destructive file player.


Maybe you are looking for
-
iPad2 and problem with the SIM card after update
even after the 9.3.1 last updated continuously having problems with SIM TIM card network. I changed and I tried with another SIM card but the problem remains. I did have all those problems with 9.2.1. Apple could intervene and solve these problems? O
-
First of all, I would like to wish you all a happy holiday season. As I was browsing these pages, I noticed that all the Mac users have a specific question about their Mac SSID disc with storage to mention the OTHER. In the situation of mine when I c
-
My background image is enlarged.
I tried to set a picture as my background, but any mode (stretching, tiled floor, Center) I put it in it still is zoom in on the picture. On my screen user connection Image is fine, but as soon as I connect it is enlarged. Help.
-
Windows Vista Basic has stopped working on my laptop.
After my recent updates, Windows Vista Basic has stopped working on my laptop.
-
LaserJet P2055 very slow in the scanned PDF files printing
We have three printers Laserjet P2055DN. They have all of the extreme difficulties in printing scanned PDFs, especially of our Toshiba e_Studio 451 Copier/scanner. The printer that I'm testing has 384 MB of ram. The OS is Windows 7 Pro 32-bit. The dr