remove the borders mx:TextInput (focus)
Hi all
I have this TextInput element that I want to use without its borders. I can remove the borders, but when I click in the textfield it gets orange borders.
So the question is how to remove these borders when the TextInput element has focus?
Here is the code that I currently have:
< mx:TextInput " text = ' My default text'x ='97"y ="10 "" ".
"" borderStyle = "none"
"" borderColor = "#FFFFFF"
borderSkin="{null}"
"" dropShadowColor = "0xFFFFFF"
"" dropShadowEnabled = "false"
borderThickness="0"
" fontFamily ="Arial"fontSize ="15"/ >
thnx
Luca
Hello
Please check the code below
private function setBorderThickness (): void {}
this.tIn.styleName = "textInput";
}
]]>
.textInput {}
Focus-thickness: 0.
}
borderStyle = "none" borderColor = "#FFFFFF" = "{null}" borderSkin
dropShadowColor = "0xFFFFFF" dropShadowEnabled = "false" borderThickness = "0".
fontFamily = "Arial" fontSize = "15" focusIn = "setBorderThickness ()" / > "
Setting the focusThickness 0 on focusIn event will meet your expectations.
Kind regards
Anitha
Tags: Flex
Similar Questions
-
DeskJet 1000: Remove the borders on my photos
My little Deskjet 1000 prints beautifully, but here's the problem I have: it prints with a border around the sides. I don't want a border. I put photo paper glossy 4 x 6 print in portrait, and there is a border of white half inch around all sides and a border of 2 inches on the bottom. Why is this?
I have gone into the layout for printing and tried to resize the borders up to 0 "and it just doesn't work. When I put to zero and click on the next box, the minimum appears comme.125. Is it possible that a paper 4 x 6 can be completely filled with photo?
Thank you
Hello
Your printer does not support printing without margins (borderless).
Kind regards.
-
Cannot remove the borders around each letter.
Hello
I'm new to InDesign and feel my way around this software on a trial basis. I'm changing font colors (see the attached desktop image), but whenever I go on the color chart to choose my color, it colors a border around each letter and the filling inside the letter is always black. Even when I turn off the race, it does not solve the problem. Can anyone help? (keep it simple as possible please). Thank you

Look at the symbols at the top of your Swatches palette. The outline of the letter is targeted. Click on the symbol for the letter to bring it forward, and then the color will be applied to the letter instead of its contour.
-
Removal of the borders of the Section in OBIEE 11 g
Hi gurus,
I want to remove the borders of section in the OBIEE.
I tried the user border-style: none; It seems to not work.
I want to remove the borders for sections permanently. What file I need to change?
Thanks in advance for the help
Vincent
Hello
Custom-> display-> css style options section properties: hidden; in 2 text boxes.
Try this... its worked for me.
Thank you
Prasanna
-
How to remove the table border
Dear Kings.
I was trying to remove the borders of tables (my coding below).
This encoding does not "result: undefined"? How to remove all borders from the table. Please suggest friends.
var mTables = app.activeDocument.stories.everyItem().tables.everyItem();
with (mTables) {
  topBorderStrokeWeight = 0;
  bottomBorderStrokeWeight = 0;
  leftBorderStrokeWeight = 0;
  rightBorderStrokeWeight = 0;
  }
alert("Done")
Thank you in advance to all
Try this,
if(app.activeDocument.stories.everyItem().tables.length>0) { app.activeDocument.stories.everyItem().tables.everyItem().cells.everyItem().bottomEdgeStrokeWeight = 0; app.activeDocument.stories.everyItem().tables.everyItem().cells.everyItem().topEdgeStrokeWeight = 0; app.activeDocument.stories.everyItem().tables.everyItem().cells.everyItem().leftEdgeStrokeWeight = 0; app.activeDocument.stories.everyItem().tables.everyItem().cells.everyItem().rightEdgeStrokeWeight = 0; } -
Removal of the borders of all Images
I learned that I could remove the border from all images on my site with this code:
an img {border: none ;}}
I added this line to my CSS, but it did not work. Any ideas? My CSS is below:
a: link {}
text-decoration: none;
color: #900;
background: transparent;
}
a: visited {}
text-decoration: none;
color: #006;
background: transparent;
}
a: hover {}
text-decoration: none;
color: #F00;
background: transparent;
}
a: focus {}
text-decoration: none;
color: #fff;
background: #6196BC;
}
a: active {}
text-decoration: none;
color: #600;
background: transparent;
}
a: img {}
border: none;
}
Remove the two points between 'a' and the 'img '. Use a space.
"a: img ' is meaningless
'an img' is a descendant selector (refers to any
tag inside a .)
-
To remove the search bar to see the beautiful snowmen snow
I can click between the search bars and URL to shorten to the left, but the right side of the search bar there where he was. I want to condense the two bars to the left so I can see the snowmen beautiful of my add-on. Or remove the search completely bar.
Thank you, NickYou can move the seek bar '3-bar' Firefox dropdown menu button and it will work again correctly and answer the hotkey Ctrl + K.
- Make a right click of the search logo-> move menu
You can also consider adding an opacity in the address bar and the search bar.
Add code to the file userChrome.css below default @namespace.
@namespace url("http://www.mozilla.org/keymaster/gatekeeper/there.is.only.xul"); /* only needed once */

#navigator-toolbox {min-height:200px!important}

#urlbar {opacity:0.5!important}
#urlbar:hover {opacity:0.8!important}
#urlbar[focused="true"] {opacity:1!important}

#searchbar .searchbar-textbox {opacity:0.5!important}
#searchbar .searchbar-textbox:hover {opacity:0.8!important}
#searchbar .searchbar-textbox[focused="true"] {opacity:1!important}
The file userChrome.css (UI) customization and userContent.css (Web sites) are located in the folder of chrome in the Firefox profile folder.
- Create the folder chrome (lowercase) in the .default < xxxxxxxx > profile folder if the folder does not exist
- Use a text editor like Notepad to create a userChrome.css (new) file in the folder chrome (file name is case sensitive)
- Paste the code in the userChrome.css file in the Editor window
- Make sure that the userChrome.css file starts with the default @namespace line
- Make sure that you select "All files" and not "text files" when you save the file via "save file as" in the text editor as userChrome.css.
Otherwise, Windows can add a hidden .txt file extension and you end up with one does not not userChrome.css.txt file
You can use this button to go to the Firefox profile folder currently in use:
- Help > troubleshooting information > profile directory: see file (Linux: open the directory;) Mac: View in the Finder)
- http://KB.mozillazine.org/Profile_folder_-_Firefox
-
My NEX - L 6 freezes after I turn it on, then press the film. Need to remove the battery.
I have the NEX-6 with a 16-50 lens and it freezes when I turn it on then press the movie button. If I wait longer before pressing the button, it seems to be OK, but if not, the goal remains unretracted and start and stop again does not help. I have to remove the battery and restart the device. It took me a while to understand why it was freezing upwards, and there is at least one situation where I seen it happen on a regular basis. Does anyone else have this problem? I hope an update of the firmware wouldn't be now, but have not seen.
No when I turn it on, it gets stuck, like a windows pc stuck with the sandclock or the circle around truning

Its either a bug software or a problem with the 18-200mm lens, it doen ot havppen with the 16-50mm lens.
Also, sometimes he will, but refuses to focus, as the engine focum does not report you to turn.
-
How to remove the virus boostspeed.exe
How to remove the virus boostspeed.exe
Hi Laurence,.
As far as I KNOW, you're talking about Auslogics Bootspeed, and it is a program (even if some consider how he acts and what he does to be very similar to how the system will react as if he was infected). For technical support, see: http://www.auslogics.com/en/support/.
If it's this product, there seems to be any special product online removal process (but perhaps custom support can help). If it isn't this product or there is nothing like it on your system, then why do you assume that it is a virus - are guessing you or some AV programs, told you that (and if so, which) and how locate you the file name as being the problem? What is the full path to the file (for example, C:\Program Auslogics... or other)? What security software you have installed (all names and the exact version of each)? What version of Windows are you using? Indeed, please see http://support.microsoft.com/kb/555375 for ideas on other information that will help us. The more we know, the better we can help and the more focused we can make recommendations.
I would try the following: start by creating a system restore point, and then back up the registry as well (just to be on the safe side).
Download the free Revo: http://www.revouninstaller.com/revo_uninstaller_free_download.html and use it in advanced mode to completely remove Auslogics Bootspeed. If it does not work because it says it is running (which is possible if there is probably not), then start safe mode and try again to remove use Revo in Mode safe. The chances of success are much higher now that it is not likely to be running in Mode safe.
I hope this helps. Please get back to us in all cases, and if it haunts you again, please answer these questions as well as what happened when you tried to remove it as suggested. On this basis, we will have a better idea if we treat just a difficult program to remove or legitimate an infection of any (or possibly both) and take the necessary measures from there - but we need to learn more and to see if the simple answer works (or why it failed). We desperately need your help here (provision of information) to be able to help (with recommendations and options and courses of action - or more questions).
Thanks and good luck!
Kosh
-
Remove the container blocks app
In my application the user can add new container objects to will be and I want to give them the ability to delete these objects as well. In my design, I have alread QML set for the container that contains other containers, a portion of text, and a context menu. Menu is in the context where I give the user the option to delete the container. When remove is called a C++ function goes through my data model and removes the container of the user interface and removes the application data model object. Problem is after I called the (container) remove call I call delete against the container and the application crashes. I think that the crash is because I'm calling Delete against the container too early, but I don't know, and if I'm what would be a good way to work around this problem? Here is a condensed version of the QML/code I use:
hand. QML. stationContainer is where all new containers are added and removed
// Application with UI adaptability support template
import bb.cascades 1.0
import bb.system 1.0

NavigationPane {
    backButtonsVisible: true
    id: navigationPane
    objectName: "navigationPane"

    // create application UI page
    Page {
        Container {
            layout: DockLayout {
            }
            AppBackground {
                // setup application background
                background: Color.Black
                verticalAlignment: VerticalAlignment.Fill
                horizontalAlignment: HorizontalAlignment.Fill
            }
            Container {
                horizontalAlignment: HorizontalAlignment.Fill
                Container {
                    layoutProperties: StackLayoutProperties {
                        spaceQuota: 1.0
                    }
                    layout: DockLayout {
                    }
                    verticalAlignment: VerticalAlignment.Fill
                    horizontalAlignment: HorizontalAlignment.Fill
                    ScrollView {
                        scrollViewProperties {
                            scrollMode: ScrollMode.Vertical
                        }

                    Container {
                        property int padding: 10
                        objectName: "stationStacks"
                        layout: StackLayout {
                            id: stationStacks

                            // change layout direction according to current device orientation
                            // this feature is disabled for 720x720 devices in current template
                            // see: assets/720x720/AppOrientationHandler.qml
                            orientation: (orientationHandler.orientation == UIOrientation.Portrait) ? LayoutOrientation.TopToBottom : LayoutOrientation.LeftToRight
                        }

                        topPadding: padding
                        bottomPadding: padding
                        leftPadding: padding
                        rightPadding: padding
                        verticalAlignment: VerticalAlignment.Center
                        horizontalAlignment: HorizontalAlignment.Center
                    }
                }
                }
            }
        }
    }    // Page
    onPopTransitionEnded: { page.destroy(); }
}// NavigationPane
Container for model that is reused.
import bb.cascades 1.0

Container {
    topPadding: 25
    layout: StackLayout {
        orientation: LayoutOrientation.TopToBottom
    }

    Container {
        layout: StackLayout {
            orientation: LayoutOrientation.LeftToRight
        }

        Container {

            Container {
                id: identifierButton
                objectName: "identifierButton"
                layout: StackLayout {
                    orientation: LayoutOrientation.LeftToRight
                }
                contextActions: [
                    ActionSet {
                        title: "Actions"
                        subtitle: "This is an action set."

                        actions: [
                            ActionItem {
                                title: "Info"
                                onTriggered: {
                                    app.showStationInfo(sIdentifier);
                                }
                            },
                            ActionItem {
                                title: "Refresh"
                                onTriggered: {
                                    app.refreshStation(sIdentifier);
                                }
                            },
                            ActionItem {
                                title: "Remove"
                                onTriggered: {
                                    app.removeStation(sIdentifier);
                                }
                            }
                        ]
                    } // end of ActionSet
                ] // end of contextActions list
                Label {
                    id: identifierLabel
                    text: "Label"
                    objectName: "identifierLabel"

                }

                onTouch: {
                    if (event.isDown() || event.isMove()) {
                        // Focused, change the background
                        identifierButton.background = Color.Gray;
                    } else {
                        identifierButton.background = Color.create("#ff21697d");
                    }
                }
                verticalAlignment: VerticalAlignment.Center
                horizontalAlignment: HorizontalAlignment.Left

            }
        }
        Container {
            Label {
                id: stationName
            }
        }
    }
    Container {
        TextArea {
            id: stationData
        }

    }
}
How to take the container of model and use:
/** * Setup and add the UI object for the station */ void WeatherPilotApp::CreateStationUI(StationData *pStationData) { Container *stackPane = mApp->findChild(); stationContainer->setObjectName(pStationData->getIdentifier()); QString objectName = QString::fromStdString("identifierLabel"); Label* label = stationContainer->findChild The code to remove station is here:
void WeatherPilotApp::removeStation(QObject* qStationData) { StationData* stationData = (StationData*) qStationData; addRemoveStation(stationData->getIdentifier(), false); } /** * Function will add, remove, or update all stations passed in as a * comma or space separated list */ void WeatherPilotApp::addRemoveStation(QString sIdentifiers, bool bAdd) { qDebug() << "AddStation " << sIdentifiers; sIdentifiers.replace(',', ' '); vectorsplitIdentifiers; QStringList idList = sIdentifiers.split(' ', QString::SkipEmptyParts); for (QStringList::const_iterator iter = idList.constBegin(); iter != idList.constEnd(); ++iter) { QString id = (*iter).toLocal8Bit().constData(); splitIdentifiers.push_back(id.toUpper()); qDebug() << "Added " << id; } if (bAdd) { //handle addition logic } // Remove the stations else { for (unsigned int idx = 0; idx < splitIdentifiers.size(); idx++) { for (vector Try deleteLater() and see if it makes a difference, but to be honest, I do exactly the same thing in my code...
void CardEditor::onFieldRemoved(TitleValueField* tvf) {
    if (tvf) {
        CardLabelEdit* c = mLabelMap.value(tvf);

        if (c) {
            remove(c);
            delete c;
            mLabelMap.remove(tvf);
        }
    }
}
This command removes a CustomControl which is basically just a container with two TextFields in so pretty similar to what you want to do.
My guess is that the problem is elsewhere perhaps with your vectorial cartography or your logic of pointer, try putting some checks and/or set a breakpoint on the removal of line and see the status of your vector and pointers at this time there.
If you have configured all signals with these dynamic objects, you also need to exercise caution.
[Edit] There was a good discussion about deleteLater in this thread...
-
Remove the edge of the field button (JDK 4.5)
Hello
It is possible to remove the border around the bitmap button class slot? So everything that appears when the image is just the image without borders.
Thank you.
This is my class-
Import net.rim.device.api.system.Bitmap;
Import net.rim.device.api.ui.Font;
Import net.rim.device.api.ui.Graphics;
Import net.rim.device.api.ui.Ui;
Import net.rim.device.api.ui.component.ButtonField;/**
* Field button with a bitmap as its label.
*/
SerializableAttribute public class BitmapButtonNoClickField extends ButtonField {}
private bitmap Bitmap;
bitmapHighlight private bitmap;
Private boolean stressed = false;
private fonts fonts;
/**
* Instantiates a new button bitmap field.
*
@param bitmap bitmap to use as a label
*/
public BitmapButtonNoClickField (bitmap image Bitmap image, image Bitmap bitmapHighlight, label As String, int width, make police) {}This (bitmap, bitmapHighlight, ButtonField.CONSUME_CLICK |) ButtonField.FIELD_HCENTER | ButtonField.NON_FOCUSABLE | ButtonField.FIELD_VCENTER
the label, width, police);
}public BitmapButtonNoClickField (bitmap image Bitmap image, image Bitmap bitmapHighlight, long style,
String label, int width, make police) {}
Super (style);
This.Bitmap = bitmap;
this.bitmapHighlight = bitmapHighlight;
This.font = fonts;
}/ * (non-Javadoc)
* @see net.rim.device.api.ui.component.ButtonField #layout (int, int)
*/
Protected Sub layout (int width, int height) {}
setExtent (getPreferredWidth (), getPreferredHeight());
}/ * (non-Javadoc)
* @see net.rim.device.api.ui.component.ButtonField #getPreferredWidth)
*/
public int getPreferredWidth() {}
Return bitmap.getWidth ();
}/ * (non-Javadoc)
* @see net.rim.device.api.ui.component.ButtonField #getPreferredHeight)
*/
public int getPreferredHeight() {}
Return bitmap.getHeight ();
}/ * (non-Javadoc)
* @see net.rim.device.api.ui.component.ButtonField #paint (net.rim.device.api.ui.Graphics)
*/
protected void paint (Graphics graphics) {}
width int = bitmap.getWidth ();
int size = bitmap.getHeight ();
Image bitmap b = bitmap;
If (highlighted)
b = bitmapHighlight;
graphics.fillRoundRect (0, 0, getWidth(), getHeight(), 10, 10);
graphics.drawBitmap (0, 0, width, height, b, 0, 0);
graphics.setFont (do);
Super.Paint (Graphics);
graphics.drawText (label, 0, bitmap.getHeight ());
}}
If by "the code you posted" you mean advanced buttons, fields and managers, then no, it is not part of any levy JDE. This has been created separately for reading more advanced developers. You must change the package names here as com.rim... do not work on any real device (works fine in the Simulator, however).
There was a thread here in this forum about the legality of using the code in this article from book of knowledge - you can read it yourself:
Legal issues Using - advanced tool buttons, fields and managers
It wasn't for that resolution, but claim that it was already used in some applications. Personally, I am looking at the source code it orientation rather than a simple copy and paste. New - people claim she has some problems and I've seen questionable code in there in some places, but overall, it's extremely useful.
-
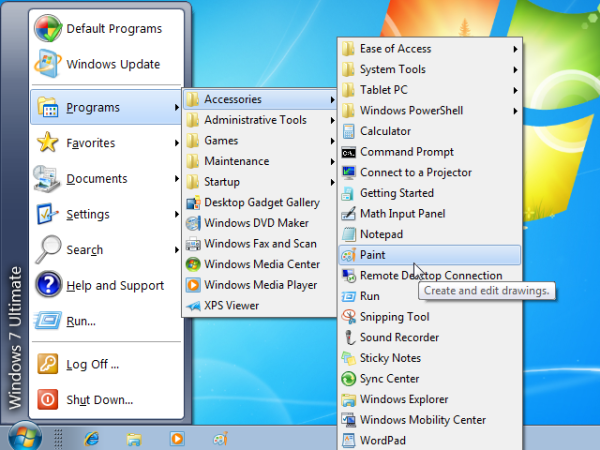
How to remove the search box in the Windows 7 Start Menu?
I'm a guy from keyboard. Encoder, mudder. Therefore, I prefer my Start menu for user-friendly keyboard, which includes the removal of the search box as the focus of pigs. I can't find this option in the control panel to the taskbar and Start Menu. I lack, or it is impossible to get the classic Windows, looking for the start menu?
I forgot on the thing... If you want to remove the search box, try this: start > Control Panel > programs > Turn Windows features or disable > uncheck Windows Search
...
I said that you can press Tab... wrong... you must press SHIFT + Tab.
...
About to express my opinion - there is a simple reason why I do this. Some time ago, someone asked how to remove the search box, and it received no response for a few days. After that, I found this option, how to remove... When I said on this subject after a few days, I heard that this person used to this new feature of Windows and now it will keep it. I'm not saying that your opinion is wrong... this system differ only from XP... so we have to try to learn something new and check after a few days we don't like this solution more than the previous.
...
I wonder why write you in commentary edition which has pasted the link almost not worth it. You will get exactly the same behavior of Menu start as in Windows XP. I thought that you, like this old solution... "Pinning just something that mimics the classic style"... No... you have clicked on the first link... you should read more prudent. There was also another. But even if you have selected the first solution with menu PIN... I guess you don't know that you can run all the pinned programs by pressing the Windows key + number... for example, WinKey + 1, so that each action is made without a mouse.
-
How can I change the ClickLock to the borders of windows 7 default blue border?
Original title: gray ClickLock Windows 7 box
Hello. I had installed TuneUp months before, and I have removed from my pc. The box do you like the ClickLock is now gray. Here's a link, it looks like: http://i48.tinypic.com/2jfkcox.png. My question is how can I do it at the borders of windows 7 default blue. Thanks in advance
Hello
Thank you for the question to Microsoft Community. I'll give my best to help you.
From your problem description, I understand that you want to change the border of ClickLock to the borders of windows default blue 7.
You can perform the methods suggested below and check if they will help you solve the problem.
Method 1: disable and turn on ClickLock. To do this, follow the steps in this link:
http://Windows.Microsoft.com/is-is/Windows-XP/help/using-ClickLock
Method 2: Check out themes. To do this, follow the steps in this link:
Change the theme to improve performance
http://Windows.Microsoft.com/is-is/Windows7/change-the-theme-to-improve-performance
If the problem persists, or if you want more help answer we are happy to help you.
-
How to remove the old key wifi Windows 7? It is automatically to connect to the old key... If I delete also the same old key is coming.
How to remove the old key wifi Windows 7? It is automatically to connect to the old key... If I delete also the same old key is coming.
Here you go:
- Control Panel
- Network and sharing Center
- Manage wireless networks.
- Right click on the wireless network unwanted.
- Delete
Also note that since there is a network problem, a Forum that focuses on networking would be a better place to ask this question. This forum addresses issues of Windows security. -
I use the date picker 8 Javafx. Its works fine. I've defined a style sheet for my application, and in this stylesheet, I have a button style. I apply this style to the entire scene.
Now my question is: when I use the date picker and I click on the calendar icon, the datepicker popup appears and the left and right arrows bordering fields month and year in the seems to choose the style of the button class of stylesheet defined in my app., is there a way to avoid this and say datepicker to use default styles and styles not defined my request.
I tried to remove the style when running from the scene, but of no use. Any help?
Thank you
Try to copy all the information from modena.css to something, like .date-picker button {} to 'substitute' General button class.

Maybe you are looking for
-
Firefox is opening of Web sites and suggesting I have download some add-ons that I don't trust.
Since I've updated a few weeks ago Firefox randomly opening custody of the browser windows and invites me to download what is called "playmediaplayer" and suggesting that updating Java to the latest version. In the past Firefox suggested I have disab
-
Satellite U200-181. Slow touchpad on Linux
I use two operating systems on my Toshiba Satellite U200-181. They are: MS Windows XP Home and Debian GNU Linux (stable) Etch. MS Windows XP, the touchpad features work very well, but there are problems under Linux:-cursor moves very slowly when I mo
-
network controller driver windows 7. HP 255 G3
Hello. I have literally searched for days now a network driver. Those who must work, have not so far. When I got my pc I swapped the original HARD drive (which comes with Windows 8), an SSD that has Windows 7 above. Under Device Manager it Miss curre
-
iMac restarts again and again. Help! 10.11.3 OSX
Just last week, I've updated my iMac 21 "OSX 10.11.3 via the App Store. For the first days it was working fine, but now it suddenly stops and restarts by itself, sometimes showing the kernel panic screen, others restarts and after a few minutes, even
-
Silent Hunter 3 and 4 DO NOT recognize Windows 7 (i.e., This application can be launched with a version of Microsoft Windows 95 OSR2.1/98/ME/NT 4.0/2000/XP/Server 2003 ONLY). Help! My OS is Windows 7 Pro. and I have quite a few other games and progra