Toggle "scale of the contours and the effects?
Everyone want to 'Scale Strokes & Effects' should be a toggle UI higher level preferences buried in? I find it often useful to switch between two States scaling of the same project.
Or am I missing a shortcut for this?
Although it is not a shortcut, you can also change this setting in the transformation Panel and clicking the scale tool...
Tags: Illustrator
Similar Questions
-
The scale of the effects - bevel
I have some difficulty on the scale of a bevel effect. I have a form of logo (below) that I have applied some effects to. One of them is a wedge that looks good at this size.

However, I have to shrink the logo downstairs as I did too big. So obviously effects all become distorted as well. I realize account I would have made sure to size until I applied the effects, but good I learn. I went to the layer > layer Style > scale effect and it reduced up to 60% - roughly the same amount that I shrunk the whole logo, but it has not changed the bevel effect research jagged and rough.
Ignore the black and white, I cut a layer.

Is there a way to get around this? All other effects reduced the fine it seems, just not the bevel and I don't know how to fix it. And yes I have played around with all the bevelling of the options if it is not as if one selects the effect is smooth bevel one any difference because that's not.
Why you would even do this? Naturally, the appearance of these effects will change when you resize the layer because they are based on the pixels of the layer source and these changes... But it's really just not the smart way. Unless there is a specific requirement to keep all live effects, just merge / flatten the layers and the result on the scale.
Mylenium
-
I can't same scale forms a base logo without the widths of form changing all different. Yes, I restarted the program and restarted my computer.
What is going on? something that should take me 2 seconds I've spent an hour trying to solve the problem.
Help, please!
KMoore,
You also select the objects and uncheck snap to grid of pixels?
This is what works for existing objects. What did you prevent only new objects aligned.
-
The scale of the contours and effects in Photoshop CS5
The scale of the contours and the effects option to reside in the Preferences dialog box.
Seems like it has been deleted in CS5, anyonene know why, or where a similar function
can be found?
Thing is, when I add a stroke (layer effect) of a layer, the thickness is the same when I
Transform/Resize(Ctrl-T) layer. I really need the border to shrink accordingly as shown in
the image below.
A solution would be to convert the layer of dynamic object, but when you work with too many
layers, it's more about saving time.

Don't remember seeing such an option in the preferences. You are getting confused with Illustrator.
-
Then I reinstalled FCPX and some how the scale option is missing in the effects window. Can anyone help?
Try resetting your preferences. Organize your Opt - Cmd launches the application. Post screen shots of what you see.
-
How can I keep the sharpness after I Zoom.
Never exceed 100% scale. The image is going to deteriorate.
-
I see this sort of thing all the time on the news. They talk of a letter or something like that, and then 'scream' a piece of it that zooms for the Viewer to read.
Is this something that can be done in Premiere Pro or After Effects? If so, is there a tutorial for that?
Thank you!
Ken
Lots of ways to do so; the final aspect is to you.
But any change that will involve 2 copies of an image of the document (image, not pdf, text or Word document. Like a paper copy of scan). At least one must have a resolution in pixels above the dimensions of the video image pixel.
Example: your video is full HD - 1920 pixels by 1080 pixels. Scan a 8.5 in. by 11 in the document at 300 dpi and you get an image that is 2550 pixels 3300 pixels. You put two copies of this document scanned into your sequence of Pr image stacking them on separate video tracks. A scale down in size to show the entire document and leave one full size. Be sure to keep the size of the one at the top of the scale. To the small scale visible under the copy full size, put on a mask or garbage matte on the waist to reveal the text you want to finally show the public. Reduce the hidden copy and place it in the frame to match the document below. Animate the scale of the above 100% copy to get the desired zoom effect.
Add borders, caches, mattes of color or anything else to get the look and the desired effect.
There are other ways to do so; Some may even be easier. That's how I'd do.
-
Saving the effects Rack and the range markers
I am currently working on the best way to change the non-destructive comment. But there are problems. I did this:
- The comment opening as a waveform.
- Break into segments (sentences), marking the beginning and the end of each sentence, and then convert to a range and naming.
- Save the beaches via menu markers.
I find myself with audio files separate for every sentence that I can import and move first. However, if I apply effects using the effects Rack, the basket is not saved. To resolve this problem, I read in another post that I should use multitrack. I tried, but I don't know how to import/transfer/copy him varies from the already marked waveform file for the new multitrack version. The markers are there, but they do not appear in the markers Panel.
How to import a multitrack file ranges from a waveform file?
A common hurdle for new people to the hearing is our two different environments of editing: multitrack is a non-destructive environment for mixing different audio files to create a new work, where the waveform is a file audio single destructive Editor. In waveform display, there is no 'projects' where a file is saved with non-destructive effects, as there is currently no standard that would allow these files to be taken over in other applications.
Multitrack would be a much simpler method to work as your effect settings will remain in the session file, and you will not need to follow 100 separate files. Since you already have the ranges given in your source clips, it looks like you were near. In the markers Panel, there is a button that toggles show markers for the assets of the file of the markers of GOLD for all open files. It is located at the upper right of the markers Panel and looks like a "Marker" icon with two lines to the right of it:

When this is NOT toggled on, you would see only markers for the session file, not the assets to the breast. By clicking on that should show all markers and you should be able to select a range of marker and drag it to an audio track. Drag the next marker range and drop it to the right of the first element. Soon, you should have an arrangement that looks something like:

Now, hearing has two ways to add non-destructive effects in the multitrack environment: focused on the track or on clips. Focus on the track is best if you need to apply the same effect to all of the content on the track, such as reduction of hiss or compression, although only focused on the Clip is ideal for an effect that is only required on this clip itself, as a dramatic echo or an equalizer to help a further record matches a previous. You can add in the effects Rack Panel, or toggle the display of the mini track by clicking the fx button second from left to right, above track Panel controls:

Here you can see that, while I select the effects in the 'mini' follow the advice, the selections are reflected in the biggest effects Rack Panel itself.
If you have saved your effects of configuration you used before as a Rack Preset (the next arrow button of the "Presets:" drop-down list)

You can find that the screening and load it into the Rack of effects for your audio track. Each of your clips can be resized and overlap slightly in the track to create automatic crossfades to blend smoothly from one to the other with no pop.
When you are satisfied with the edition, you can create a mixing final audio file in a standard format such as WAV or MP3 by selecting file > export > multitrack mixer > throughout the Session. (You can also use the multitrack > Mixdown Session for the new file to quickly create a mix, but Preview menu item before the Save to disk.)
I hope it's useful.
Durin
-
Scale of the elements based on effective IPR in inDesign?
At the risk of be laughed at the community, I ask in all cases.
Is it possible to scale items in InDesign by the effective CIO? I know that you can see the info panel to see if what you put on the toisat scale less 300 dpi, but is there a way to not have to guess and check?
I would like to find a way to place an image in an effective 300 dpi, or scale based on effective dpi.
While creating a large enough program, I would rather not waste a lot of time with sizing, audit information, and then design, then verification of information. I'd also like to open each image in photoshop to fit 300 dpi.
Any suggestions are greatly appreciated!
One way is to set the images in photoshop for 300 pixels on the right size.
Another way is: https://www.rorohiko.com/wordpress/indesign-downloads/place-and-scale/
-
Application and interface scrambled freeze when the effect is on the clip
Dear users of Adobe.
Some day my application Adobe first CC began to malfunction. Maybe some Windows 7 update or update graphics card fit, because when I saw this problem on a project, all projects, I opened have been made from this time and new project as well.
DESCRIPTION OF THE PROBLEM:
When I apply any effect to any clip, the user interface freezes. It works, but the display is hanged:-I can rub on the timeline, but the timeline indicator does not move (clip playing on monitor or second full screen and rubbing noise is there)
-I can toggle effect, but the icon remains (I see on the photo that the effect is en/diss)
-Effect cannot be edited or deleted
-On some effects first freezes if I try to change the effect (kill application in the Task Manager is required)
-Program start to answer (and I can edit effects) once I reset workspace. I have to reset the workspace after each / every effect is applied to the clip. What is bulky.
-Problem exists with all the custom saved space and work with the first all those, as well with those I create new ones. Workspace so probably not corrupted.
-J' have all Windows updates and the latest version of the software of GPU (I even tried several beta different drivers from nVidia, but no change to the problem).
I have two screens on nVidia GTX770 (ASUS) where one is the program monitor, and it shows image full screen. Problem is the same if only one view is used, but while testing this I found another scenario where MISTLETOE is reset, without reset via menu option: If the focus went from the Panel to the PROGRAM Committee, GUI is reset and I can work normally. This work only if two panels are on the same group, the Panel of the hidden program because while the effect controls panel is active. If I drag the effects (on second monitor) TIME focus have no effect. I need to reset the workspace only.
Some effects become not only which do not meet, but even the hang first if I try to edit before you reset space work (or switch effect-> program). In this case, I need to kill the process monitor first (Task Manager). If I reset the right of the workspace after that I place effect on clip, first work normally until I add new effect to new (or even) a clip. If I COPY-PASTE effects from clip to clip, it works without the reset workspace.
When I close the first, more often it does not turn OFF in process list. I have to kill the process before I want to run again. Or restart the PC, of course. I know when he did not stop second doe to display full-screen does not return to the office, but stays black until I have to kill the first. First remains in memory even if I use only one view. QT32 process stops when I kill the process of creation.
During the problem done first, Adobe Media Encoder does not work. It begins its own process of QT32 and it closes properly, without worrying first is stuck or active.
I have a slight idea this problem started when I installed first CS6 and it have uninstalled after leaving Encore CS6 on the system. I think it is software problem, because lately, I is no rate of material. The system is almost 2 years old SB-E with INTEL DX79SR Board. I reinstalled windows, a few months before, but the problem started a week ago after some update or even CS6 associated. I can't say for shure. I have no install/uninstall other software PC lately.
I use the 6.5 version first. I always solved my problems by reinstalling Windows and first or by finding the solution on the forums. This time I found nothing on all internet and I cannot reinstall system before finishing long project. But this problem, it is more difficult to finish. It seems that system is slower and less sensitive, as it used to be.
Thank you very much for any advice or solution.
MIHAELHi all
It is a problem with the last GoPro Studio Installer. We're going to be it fixed in the next version of Studio of GoPro. in the meantime, you can solve it by removing the CineForm entries in the following folder:
c:\Program files\adobe\adboe first pro cc\settings\badgeicons\
Jake Segraves
Director of technical support
GoPro
-
CS6: Is the Publisher of "Contour" for layer effects gone?
Hello. In an earlier version of Photoshop, you could change the contour (resembling curves) that have shaped the layer as the drop shadow effects or bevels. To do this, you have opened the library drop-down list of contours in a style like the Shadow dialog; then you have double-clicked on a contour icon and you have the 'Contour' Editor, a dialog that looks like a small curves dialog.
But finding no way to change contour provided the CS6. I can create new ones, which doubles the last contour turned on, and I can add more outlines provided by Adobe. But a double click on an icon of contour only applies this contour and it there's no way, it seems, to get a "outline editor.
Or is it?
Any help is appreciated! Thank you!
SSM
I am running Windows 7/64 bit with enough RAM, with PS CS6 Extended.
Click a contour thumbnail in the layer Style dialog, and not in the library of contours, to open the editor of contour lines.
-
growth and reduce the effect does not
Hello, I followed the tutorials to grow & reduce the effects, but it doesn't seem to work. I'm using CS5. When I go to the browser it grow not or anything.
I tried to change the color and images to see if FTP was working properly and it does. The effect won't work. The tutorial makes it look so easy. Help, please!
Thank you
Steve
< ! DOCTYPE html PUBLIC "-//W3C//DTD XHTML 1.0 Transitional / / IN" "http://www.w3.org/TR/xhtml1/DTD/xhtml1-transitional.dtd" > ""
" < html xmlns =" http://www.w3.org/1999/xhtml ">
<! - DW6 - >
< head >
<!-copyright 2005 Macromedia, Inc. All rights reserved. ->
< title > Ricos - Bouquets < /title >
< meta http-equiv = "Content-Type" content = text/html"; charset = iso-8859-1 "/ >"
< link rel = "stylesheet" href = "mm_spa.css" type = "text/css" / > "
< style type = "text/css" >
<!--
.style6 {color: #FFFF00}
. Style7 {do-family: "Bodoni MT"}
{.style8}
color: #FFFFFF;
do-size: 16px;
}
. STYLE13 {make-size: 16px}
.style14 {color: #FFFFFF}
.style15 {color: #FFFFFF; do-family: Arial ;}}
.style16 {color: #FF9900}
->
< / style >
< script src = "SpryAssets/SpryEffects.js" type = "text/javascript" > < / script > "
< script type = "text/javascript" >
function MM_effectGrowShrink (targetElement, duration, of, to, toggle, referHeight, growFromCenter)
{
Spry.Effect.DoGrow (targetElement, {duration: duration,:, to: to, turn on/off: toggle, referHeight: referHeight, growCenter: growFromCenter});
}
< /script >
< / head >
< body bgcolor = background = "#0000" >
< table width = "1115" height = "752" border = "0" cellpadding = "0" cellspacing = "0" bordercolor = "#00FF00" >
< tr bgcolor = "#220103" >
< td height = "150" colspan = "6" nowrap = "nowrap" bgcolor = "#522449" > < img src="Images/Ricos/fuchsia-background_800x600.jpg" alt = "title" width = "1108" height = "150" / > < table >
< /tr >
< tr bgcolor = "#FF9900" >
"< td colspan ="6"> < img src ="mm_spacer.gif"alt =" "width ="1"height ="1"border ="0"/ > < table >
< /tr >
< tr bgcolor = "#FF080E" >
"< td colspan ="6"> < img src ="mm_spacer.gif"alt =" "width ="1"height ="2"border ="0"/ > < table >
< /tr >
< tr bgcolor = "#FF9900" >
"< td colspan ="6"> < img src ="mm_spacer.gif"alt =" "width ="1"height ="1"border ="0"/ > < table >
< /tr >
< tr bgcolor = "#FF080E" >
"< td colspan ="6"bgcolor =" #9900FF "> < img src ="mm_spacer.gif"alt =" "width ="1"height ="18"border ="0"/ > < table >
< /tr >
< tr bgcolor = "#FF9900" >
"< td colspan ="6"> < img src ="mm_spacer.gif"alt =" "width ="1"height ="1"border ="0"/ > < table >
< /tr >
< tr bgcolor = "#FF080E" >
"< td colspan ="6"> < img src ="mm_spacer.gif"alt =" "width ="1"height ="2"border ="0"/ > < table >
< /tr >
< tr bgcolor = "#FF9900" >
"< td colspan ="6"> < img src ="mm_spacer.gif"alt =" "width ="1"height ="1"border ="0"/ > < table >
< /tr >
< b >
< td width = "221" height = "557" valign = "top" id = "navborder" > < br / >
< table border = "0" cellspacing = "0" cellpadding = "0" width = "220" id = "navigation" >
< b >
< td width = "220" > < a href = "ricos.html" class = "navText" > HOME < /a > < table > "
< /tr >
< b >
" < td width ="220"> < a href =" http://www.yellowpages.com/Santa-Rosa-CA/MIP/Pricess-botique-3411701/map?lid=3411701 "target ="_blank"class ="navText"> map & amp; DIRECTIONS < /a > < table >
< /tr >
< b >
< td width = "220" > < a href = "wedding.html" class = "navText" > WEDDING CLOTHING < /a > < table > "
< /tr >
< b >
< td width = "220" > < a href = "prom.html" class = "navText" > CLOTHING PROM < /a > < table > "
< /tr >
< b >
< td width = "220" > < a href = "1stcommunion.html" class = "navText" > 1st COMMUNION APPAREL < /a > < table > "
< /tr >
< b >
< td width = "220" > < a href = "baptism.html" class = "navText" > BAPTISM CLOTHES < /a > < table > "
< /tr >
< b >
< td > < a href = "" javascript:; "class ="navText"> BOUQUETS < /a > < table >"
< /tr >
< b >
< td > < a href = "decorations.html" class = "style6 navText style7" > DECORATIONS < /a > < table > "
< /tr >
< b >
< td > < a href = "centerpieces.html" class = "navText" > PARTS CENTER < /a > < table > "
< /tr >
< b >
< td > < a href = "jewelry.html" class = "navText" > JEWELRY < /a > < table > "
< /tr >
< b >
< td > < a href = "contact.html" class = "style6 navText style7" > GALLERY < /a > < table > "
< /tr >
< b >
< td > < a href = "contact.html" class = "style6 navText style7" > CONTACT < /a > < table > "
< /tr >
< / table > < table >
"< td width ="25"> < img src ="mm_spacer.gif"alt =" "width ="25"height ="1"border ="0"/ > < table >
"< td width ="617"align ="left"valign ="top"> < img src ="mm_spacer.gif"alt =" "width ="305"height ="1"border ="0"/ > < br / >
< br / >
< table border = "0" cellspacing = "0" cellpadding = "0" width = "459" >
< b >
< td width = "459" class = "style16 pageName" > beautiful Bouquets < table >
< /tr >
< /table >
< class p 'style13' = > all our bouquets are handmade personalized for any occasion. < /p >
< class p = "style13" > please contact us for color and design. < a href = "contact.html" > < /a > to CONTACT or visit our store. < /p >
< table width = "614" height = "420" border = "0" align = "left" cellpadding = "1" >
< b >
"< td width ="600"height ="411"align ="left"valign ="top"> < div align ="left"> < img src="Images/Ricos/bouquet2.jpg "width ="600"height ="415"onclick =" MM_effectGrowShrink (this, 1000, "0%", 100% ", true, false, false)" / > < / div > < table > "
< /tr >
< / table > < table >
"< td width ="6"> < img src ="mm_spacer.gif"alt =" "width ="5"height ="1"border ="0"/ > < table >
< td width = "241" valign = "top" > < div align = "left" >
< table width = "230" height = "221" border = "0" align = "center" cellpadding = "0" cellspacing = "0" bgcolor = "#000000" >
< b >
< height td = "18" colspan = "3" align = "center" class = "columnHeader" > < table >
< /tr >
< b >
< td width = "5" > < table >
< td width = "200" height = "150" class = 'everyday' > < p align = "left" > < / p >
< br / > < table >
"< td width ="5"> < img src ="mm_spacer.gif"alt =" "width ="5"height ="1"border ="0"/ > < table >
< /tr >
< /table >
< table width = "230" height = "234" border = "0" align = "center" cellpadding = "0" cellspacing = "0" bgcolor = "#000000" >
< b >
< height td = "50" colspan = "3" align = "center" class = "columnHeader" > < table >
< /tr >
< b >
< td width = "5" > < table >
< td width = "200" height = "150" class = 'everyday' > < p align = "left" > < / p >
< br / > < table >
< td width = "5" > < img src = "mm_spacer.gif" alt = "bouquets" width = "5" height = "1" border = "0" / > < table > "
< /tr >
< /table >
< / div > < table >
< td width = "5" align = "left" > < table >
< /tr >
< b >
< td width = "221" height = "19" > < table >
< td width = "25" > < table >
< td width = "617" > < div align = "center" > < a href = "index.html" > web design by Steven Lee < /a > < / div > < table > ' "
< td width = "6" > < table >
< td width = "241" > < table >
< td width = "5" > < table >
< /tr >
< /table >
< / body >
< / html >
Do a "search" on your computer for a folder "SpryAssets all."
If you find this folder, move or he COP to the folder root of your site.
Otherwise, navigate to the Adobe site and download the Spry files
http://www.Adobe.com/cfusion/entitlement/index.cfm?e=Labs%5Fspry
Failing that, write me at the ken to binney dot us (email address format)
and send me your phone number
-
The effects of a message as lazers and Fireworks do not work
I've updated my phone to iOS 10 but the laser and lights Fireworks and what not effects do not work. Instead, the message shows and in parentheses, it is said (sent with lasers)
Greetings aknopp21,
Thank you for using communities of Apple Support.
I see that upgrade you your iPhone to iOS 10, and laser and impact of fireworks messages do not work. I use these effects a lot on my iPhone when sending messages. So, I understand the importance of them to work on your iPhone.
Please make sure that you have not reduced motion activated. Use section reduce the screen on your iPhone, iPad or iPod touch resolution, specifically, this section:
iOS uses motion effects to create the perception of depth on your home screen and in applications. If you have sensitivity to the effects of movement or movement of screen on your iPhone, iPad or iPod touch, you can use Motion reduce to turn off these effects.
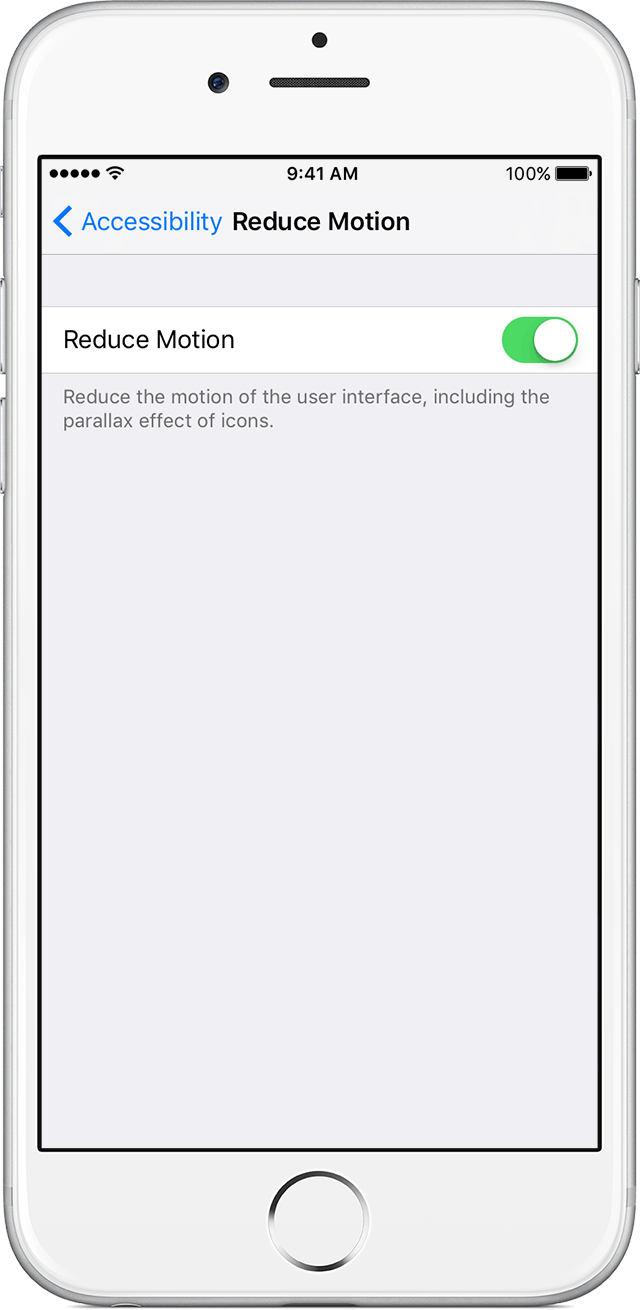
To activate the movement reduce, go to settings > general > accessibility and press the cursor to reduce the Motion.
When reducing Motion is enabled, certain effects screen change or are disabled on your device, including:
- Screen transitions and effects using the effect of dissolving instead of zoom or slide effects.
- Effect of Parallax where your wallpaper, apps and alerts that move or move slightly when you tilt your device are disabled.
- Animation and effects in some applications are disabled. For example:
- Animations of weather in the weather app
- You cannot send or receive effects of bubbles or fullscreen in Messages
If reduced motion turned on, please turn off and then test to see if you get the same result.
Have a wonderful day!
-
Backups and the effectiveness of programming main HP
I'm contemplating writing a program quite prepared for the first HP and I wonder about the effectiveness and backups. I have several questions that I couldn't find answers to in the Guide of use or in other posts.
(1) I understand that HP connectivity Kit will allow me to transfer programs between the emulator and the calculator back. But is it possible to record my programs custom from the emulator on my computer? I would like to have a backup of text files.
Is there a way to write the text file to my laptop and then copy to the first HP?
(2) is there any detailed info on the connectivity for the first HP HP Kit? It is unique to the HP Premium, or is it the same thing as the other calcultors? It is part of the package of HP Prime, or is it an additional purchase? The User Guide is available yet?
(3) all about programming the calculator seems inefficient. Of programming in the emulator seems slower than if I used a dedicated text editor. (However, I remember wrote some quite long programs on the single line of my HP 41 c years.) Is there an easy way to cut and paste the text from my computer in the emulator to test the program?
Thank you
Nick
> I understand that HP connectivity Kit will allow me to transfer programs between the emulator and the calculator back.
In fact, you don't have even the Connectivity Kit for this. The emulator and the Calculator programs transfer directly to each other with a single press of the Send button. You have even press reception (there is no this key), or specify where to send them to. You press just send, and the program will appear instantly in the other first. Cool, huh?
> But is there a way to record my programs custom from the emulator on my computer? I would like to have a backup of text files.
Yes, and it's completely intuitive. In the program editor, you just COPY EVERYTHING, then paste directly into your favorite text editor on your computer, where you can edit and/or save it as you like. You can also transfer programs from your computer to the emulator or the calculator by copying the source code of plain text in the text editor of your computer, and then paste in the emulator or a calculator. It couldn't be simpler.
> Is there any detailed info on the connectivity for the first HP HP Kit? It is unique to the HP Premium, or is it the same thing as the other calcultors? It is part of the package of HP Prime, or is it an additional purchase? The User Guide is available yet?
The "HP connectivity Kit" and its documentation are on the CD that came in the first package of HP. It's not the same program as Conn4x (the "Calculator Connectivity Kit" for the HP 48/49/50 series).
> All about programming the calculator seems inefficient. Of programming in the emulator seems slower than if I used a dedicated text editor. (However, I remember wrote some quite long programs on the single line of my HP 41 c years.) Is there an easy way to cut and paste the text from my computer in the emulator to test the program?
As mentioned above, you can easily copy the plain text source code in your favorite editor on PC and then paste it directly into the program editor is in the emulator OR the calculator. And vice versa.
Some text editors on PCs, such as TextPad to Helios Software, allow syntactic macros and customizable. These tools are very useful for the first programming.
> I realize that the connection Kit may be just a special USB cable. Is this fair?
In fact, it's just. It uses the same USB cable by the calculator to recharge its battery and to communicate with the emulator.
Hope that helps!
-
the scale of data acquisition and data entry error
I have a USB 6211 camera set to MAX for 11 different channels: the first 10 channels are configured with a scale factor of 2 while the last channel is configured with a scale of 1. I connected battery 9 V for the first two channels, ai0 & ai1, (level 2) and the last channel, AL10, (1 scale). The input pins were 15, 17 and 20 for input voltage with pin 28 connected as a reason. Then, I checked the feature in MAX. Surprise! I expected to see 18 volts for the first two channels and 9 volts for the last channel, but much to my surprise I got all channels showing data about 10.86 volts and the last channel showing a value of 7.79 volts! How is it that I see the values for channels not connected! In addition, why are values of cable channels so screwed up! With a 9 V battery and a scale of 2, I expect to see 18 volts, not of 10.86, and where the 7.79 volts for the channel which has a scale of 1! If I run MAX continuous mode instead of the sample N mode I get a few other strange results: I get a single horizontal line and 1 sinewave! It's amazing because I have a 9 volt battery connected to the unit! I don't even how arrays of the VI that uses these signals is like since they are all screwed. Will you please advise me on this one because I'm completely stumped.


Maybe you are looking for
-
With the new IOS, the Podcast app (your podcast app) has stopped working, they no longer updated correctly or they tell me I have a new episode of one of my subscriptions. Looking for my laptop there are at least three new episodes that did not and d
-
I have a my I plugged Mac when I turn again the fan is now blowing air all the time
I un plugged my I Mac when turns again the fan is now blowing air without stop
-
Can not update Firefox on Windows 10!
Windows 10, I'm in firefox 39.0Can not update Firefox 40.0The application to down load fails after about 39 KB
-
I can't download the new version of firefox
When I drag the firefox icon in the applications folder, it tells me I don't have permission for some components. I am the administrator of the iMac, so I am using should have permission for downloads etc.
-
store unable to download or update any Windows application
my store of windows cannot install or update any app metro even not my calendar of mail etc. it says that something has happened and this app could not be installed. Please try again (error code 0 x 80010108)