Always enter the ends of text - but I want the crossings of line!
Hello everyone. I was on the lookout here the half year past - as long as I've been programming in Labview, and now it's time to make my first post.
The problem is a minor (but boring!) and probably a quick fix: I'm unable to add line breaks in text with the button enter. Pressing enter always ends the typing. That is to say: I can't make a comment in the comics with line breaks! I can always resize and it will behave as expected, but resizing is not, in many cases, to break the lines as I want.
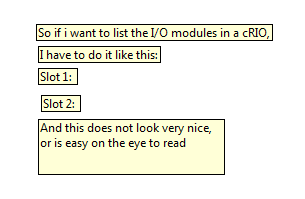
So, as shown in the example above, I have to constantly switch between the KB and mouse to make a list.
Change the "Entry of text end with the Enter key" box in tools-> Options-> environment has no effect - even after rebooting, so I'm out of ideas, but I hope that someone on this forum have had the same problem and solved.
I use LV 8.6.1 on Vista.
The numbad enter acts in the same way as my main entry.
But you put sent me in the right direction: if I disable the numeric keypad - then my 'main' enter start producing line breaks.

Tags: NI Software
Similar Questions
-
How to fix the bad or missing command interpreter enter the command shell complete
When I turn the computor says incorrect or missing cmmand interpreter enter the complete command line. How can I fix it?
Hello
1 when was the last time it was working fine?
2. are you able to boot to the desktop?
3 did you a recent software or changes to the material on the computer?
Method 1:
I suggest you try to use the last good known Configuration and try to boot to the desktop.
Using the last good known Configuration
http://Windows.Microsoft.com/en-us/Windows-Vista/using-last-known-good-configuration
I suggest to try to start the computer in safe mode and check.
Method 2:
Step 1:
Start your computer in safe mode
http://Windows.Microsoft.com/en-us/Windows-Vista/start-your-computer-in-safe-mode
Step 2:
This could happen if one of the substantive programmes is in conflict with the proper functioning of your computer. To help resolve the error and other messages, you can start Windows Vista by using a minimal set of drivers and startup programs. This type of boot is known as a "clean boot". A clean boot helps eliminate software conflicts.
How to troubleshoot a problem by performing a clean boot in Windows Vista or Windows 7 http://support.microsoft.com/kb/929135
Note: when you are finished troubleshooting, follow step 7, mentioned in the article to start the computer to a normal startup.
If you area able to isolate the application that could be causing the problem, I suggest you uninstall and check.
Method 3:
You can also try the steps mentioned in the link and check out them.
What to do if Windows does not start correctly
http://Windows.Microsoft.com/en-us/Windows-Vista/what-to-do-if-Windows-wont-start-correctly
Important: System Restore affects the Windows system files, programs and registry settings that have been changed recently. It can also make changes to scripts, files, batch and other types of executable files on your computer. System Restore does not affect personal files, such as e-mail, documents, or photos, so it cannot help you restore a deleted file.
If you use system restore when the computer is in safe mode, you cannot undo the restore operation. However, you can run System Restore again and choose a different restore point if any. You can also create Safe Mode system restore points. System Restore affects the Windows system files, programs and registry settings that have been changed recently. It can also make changes to scripts, files, batch and other types of executable files on your computer. System Restore does not affect personal files, such as e-mail, documents, or photos, so it cannot help you restore a deleted file.
Hope this helps and keep us informed if you need help.
-
I can not access my Verizon email on my iPad. I can access the login page, but there is no box to enter the user name. I talked to Verizon support, and they say no problem at their end. Any ideas?
Macbeth,
From your description, it appears you are trying to get your mail using Safari to access your e-mail account. Why you do not use the Mail App?
http://www.Verizon.com/cs/groups/public/documents/adacct/Setup-email-mobile-Devi Ed.pdf

-
I already pay for my subscription to Adobe Muse, but every time I open the application appears as I'm always on the free trial version (7 days at the end of the trial), what to do?
Since this is an open forum, not Adobe support... you must contact Adobe personnel to help
Chat/phone: Mon - Fri 05:00-19:00 (US Pacific Time)Creative cloud support (all creative cloud customer service problems)
http://helpx.Adobe.com/x-productkb/global/service-CCM.html -
I'm having a problem in the activation. Trying to enter the key but it says try again a new key.
I'm having a problem in the activation
I am trying to enter the key but it says try again a new key, I have reinstalled windows on my pc when I bury the key, it is said, what can I do?
Is it an upgrade license? If so, try the following:
Skip entering your product key Windows 7 and complete the installation.
When you reach the desktop, click Start, right-click on computer
Click on properties
Scroll down to the Windows Activation
Click the link x days before activation.
Click on the link that says: "show me other ways to activate.
Enter the product key
Click next
Select the Activation of the phone
Click Next when you enter your key page
Select your country
Click Next, call the number listed
Be sure to explain your situation to the Appeals Officer.
Provide the installation generated when ID requested by the call agent
They give a confirmation ID in return, enter it
Click next to complete the activation.
However, the requirements for the media upgrade is that you have an operating system already eligible such as Windows XP or Vista installed to use it. Since the Windows 7 end user license agreement.
15 UPDATES. To use upgrade software, you must first be licensed for the software that is eligible for the upgrade. After the upgrade, this agreement takes the place of the agreement for the software that you upgraded. After upgrade, you can no longer use the software that you upgraded.
So, if you are always denied, you will just have to reinstall Windows XP or Vista and let it do the verification of eligibility.
-
How is it assistant BootCamp 6.0.1 running on El Capitan 10.11.5 installs single partition BootCamp on the disc Fusion consisting of 128 SSD part G SSD and 3 TB of HARD drive on an iMac (retina 5K, 27 inches, end of 2014), but not the part of the HARD drive?
This has two questions:
1 capacity of SSDS faster for Fusion drive has been reduced. Therefore less effective for the reader of the merger. For example if I need to create a partition of 80G for my windows bootcamp partition, only 48 G will be left in the drive of the merger.
2. ability of the bootcamp windows partition becomes very limited, cannot be greater than 120 G.
3. even when I try to fuse out of the drive of fusion in the 128 G SSD and 3 TB of HARD disk, and then run the BootCamp assistant to create the bootcamp partition start from scratch to reinstall El Capitan only on the HARD drive (without drive Fusion), it won't let me do anything, it just shows an error that says something like "a person has created additional partitions on this drive please select. another disc. But there is nothing else to choose.
Before my (5 K, 27 inches, end of 2014 retina) to El Capitan Yosemite, I was able to use the previous version of the wizard BootCamp 5.x to create the partition, bootcamp on the drive of the merger. And it will be divided in the fuser unit in two and insert the Bootcamp partition (with the size I chose, which can go up to 1 TB) between two partitions of MAC OSX.
The disk partitions resulting from it, will be the partition MAC OS x on the SSD, the partition MAC OS x on the HARD drive partition #1, partition MAC OS x on the HARD drive partition #3.
Then there is the BootCamp partition on the HARD drive partition #2.
Is there a way to get what I need?
That is what has been described in this notice of two canoes?
Installation of Windows on a Boot Camp partition on a drive of TB Fusion 3
Thank you.
After having worked on those weeks, I realized that I need very painfully (by first going back to Yosemite and bootcamp 5 to escape all the limitations of El Capitan and BootCamp 6) I want to share here. Someone at - it other smarter solutions welcome.
Note these steps and mentioned drivers only work for my version of iMAC, retina 5K late 2014. If you have other material, please search on the web to see which driver will work first. And all of these steps are destructive and assumed that you first take backup. It is only shared for interest only. Readers will have to bear your own risk.
A. take backup
1. take a backup completes my iMac Fusion Drive using Time Machine. Then restart with a Yosemite USB installation and select Terminal from the menu on the top bar.
B. fuse out of the merger in two physical disks drive: SSD + HDD
1. in the terminal, type the commands in show what the logical volume group ID and the ID of the logical Volume of the disc fusion)
Cs diskutil list
2. in the terminal, type commands for the fuse of the fuser unit and separate them to an SSD and a HARD drive. Note: All data will be destroyed in the drive of the merger. There are many articles in this community on how this could be done,
diskutil cs deleteVolume Logical Volume ID
CS diskutil remove logical Volume Group ID
This should finish within 30 minutes. If you have taken more time, this means that your reader of fusion has been altered somehow.
I hit this issue too. To use this command to remove the fusion drive hung up, and I need to do the hard to scramble a few sections of data in the hard disk partition table using the controls to tell the OSX this hard drive is a new without partitions:
Cat >/dev/random /dev/disk0 (where/dev/disk0 is the SSD)
and repeat for disk1/dev/disk1 which is the HARD drive in my case).
This command will not return anything, but expect to press Ctrl-Z to end after 1 minute.
2 create independent partitions (non-fusionend) for the installation of OSX.
Borne Terminal output, and select disk utility, in disk utility, select the drive to HARD disk (and not on the partition), you will see the error message and you will be asked if you want to fix the fuser unit, click on ignore. Then wipe the HARD drive to create a single 'extended OSX journaled"named"HARD drive".
3. Repeat step 2, and then erase the SSD drive to create a single 'extended OSX journaled"named"SSD ".
C. install on the HARD disk as drive didier autonomous not fusion.
1. go to Yosemite install screen and proceed with the installation of a clean copy of Yosemite to the iMAC. then connect you.
D. use BootCamp Yosemite f5 to install windows.
1. launch Yosemite bootcamp.
2. check the two checkboxes for creating the USB drive to install windows 7 or a later version, and to download the windows supports the Apple software. Do not click on the last box to install or remove windows pie creating real bootcamp partition again.
3. it may take several hours to complete this function of your internet b/w and also performance of your USB drive.
4. If you install Windows 7 (like me), then the downloaded drivers will not work for you, this will cause the issue of the device driver appleDSS.sys does not like this driver and others are too recent for windows 7 to use. Also, your keyboard and mouse may not work even if you try to plug in a USB external keyboard or a mouse. You need to replace the drivers downloaded by others (the Boot Camp 5.1.5769 drivers that I find in this link: Software Support of Boot Camp 5.1.5769.) (Note: this driver is material specific only works for my iMAC model). Once you have downloaded it, copy the two files in the root directory of the USB installation to replace the original ones. It's specific and material available for download somewhere on the Apple Site.
-From the Finder, delete the $WinPE$ and the Boot Camp of the FLASH PLAYER files.
-Expand the old drivers for Boot Camp 5.1.5769 (two records and another file) on your desktop.
-Copy the $WinPE$ and records of Boot Camp in the FLASH PLAYER.
5. open Boot Camp Assistant again and only select the third option, install Windows 7.
It will show you the screen to select what installation disk, select HARD drive.
Then drag the slide bar to select the size of the Bootcamp partition for windows you want, knowing that there is a restriction for windows installed using training camp on a MAC that the last byte of the BootCamp partition must reside in the first byte of the 2.2 T of each physical hard drive.
For my case, I need only 500G for bootcamp and leaving behind 1.7 to for my MAC OSX partition immediately after the bootcamp partition and an another 0.8 T MAC OSX partition after him. 1.7 TB and the partition of MAC OS x 0.8 TB well exploited in the meantime bootcamp partition, will be merged into a fusion drive by Bootcamp. Thus, you will end up with total 2.5 TB of disk space in a logical drive - fuser.
Go to this link for more details on this subject: n-on-a-3-tb-fusion-drive http://twocanoes.com/winclone/support/installing-windows-on-a-boot-camp-partitio
6. continue the process to partition the hard drive, then it will restart automatically in windows installation mode, install windows.
7. once the installation is complete, check that windows is functioning correctly.
E. Si you want to upgrade to windows 10 Windows 7.
1 if you plan to upgrade to windows 10, you'll find that the windows IE v.8 7 is no longer works and had many problems to load the page. Then when you try to download the latest version of Internet Explorer, you get an error that you need at least windows 7 SP1 to support the last IE. Life is too complicated, just download the google Chrome browser, then search for download windows 10 and then run the Microsoft valuation tool to upgrade.
2 but before upgrade you, unplug all your MAC USB drives, otherwise, you will find that, after having spent an hour downloading the windows 10 software, the upgrade will fail with the error "/ dynamicupdate...» ». It is an inexplicable mistake that no one seems to understand why. There are articles with proven results that the removal of all USB drives before running the windows 10 upgrade tool will correct this problem.
F. reinstall OSX El Capitan
Once your target windows system (if windows 7, windows 8 or windows 10) works very well. You can continue to create again your Fusion drive and reinstall OSX El Capitan.
1. Insert the install of OSX Yosemite rear USB to the iMAC, and then select Restart Windows, or stop, and then turn the MAC once again.
2. When you hear the ringing tone, press on and hold down the option key for 10 seconds. Then you release.
3. on the selection screen, select start Yosemite OSX install drive.
4. after starting, do not proceed to install OSX El Capitan again. But select Terminal from the menu bar.
5. in the terminal, type the command 'diskutil list cs' and you should see nothing to prove that there are no existing fusion drive yet.
6 type the 'diskutil list' command to list all disks and partitions.
The SSD has two partitions, the/dev/disk0s1 of EFI (209 MB) partition and the other/dev/disk0s2 of OSX partition we created in step B above, called SSD around 121 G.
The HARD drive has two partitions, the/dev/disk1s1 of EFI (209 MB) partition and the other/dev/disk1s2 of OSX partition we created in step B above, called SSD.
G. delete the logical storage of nucleus on the HARD disk drive and it refuses with the DSS to form a merger with faster performance disc
1. Insert the install of OSX El Capitan rear USB to the iMAC, and then select Restart Windows, or stop, and then turn the MAC once again.
2. When you hear the ringing tone, press on and hold down the option key for 10 seconds. Then you release.
3. on the selection screen, select start Yosemite OSX install drive.
4. after starting, do not proceed to install OSX El Capitan again. But select Terminal from the menu bar.
5. in the terminal, type orders for (to show what are the logical volume group ID and the ID of the logical Volume of the logical drive). You should see the logical volume to basic storage group created using two partitions on the hard drive, 1.7 TB and TB 0.8 created when we run the Yosemite Bootcamp to install windows.
Cs diskutil list
6. in the terminal, type commands to delete logical drives from basic storage. Note: All data will be destroyed in the logical drive.
diskutil cs deleteVolume Logical Volume ID
CS diskutil remove logical Volume Group ID
7. tap "diskutil list" command lists all the resulting partitions. You should see that the HARD drive has the following partitions.
/ dev/disk0 (internal, physical):
#: NAME SIZE TYPE IDENTIFIER
0: GUID_partition_scheme * GB 121,3 disk0
1: disk0s1 EFI EFI 209.7 MB
2: Apple_HFS GB SSD 121.0 disk0s2
/ dev/disk1 (internal, physical):
#: NAME SIZE TYPE IDENTIFIER
0: GUID_partition_scheme * 3.0 to disk1
1: EFI EFI 209.7 MB disk1s1
2: Apple_HFS 1.7 Untitled TB disk1s2
3: disk1s3 Apple_Boot Recovery 650.0 MB HD
4: Microsoft database BOOTCAMP 503.0 GB disk1s4
5: Apple_HFS 801,4 Untitled GB disk1s5
8 type the following commands to create the logical volumes group, named "myLVG" (or the name) of fuser using the usable for OSX to the SSD and HDD partitions.
diskutil cs to create "myLVG" disk0s2 disk1s2 disk1s5
Note: Mark the group id of logical volume shown in the results.
In my case, I want to book the last partition as standalone partition disk1s5 no-fusionend, so I can use it to raise the back, or format it in FAT32 to allow the exchange of data between the MAC and boot camp.
So, I do not understand this last partition in the drive of the merger. in my case, the command that I used is: diskutil cs to create "myLVG" disk0s2 disk1s2
9 create logical volumes named "Macintosh HD" (or you call it) on the logical volume group we just created for the reader of the merger.
diskutil createvolume logical volume group ID jhfs cs + 'Macintosh HD' 100%
10 command "diskutil cs type list" to check the resulting fusion drive created.
CoreStorage groups of logical volumes (1 found)
|
+ Logical Volume - Group F53C7A25-C2F3-4997-91E9-2E6B6BAB2E0E
=========================================================
Name: LVG
Status: online
Dimensions: 1815635525632 B (1.8 to)
Free space: 90112 B (90.1 KB)
|
+-Physical volume E176873C-7C80-4759-8110-BA7307E0C4B3
| ----------------------------------------------------
| Index: 0
| Disc: disk0s2
| Status: online
| Dimensions: 120988852224 B (121.0 GB)
|
+-Physical volume 6535AC3C-DCF8-453F-AD47-98905538386E
| ----------------------------------------------------
| Index: 1
| Disc: disk1s2
| Status: online
| Dimensions: 1694646673408 B (1.7 to)
|
+--> Logical volume family F3D15F87-FB84-4B43-B2F2-E9EACC7C42D9
----------------------------------------------------------
Encryption type: no
|
+--> Logical volume 0D807F6E-FB7C-418F-AAF4-EF3EA3525D10
---------------------------------------------------
Disc: disk2
Status: online
Size (Total): 1809780178944 B (1.8 to)
Reversible: no
Name: Macintosh HD
Volume name: Macintosh HD
Content indicator: Apple_HFS
LVG Type: Fusion, sparse
11 exit the terminal, go back to OSX El Capitan install screen and select the name of the fuser unit 'Macintosh HD' proceed to begin the installation of the os x for installation.
12. There will be a step in the installation ask you if you want to configure as a new computer, or restore from a time machine previous backup. Make your own choices it accordingly.
13 once OSX El Capitan has been installed and you have finished restoring the data and custom configurations, you can enter the application of preferences to check if you see the icon of the "Startup" disk", and if you choose Startup BootCamp in the next reboot, you should be able to boot up to Windows without pressing and holding the button option when reboot and choose to start windows manually. Also, in windows, you should be able to click on the bootcamp Control Panel and select for a startup to OSX on the next reboot.
14. one thing to be aware, if you install bootcamp in this way, the boot camp and the GUI utility disk in OSX El Capitan will not be able to adjust your settings. This means, if you need to touch anything or to readjust the size of the partition, you will need to do it again in step A. Alternatively, some how to get started with installing Mac OSX Yosemite USB, then adjust the partitions using similar commands shown in this article or other articles in this community.
15. yet once please take personal responsibility on damage if you follow the instructions in this article.
-
This has happened on several different sites in several different contexts. I enter information but then receive a "Please indicate your name and your email address" or "This is not a properly formatted e-mail address" message (based on whatever the form code provides some error messages for empty mandatory fields). I rechecked, of course, and the text has been entered correctly. This has happened once with AutoFill, last time I entered the text myself.
Clear the cache and cookies from sites that cause problems.
"Clear the Cache":
- Firefox > Preferences > advanced > network > storage (Cache) offline: 'clear now '.
'Delete Cookies' sites causing problems:
- Firefox > Preferences > privacy > Cookies: "show the Cookies".
Start Firefox in Firefox to solve the issues in Safe Mode to check if one of the extensions of the origin of the problem (switch to the DEFAULT theme: Firefox (Tools) > Add-ons > appearance/themes).
- Makes no changes on the start safe mode window.
- https://support.Mozilla.com/kb/safe+mode
You can try to remove saved forms (autofill) data are case which is corrupting the data.
- Click on the (empty) input field on the web page to open the drop-down list
- Select an entry in the drop-down list
- Press the DELETE key (on a Mac: shift + delete) to remove it.
Firefox will remember new form data when entered.
-
Computer will display the text but not the graphics
I have a computer that is running Windows 7 Pro 64 bit that will display the text, but will not be graphic print (what I get is several pages of garbled text and what looks like Morse code).
The problem is the same with a HP Officejet Pro 6230 or an Officejet Pro 8100.
The problem occurs if I am connected with a domain users account or the local administrator account.
The problem occurs using the re-discovery of HP network port monitor or the standard TCP/IP port.
Two other computers connected to the printer and also running Windows 7 Pro 64 bit, you do not have the problem.
HP printing and doctor Scan didn't find any problem and is not the problem of printer Microsoft Fixit fix anything.
I will try to assign another driver by following the instructions at:
but I do not know what driver to use.
This Technet article:
suggests that a third-party port monitor may be to blame. I tried to remove the rediscovery of HP Network Monitor, but I get an error and I can't remove it. As far as I can tell, this is the third port only installed on the computer monitor.
I have searched this forum, but could not find a similar problem that has a solution.
What other information should I provide?
Thank you!
Jeffrey Pike
Groton public library
ELSA:
Further investigation of this issue today, I learned that probably, printing problems don't were not due to the computer or printer, but a bad pass that the computer is plugged into. I ordered a new switch, and I hope that it will be the end of my troubles. Thank you for the help that is available to you.
Jeffrey Pike
Groton public library
-
Re-enter the key of W7, but my mouse and keyboard are not active?
Hi guys when I turn on my computer now, it sends me directly on a screen where it asks me to re - enter the key of W7, I I try this but recognized the tRNA of the mouse and keyboard. After about 2 minutes, it goes to a screen where it says "this copy of Windows not genuine."
If you can shed some light on how to get the mouse and keyboard to the rear, it would be great.
Thank you!
Have you tried to connect the keyboard and mouse to different USB ports?
Is it wireless or wired keyboard and mouse?
You can always re - enter the product key when you reach the office by following these steps:
Press Windows key + R
Type: slui.exe 3
Press enter
Enter the product key and click next to activate via the Internet.
-
Remark Office OMR
I've been remark office omr 8.1 installed on 32-bit windows vista (intel pentium DC) for the last year laptop. Now plan to move it to a more recent hardware and the OS.
I'm trying to install Office note 8.1 on Windows 7 Home Basic 64 bit (on laptop AMD E450 DC base). But am getting this error message immediately after you enter the serial number and authentication code. I tried to install different versions of the .net Framework (from 1.1 to 4), but nothing seems to solve the problem.
I even tried to install it in mode compatibality. but no luck.
Here is the error message (between BEGIN and END lines)
-BEGIN-
An error occurred instantiating the object of authentication. Please restart your computer, and they run the Setup again.
Error number = 2147219705Error = description
------ END--------
Appreciate any help
Thank you
SJ
Just for the follow-up of this: I have sent comments, and they responded in 20 minutes with:
Please contact the Support of the note. I'm sorry that you are experiencing this error, but it seems by the error message that you install note on a Windows 7 computer. This error is caused by a Microsoft security update that was released in July 2011 for Windows 7 and caused upward to change our software. Here is access to our Download Center for you to install the version 8.4 of note. You will use your current serial number, license key and authentication code.They then provided a link to their Download Center where I could download 8.4E - mailer to * address email is removed from the privacy * and they will answer you. They have great customer service. -
Customize the filter/search text, but display the original text of the research to adf 12.1.3
After customization of search in the QueryFilterBean text, how always display the original text entered by the user if the results of the table appear.
It is in the ADF 12.1.3 version. Is this possible?
You introduce new variables to filter for the entrance of users as is described in this blog https://tompeez.wordpress.com/2015/04/11/how-to-filter-adf-bound-tables-by-date-range-jdeveloper-12-1-x/
Then read the values of variables in the onQueryListener in your bean method that you introduced in the filter and apply both in terms of filter criteria.
Timo
-
How can I activate a check box if the data have been entered in a different text field?
Hello. I would use four check boxes on a form, each of which will enable (check) if the data have been entered in four text fields of form on a different page in the same form.
Example:
Page 1 will have a question like... How many apples did you eat last month? "Text1" = 3
So, given that the user has responded to 3 in the field 'text1', "checkbox1" must now be verified on page 2.
... and so on for the other three.
Note: The answers to the questions will be like a number. If the user enters 0 (zero), then I don't want the boxes to activate it. So, any greater than zero response will check the checkbox.
Follow-up to question...
Is it possible for a text field quite different form whether visible or not visible (default read-only text) based on the status of each check box mentioned above?
Example:
"checkbox1" will have a field of text next to it named "date1" with a date hidden. If "checkbox1" is checked (because of the above), then the date will be visible.
... and so on for the other three.
Thank you very much!
-You can use something like this as the custom of your text field validation script:
if (event.value=="3") this.getField("checkbox1").checkThisBox(0, true);-Yes, but you shouldn't make it dependent on the box to check, but integrate it in the script above, like this:
if (event.value=="3") {
    this.getField("checkbox1").checkThisBox(0, true);
    this.getField("date1").display = display.visible;
} else {
    this.getField("date1").display = display.hidden;
}
If you also want to uncheck the checkbox where the value of the text field is not 3 then double online #2 but with the false instead of true value in the else block.
-
My free trial has ended and a week later, I received a notice asking if I wanted to continue my trial of Lightroom. I clicked on "continue", it says that I have a "reduced" version of Lightroom. I intend to purchase the full version, but I want to assure you that when I have cked button of the trial to continue"that I didn't sign upward for a subscription to Lightroom.
No, unless you enter credit card details and you buy manually, it will not automatically subscribe to any subscription.
You can go ahead and buy the full version.
You can buy subscription creative photography of cloud which includes Photoshop and Lightroom for $9.99 per month.
Or "
You can purchase the standalone version of Lightroom that comes with serial number,
-
Unable to select or enter the text in the hidden form field
If I select 'Visible' to fields in the form that I created, I can enter text in them BUT they show as a gray light box.
If I select "Hidden" or "Hidden but printable" there is no box grey, but I can not put in value, select or enter the text in the fields once the PDF form is saved.
It of the same or not I have to save as 'Reader Extended PDF' or not.
I use Acrobat for Mac.
Thanks in advance.
It's highlighting of field assets.
-
problem with fonts (eith text layers) after entering the serial number


PS CS6 x 64 Extendet
After entering the serial number moved layers of text in the files which were made in the the trial version
Welcome to the forum!
I never heard talk about fonts moving once someone enters a serial number, but here are a few things to try:
1. If you use a font management program, make sure that the fonts you need are still installed and assets.
2. If you do not use a font management program, make sure that the fonts you need are in the proper location for your operating system.
3 read the tips at http://helpx.adobe.com/photoshop/kb/troubleshoot-fonts-photoshop-cs5.html and see if any apply to your situation.
I'm sorry I don't have more specific suggestions. Maybe someone else on this forum can help?


Maybe you are looking for
-
Satellite A215-S4757: sites Web continues to display after 30 seconds using WLan
I can connect to wi - fi but when I open internet Explorer sometimes if I'm lucky, I'll get internet for like 30 seconds and then after that, the pages will be stop showing yet I am always connected. On top of all this, the laptop works slowly. Can a
-
are there any usb 2.0 drivers for dos? If so, how can I install them?
-
Problem with wireless B USB adapter unable to connect to wireless G router.
Hi, I had a LInksys Wireless - B 802 adapter. 11B with a computer Win XP and Win 7 Wireless-G Notebook, both to connect to a Linksys Wireless-G Router WRT54G2. The Win 7 Wireless - G Notebook no problem to establish the connection to the router. My 8
-
I can't email my other programs... Access, Word, Excel, or my scanner.
* O.T. > Outlook e-mail I use Windows 7, I have updated recently, by e-mail from Microsoft that I have would no longer be able to use Outlook, my Outlook for Windows 10 desktop program, Outlook only, leaving the rest of 7. Everything is good except t
-
Hi all(1) we have 8 different folders in a single project, all records of these 8 contains the mappings and pointing to 8 different schema. and I've created packages. We have little packages that require mappings of FILE 1 and FILE 2 and also train F