Cannot see how to change the CSS properties in CSS designer in 2014 CC DW
I've recently updated for DW CS5 until 2014. I noticed that the 2014 version doesn't have the possibility to make changes in the CSS properties using CSS designer. In DW CS5, I could easily change CSS properties in the CSS box. Now with 2014, I must open the CSS page and manually enter the values in the code for the line. This seems to be a huge step backward. On that note, since 2014 shows the CSS style tags element in Design view, it would be great if you can click on them to go directly to the Properties menu. This function, as it is now, is a bit useless. I hope that Adobe makes it easy access to the CSS on the next version of the software.
Much has changed since CS5.
CSS Designer: A tool of Visual design in Dreamweaver cc | Inspired by Adobe Magazine
Personally, I find manually adding the code in the .css file to be much faster than the CSS panel or the new CSS designer, but you can certainly add/edit css to use. I wouldn't call it worthless until you are faster to manually code than to make selections in the menus of many however in the designer.
You need not open the file .css separately. You can click on the name of the .css file in the bar of dependent files at the top of your document that the css is attached, to view its source code and make changes there.
Tags: Dreamweaver
Similar Questions
-
It is difficult to see how to change the color of the scrollbar in gray on gray background?
It is difficult to see how to change the color of the scrollbar in gray on gray background?
I think you should probably use an extension or theme to replace the default colors.
If you are not interested in all the changes that might come with a new theme, is the next extension compatible with Linux?
-
Martyn King: King of Martyn: I don't see how to change the opacity on MUSE CC it is grayed out when I select my form box.
Martyn King: On an element in the form of CAPTCHA.
Unfortunately, we can not change the opacity of the captcha has filed the fill option, are looking for a way to set the background and text color even? or you want to set the opacity so that object behind the rating should be visible?
Thank you
Sanjit
-
How to change the css on basket buy now button?
Hi all
I have been racking my brain on this one and could really use some help!
Check out the "BUY NOW" button on my site here:
How can I get rid of the gray/white color behind the text? (it is gray on a browser, white on another!)
I want it to be a solid red button and hold the gray area to be transparent.
I looked in a lot of the css files but may not know what style is with this button.
Does anyone know where I'm supposed to go to change that?
Any help would be greatly appreciated. Thank you!
Jason
-
How to change the text properties.

Hello.
I want to change the properties of the textFrame using JS.
Here is my code, but there is a problem.
Only the first line is changed.
Any idea?
Thank you.
  var myDocument = app.documents.item(0);
  var myStory = myDocument.stories.item(0);    // < - It's all change if I use "everyItem()" instead of "item(0)".   But it's too slow.
  var myText = myStory.paragraphs.item(0);
  myText.pointSize = 10;
  myText.fillColor = myDocument.colors.item("Black");
Well now...
myStory.paragraphs.item (0)
You can hear the first paragraph of the story.
To change all the paragraphs, you can use a
myStory.paragraphs.everyItem)or
myStory.texts [0]or simply
monarticle
-
How to change the default properties of the Apache plugin and machine names
Hello
Two questions:
1. How do change you the computer name (under services/servers too)? My problem is that I have a big cluster running on Amazon EC2, and when I add them to the Hyperic they use the FULL, i.e. "ec2-XX-XX-XX-XXX.z-X.compute-X.amazonaws.com" domain name I then manually change them to their real domain name. This involves a LOT of steps. Anyway to do this more effectively?
I just tried to change the db directly, but this does not seem to work. (Tables: eam_server, eam_service, eam_resource, eam_platform).
2. How can I change the default settings for the Apache plugin? I run Debian for PID and Exec locations are different than the default values. I was not able to find these values by default in server locations or the agent or the database anywhere.
Thanks in advance!
DavidHi David,
> Hi,.
>
> Two questions:
>
> 1. How do change you the computer name (in the)
(> services/servers too)? My problem is that I have a
> large cluster running on Amazon EC2, and when I add
> to Hyperic they use the FULL domain name, i.e.
> 'ec2-XX-XX-XX-XXX.z-X.compute-X.amazonaws.com '. I have
> then must manually change their actual
> domain names. This involves a LOT of steps. In any case to make
> this more effectively?
>
> I just tried to change the db directly but does not
> seem to work well. (Tables: eam_server,)
(> eam_service, eam_resource, eam_platform).I don't know a smart way to do it. As SIGAR determines the hostname by OS specific functions based on the NIC main automatically, it is difficult to manipulate the configuration.
>
> 2. How can I change the default settings for the Apache plugin?
> I run Debian for the locations of PID and Exec are
> different than the default values. I could not
> find these default values in the server or the agent locations
> or in the database anywhere.Hi, it is possible. Search the apache - plugin.jar in your directory of the HQ Agent and extract to a folder. Then unzip it with jar - x
Modify etc/hq - plugin.xml and look for the DEFAULT_PIDFILE property. You will find an example for Apache ERS product that looks like this.
value = "logs/httpsd. PID "/ >"Copy of your Apache (1.3,2.0 or 2.2) of the article and adapt it to your needs, for example:
version = "2.0".
include = "1.3" >
Class = "Apache20ServerDetector" / >
Description = "Server MPM" / >
value = "/ var/run/httpd." PID "/ >"
After that, recreate the jar with jar - c and spread the new jar file to your appropriate HQ server and directories of agents HQ.
This solution has some disatvantages, for example, if you are upgrading your versions of the Agent and the server.
If you a familiar with the development of a plugin you can create a plugin for Apache specific Debian and preconfigure all of your values.>
> Thanks in advance!
> DavidHope this helps
Mirko -
Hello
This is pavan, I use apex 4.2.3
I want tabs we use in the structure of the apex as House, appbuilder, sql workshop and SubTabs I want the same look and same field click us the sub-tab the mail tab should hilighted I use a theme No 20 but when I created the list and watch the decline his don't look that a lot of good may I know how to handle.
I tried here http://apex.oracle.com/pls/apex/f?p=52985:1:10701438256
where I have to change all references please send.
Thanks in advance,
Kind regards
PavanPavan
If you want that the list entry parent to be common if one of the entrances to the child is current, then the 'current list for Pages Input Type' cannot be 'target of the current Page.
One option is to use a "Colon delimited List Page", and add the list of pages to the list "entry for present Condition." The disadvantage of this method when adding a child list entry, you need to add the page to the list target.
Another option is to use "Exist Sql Query" and use a select statement of the hierarchy on apex_application_list_entries for example
select ''
from   apex_application_list_entries lie
where  lie.list_name = 'List1'
and    lie.application_id = :app_id
and    substr(lie.entry_target
             ,instr(lie.entry_target,':',1,1)+1
             ,instr(lie.entry_target,':',1,2)-instr(lie.entry_target,':',1,1)-1
             ) = :app_id
start with lie.parent_entry_text = 'Images'
connect by lie.entry_text = lie.parent_entry_text
I found that, in the workshop of sql, the query takes several seconds. So use the one which suites best your situation.
In regards to the region covering the whole of the page.
The simplest solution is to use the model of the area and the same "Point of view" in the breadcrumb area.
But essentially the width of the region must be set to 100%.
Or the background color should be transparent and the section of page of the region is placed in must cover the entire width and have the right color.
Nicolette
-
How to change the color of the text in a form?
I hae a standard Muse contact form in my site, and I don't see how to change the color of the text in the form labels and the text that is in a field before seizure is produced, but how do change you the color of the text that is entered in a field by a user?
Hello kevinb,.
The solution in this thread provided by Connor - change the attributes of text on turnover of muse , that's what you have to do.
Let me know if you need additional information.
Kind regards
Ankush
-
GMA x4500HD on a latitude E6400: how to change the amount of memory assigned to the graphic card
Hello
I have a latitude E6400 with the A03 BIOS and lastest drivers memory on Vista x 64.
I don't see how to change the amount of RAM assigned to the integrated graphics cards.
How can I change this setting?
Concerning
-
How to change the icon of the web in the browser window
I created my site and cannot find how to change the icon in the browser window (as they have done at the top of this page with the icon of Adobe before the Adobe Forums: text) anyone would be nice to give me a little help?
Do you mean the favicon?
I only learned that recently about favicons myself - so if you google the word you will get a lot of resources to do this. Bascially, it's a little icon file located in the root directory of your site that browsers search and display for you. As long as the file is there (* named favicon.ico*) will automatically appear if I'm wrong in what I read.
It's the thing you're looking for? (edit: it also appears in your list of bookmarks in firefox - if it isn't the one you want it is the favicon file)
-
How to change the Spry CSS tab
I like to use these old screens provided with the former DW Spry tab. I just looked in DW CC and it looks like they aren't there and more. But anyway, I made one for my client. Now, they want to get one of the tabs on the far right of the margin. See the image below:

I don't know yet if it's possible to do and if someone has done this before, can you tell me what code I need to change in the CSS? I would have joined the CSS file, but it seems that you cannot attach files in this forum, so I've copied below.
Please offer any means to change the color of the tabs, etc. - I just need to know how - or at all - this tab can be moved to the right.
Thanks, Guy deaf
PS I'm sorry that the CSS code does not correctly appear in this forum. When I type this message, looks like it will display line-by-line, but it's not. I'm sorry.
---------------------------------------------
@charset "UTF-8"; /* SpryTabbedPanels.css - version 0.6 - Spry Pre-Release 1.6.1 */ /* Copyright (c) 2006. Adobe Systems Incorporated. All rights reserved. */ /* Horizontal Tabbed Panels * * The default style for a TabbedPanels widget places all tab buttons * (left aligned) above the content panel. */ /* This is the selector for the main TabbedPanels container. For our * default style, this container does not contribute anything visually, * but it is floated left to make sure that any floating or clearing done * with any of its child elements are contained completely within the * TabbedPanels container, to minimize any impact or undesireable * interaction with other floated elements on the page that may be used * for layout. * * If you want to constrain the width of the TabbedPanels widget, set a * width on the TabbedPanels container. By default, the TabbedPanels widget * expands horizontally to fill up available space. * * The name of the class ("TabbedPanels") used in this selector is not * necessary to make the widget function. You can use any class name you * want to style the TabbedPanels container. */ .TabbedPanels { overflow: hidden; margin: 0px; padding: 0px; clear: none; width: 100%; /* IE Hack to force proper layout when preceded by a paragraph. (hasLayout Bug)*/ } /* This is the selector for the TabGroup. The TabGroup container houses * all of the tab buttons for each tabbed panel in the widget. This container * does not contribute anything visually to the look of the widget for our * default style. * * The name of the class ("TabbedPanelsTabGroup") used in this selector is not * necessary to make the widget function. You can use any class name you * want to style the TabGroup container. */ .TabbedPanelsTabGroup { margin: 0px; padding: 0px; } /* This is the selector for the TabbedPanelsTab. This container houses * the title for the panel. This is also the tab "button" that the user clicks * on to activate the corresponding content panel so that it appears on top * of the other tabbed panels contained in the widget. * * For our default style, each tab is positioned relatively 1 pixel down from * where it wold normally render. This allows each tab to overlap the content * panel that renders below it. Each tab is rendered with a 1 pixel bottom * border that has a color that matches the top border of the current content * panel. This gives the appearance that the tab is being drawn behind the * content panel. * * The name of the class ("TabbedPanelsTab") used in this selector is not * necessary to make the widget function. You can use any class name you want * to style this tab container. */ .TabbedPanelsTab { position: relative; top: 1px; float: left; padding: 5px 20px; margin: 0px 1px 0px 0px; font: bold 12px sans-serif; background-color: #f1c185; list-style: none; border-left: solid 1px #CCC; border-bottom: solid 1px #999; border-top: solid 1px #999; border-right: solid 1px #999; border-radius: 5px 5px 0px 0px; -moz-user-select: none; -khtml-user-select: none; cursor: pointer; } /* This selector is an example of how to change the appearnce of a tab button * container as the mouse enters it. The class "TabbedPanelsTabHover" is * programatically added and removed from the tab element as the mouse enters * and exits the container. */ .TabbedPanelsTabHover { background-color: #ffd197; } /* This selector is an example of how to change the appearance of a tab button * container after the user has clicked on it to activate a content panel. * The class "TabbedPanelsTabSelected" is programatically added and removed * from the tab element as the user clicks on the tab button containers in * the widget. * * As mentioned above, for our default style, tab buttons are positioned * 1 pixel down from where it would normally render. When the tab button is * selected, we change its bottom border to match the background color of the * content panel so that it looks like the tab is part of the content panel. */ .TabbedPanelsTabSelected { background-color: #ffe9cd; border-bottom: 1px solid #EEE; } /* This selector is an example of how to make a link inside of a tab button * look like normal text. Users may want to use links inside of a tab button * so that when it gets focus, the text *inside* the tab button gets a focus * ring around it, instead of the focus ring around the entire tab. */ .TabbedPanelsTab a { color: black; text-decoration: none; } /* This is the selector for the ContentGroup. The ContentGroup container houses * all of the content panels for each tabbed panel in the widget. For our * default style, this container provides the background color and borders that * surround the content. * * The name of the class ("TabbedPanelsContentGroup") used in this selector is * not necessary to make the widget function. You can use any class name you * want to style the ContentGroup container. */ .TabbedPanelsContentGroup { clear: both; border-top: solid 1px #999; background-color: #FFF; } /* This is the selector for the Content panel. The Content panel holds the * content for a single tabbed panel. For our default style, this container * provides some padding, so that the content is not pushed up against the * widget borders. * * The name of the class ("TabbedPanelsContent") used in this selector is * not necessary to make the widget function. You can use any class name you * want to style the Content container. */ .TabbedPanelsContent { overflow: hidden; padding: 4px; } /* This selector is an example of how to change the appearnce of the currently * active container panel. The class "TabbedPanelsContentVisible" is * programatically added and removed from the content element as the panel * is activated/deactivated. */ .TabbedPanelsContentVisible { } /* Vertical Tabbed Panels * * The following rules override some of the default rules above so that the * TabbedPanels widget renders with its tab buttons along the left side of * the currently active content panel. * * With the rules defined below, the only change that will have to be made * to switch a horizontal tabbed panels widget to a vertical tabbed panels * widget, is to use the "VTabbedPanels" class on the top-level widget * container element, instead of "TabbedPanels". */ .VTabbedPanels { overflow: hidden; zoom: 1; } /* This selector floats the TabGroup so that the tab buttons it contains * render to the left of the active content panel. A border is drawn around * the group container to make it look like a list container. */ .VTabbedPanels .TabbedPanelsTabGroup { float: left; width: 10em; height: 20em; background-color: #EEE; position: relative; border-top: solid 1px #999; border-right: solid 1px #999; border-left: solid 1px #CCC; border-bottom: solid 1px #CCC; } /* This selector disables the float property that is placed on each tab button * by the default TabbedPanelsTab selector rule above. It also draws a bottom * border for the tab. The tab button will get its left and right border from * the TabGroup, and its top border from the TabGroup or tab button above it. */ .VTabbedPanels .TabbedPanelsTab { float: none; margin: 0px; border-top: none; border-left: none; border-right: none; } /* This selector disables the float property that is placed on each tab button * by the default TabbedPanelsTab selector rule above. It also draws a bottom * border for the tab. The tab button will get its left and right border from * the TabGroup, and its top border from the TabGroup or tab button above it. */ .VTabbedPanels .TabbedPanelsTabSelected { background-color: #EEE; border-bottom: solid 1px #999; } /* This selector floats the content panels for the widget so that they * render to the right of the tabbed buttons. */ .VTabbedPanels .TabbedPanelsContentGroup { clear: none; float: left; padding: 0px; width: 30em; height: 20em; } /* Styles for Printing */ @media print { .TabbedPanels { overflow: visible !important; } .TabbedPanelsContentGroup { display: block !important; overflow: visible !important; height: auto !important; } .TabbedPanelsContent { overflow: visible !important; display: block !important; clear:both !important; } .TabbedPanelsTab { overflow: visible !important; display: block !important; clear:both !important; } }!-[CodeBlockStart:dffe5525-a787-4a98-a87f-f24554b12141]-->@charset 'UTF-8'; / * SpryTabbedPanels.css - 0.6 - pre-release Spry 1.6.1 version * / / * Copyright (c) 2006] Adobe Systems Incorporated. All rights reserved. * / / * Horizontal tabbed panels * the default style for a TabbedPanels widget puts all the tab buttons * (stalled left) above the content panel. * / / * This is the selector for the main container of TabbedPanels. For our * style by default, this container does not contribute anything visually, * but it is floated to the left to ensure that all floating or compensation done * with any which of her children the elements lie entirely within the limits the * TabbedPanels container, in order to minimize any impact or unwanted * interaction with other floating elements on the page which may be used * for page layout. * If you want to limit the width of the widget TabbedPanels, define a * width of the container TabbedPanels. By default, the widget TabbedPanels * extends horizontally to fill the available space. * The name of the class ("TabbedPanels") used in this selector is not * necessary to make the widget service. You can use a class name, you * want to style the TabbedPanels container. */ . TabbedPanels {overflow: hidden;} margin: 0px; padding: 0px; Clear: none; Width: 100%; / * Hack IE to force the layout correct when preceded by a paragraph. (hasLayout bug) * /} / * this is the selector for the TabGroup. The container of TabGroup houses * all buttons on the tab for each tabs in the widget panel. This container * does not contribute to what both visually in the appearance of the widget for our * default style. * The name of the class ("TabbedPanelsTabGroup") used in this selector is not * necessary to make the widget service. You can use a class name, you * want to style the TabGroup container. */ . TabbedPanelsTabGroup {margin: 0px;} padding: 0px; } / * This is the selector for the TabbedPanelsTab. This container houses * the title of the Panel. It is also tab 'button' that the user clicks on * to activate the corresponding content panel so that it appears on top * of the other tabs in the widget panels. * For our style by default, each tab is positioned relatively 1 pixel down from * where it would normally. This allows each tab overlap content * panel that renders underneath. Each tab is rendered with a background of 1 pixel * border which has a color that corresponds to the upper edge of the current content * panel. This gives the appearance that the tab is drawn behind the * content panel. * The name of the class ("TabbedPanelsTab") used in this selector is not * necessary to make the widget service. You can use any class name you want * to style the tab container. */ . TabbedPanelsTab {position: relative;} Top: 1px; float: left; padding: 5px 20px; margin: 0px 1px 0px 0px; Police: bold 12px without serif. background-color: #f1c185; list-style: none; border-left: 1px solid #CCC; border-bottom: 1px solid #999; border-top: 1px solid #999; border-right: 1px solid #999; border-radius: 5px 0px 5px 0px; -moz-user-select: none; -khtml-user-select: none; cursor: pointer; } / * This selector is an example how to change the appearance of a button in the tab * container as the mouse enters in the it. The class is "TabbedPanelsTabHover" * programatically add and remove the element tab as the mouse between in * in and out of the container. */ . TabbedPanelsTabHover {background-color: #ffd197 ;} / * this selector is an example how to do to change the appearance of a button in the tab * container after the user has clicked on it to activate a content panel.} * The 'TabbedPanelsTabSelected' class is programmatically added and removed * the tab element as long as the user clicks button tab containers in * the widget. * As mentioned above, for our style by default, the tab buttons are positioned * 1 pixel down where he would normally. What is the tab key * selected, we change its bottom border to match the background color of the * content panel so that it looks like the tab is the content panel. */ . TabbedPanelsTabSelected {background-color: #ffe9cd;} border-bottom: 1px solid #EEE; } / * This selector is an example of how to make a link inside a tab button * look like normal text. Users may want to use the links within a tab button * so that when it gets the focus, the text * inside * the tab button gets a focus * ring around it, instead of the ring around the whole tab. * /. TabbedPanelsTab a {color: black;} text-decoration: none; } / * This is the selector for the ContentGroup. The ContentGroup container houses * all panels of content for each tabs in the widget panel. For our * style by default, this container provides the background color and borders that * surround content. * The name of the class ("TabbedPanelsContentGroup") used in this selector is * not necessary to make the widget function. You can use a class name, you * want to style the ContentGroup container. */ . TabbedPanelsContentGroup {clear: both;} border-top: 1px solid #999; background-color: #FFF; } / * This is the selector for the content panel. The content panel contains the * content for a single panel tabs. For our default style, this container * provides some padding, so that content is not pushed upward against the * widget borders. * The name of the class ("TabbedPanelsContent") used in this selector is * not necessary to make the widget function. You can use a class name, you * want to style the content container. */ . TabbedPanelsContent {overflow: hidden;} padding: 4px; } / * This selector is an example of how to change the appearance of the currently * active panel container. The class is "TabbedPanelsContentVisible" * programatically added and removed from the content as the Panel item * is enabled/disabled. */ . TabbedPanelsContentVisible {} / * vertical tabbed panels * following rules override some of the default rules above so that the * TabbedPanels widget is rendered with its buttons on the tab on the left of * the active content panel. * With the rules defined below, the only change that will be made * to move a widget panels to horizontal tabs to vertical tabbed panels * widget, is to use the 'VTabbedPanels' class on the top-level widget * element container, instead of "TabbedPanels. */ . VTabbedPanels {overflow: hidden;} Zoom: 1; } / * This selector floats the TabGroup so that the tab buttons it contains * make left of active content panel. A border is drawn around * the group container to make it look like a container from the list. */ . VTabbedPanels. TabbedPanelsTabGroup {float: left;} Width: 10em; height: 20em; background-color: #EEE; position: relative; border-top: 1px solid #999; border-right: 1px solid #999; border-left: 1px solid #CCC; border-bottom: 1px solid #CCC; } / * This selector disables the float property that is placed on each button of the tab * by the rule above TabbedPanelsTab default selector. He also draws a background * border for the tab. The tab button will get his left and right border of * the TabGroup and its superior border of the tab above it or button TabGroup. */ . VTabbedPanels. TabbedPanelsTab {float: none;} margin: 0px; border-top: none; border-left: none; border-right: none; } / * This selector disables the float property that is placed on each button of the tab * by the rule above TabbedPanelsTab default selector. He also draws a background * border for the tab. The tab button will get his left and right border of * the TabGroup and its superior border of the tab above it or button TabGroup. */ . VTabbedPanels. TabbedPanelsTabSelected {background-color: #EEE;} border-bottom: 1px solid #999; } / * This selector fleet contained signs of the widget while they * make it to the right of the tabs buttons. */ . VTabbedPanels. TabbedPanelsContentGroup {clear: none;} float: left; padding: 0px; Width: 30em; height: 20em; } / * Printing styles * / @media print {.} TabbedPanels {overflow: visible! important;}. TabbedPanelsContentGroup {display: block! important;} overflow: visible! important; height: auto! important; } . TabbedPanelsContent {overflow: visible! important;} display: block! important; clear: both! important; } . TabbedPanelsTab {overflow: visible! important;} display: block! important; clear: both! important; } }
Add the class like below:
- Open Ocean
-
I downloaded a free trial of Adobe Creative cloud and dreamweaver CC. I am not able to download a .psd to see how to extract the HTML and CSS.
Download button is disabled. What is the case for a free trial?
Hey girijamg,
I asked that you try to open a page because snippet Panel will be disabled until there is a html page is open in DW.
Excerpt from Panel will be ready for the job that after any html page is open in DW.
Hope it makes sense.
Lalita
-
How am I able to change the css file in a model?
Hello everyone.
I'm pretty new to Dreamweaver, so any help would be greatly appreciated.
I built my index file related a particular css file and saved as a model, but I use
different css files for some of my other pages. So, when I save a new page used to
a corresponding model of css file is replaced, and the css of index file is used.
Is in any way change the css file once it has been registered?
Thank you
Rich
It is best to alll your at the level of the site CSS in an external file.
Use CSS only incorporated into page-specific CSS rules. In other words, integrated CSS goes in the
-
Hello
We try to change the extended properties, I think the component in the web designer to display a selector of user object instead of a text field for extended properties, attached to the element of service requested... Any help would be appreciated...
Thank you
I think you can also do the following
(1) expand the ShoppingCartItem and PersonWantsOrg table with a column (CCC_Person). This will be a foreign key column containing pointing to the Person table, and this will stored an entry UID_Peson
(2) create a new request property (shop Manager-> IT > config database-> properties of demand), assign this column CCC_Person
(3) affect the request property of the AccProduct (open the product and find the field 'Properties of the request' in the Manager)
Once done, when you click on 'Request', it should allow the request property, which in turn is a FK field in the person table, in effect it should allow you to choose a person.
I have not tested but I think it should work.
If you prefer to use ADSAccount instead of the person, change the column pointing to ADSAccount instead. Of course, you need manage what is happening with this column in the backend process.
HTH
-
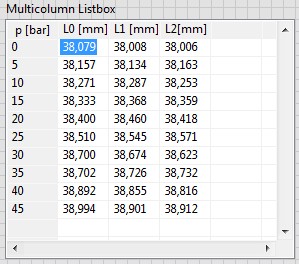
How to change the upper-left corner of the multicolumn listbox?
Can I change the properties of the cell (-1, -1), but I don't know how to change the text.
Is it too simple or impossible?
Kind regards
Ljubo.
In Excel, you cannot change the headers of columns (A, B, c...) and headers of lines (1, 2, 3,...).
I have a 2D data table Y a 1 d of data table X. data of X are the same for all the columns of Y. The first idea was to use X values as row headings to give him special attention. There should be a header above the data of X (name, quantity, unit,...). See the example below.
The solution is very simple: I created a label and put it on the upper left corner of the listbox.
Good day
Ljubo.


Delete the following in your css spry as file its in the ' query print media "and has no effect on the screen - have added you it to the wrong place."
{.alignRight}
position: relative;
Top: 1px;
float: right! important;
padding: 5px 20px;
margin: 0px 1px 0px 0px;
Police: bold 12px without serif.
background-color: #f1c185;
list-style: none;
border-left: 1px solid #CCC;
border-bottom: 1px solid #999;
border-top: 1px solid #999;
border-right: 1px solid #999;
border-radius: 5px 0px 5px 0px;
-moz-user-select: none;
-khtml-user-select: none;
cursor: pointer;
}
Add the below css just above the press query written:
{.alignRight}
float: right! important;
}
/ * Print styles * /.
@media print {}

Maybe you are looking for
-
I have an iPhone 5 s protected by a waterproof case, secure screw using Allen. This command removes the possibility of using the ID of the contact. Contact ID is required by the App Store! I found a way around locking the screen, but not found how to
-
Unknown devices shared on the side bar of the Finder
Quick overview of my MacBook: MacBook Air (13 inch, early 2015) OS X El Capitan 10.11.6 Version So I just moved into my place of residence of the school, we are provided access to the Wi - Fi connection for students. When I connected to the WiFi, per
-
JOURN. Resetting the Virtualstore E account
HelloI have a Toshiba JournE and I need help with Virtualstore (white screen on startup), please do a reset of the account, the account number is 30324Thank you!
-
What iOS device was the first without a physical back button?
Which device (ios) was the first without a physical back button?
-
Hello I have a code with several SubVIs, each with several objects. I would like references to all objects in a single source of group in order to access the properties of the objects through property nodes in another screw. Since I have a group of r