How to change the row height in tableLayoutManager?
HIII all,.
I used TableLayoutManager in my application but don't know how to increase the row height.
I use this reference for the TableLayoutManager link.
How - to create a presentation of the rich UI at TableLayoutManager
Article number: DB-00783
and I want to make the size of the entire line 68 px...
any body can help me how to change the RowHeight in tableFieldManager?
@peter
Thank you Peter for your answer.
I solved the problem as you indicate in the Tablelayoutmanager.java change before 5 months.
I asked you our post reply you as soon as possible...
I don't care
Thank you.
regaurds,
Albert_anks
Tags: BlackBerry Developers
Similar Questions
-
Bidi text JTextPane and JTextArea changes the row height
You can use the following example to demonstrate the problem. When you run, copy and paste an Arab character of http://www.alanwood.net/unicode/arabic.html in the display area. This creates a condition of bidi in the document. The circumflex replaces one with a flag at the top to indicate ownership LTR or RTL of the character. The height of the display line, going at a lower height. I am able to detect the State of bidi. I can't get any action to indicate what was the change of line height. I've exhausted all measuring height of possible line that I could find. The size reported by all methods does not State non-bidi bidi State, even if the row height is significantly reduced. Anyone else encounter this? Any proven way to measure the difference?
to import javax.swing.JFrame;
Import javax.swing.JTextPane;
public class HelloSwing {}
Public Shared Sub main (String [] args) {}
JFrame frame = new JFrame ("HelloWorldSwing");
OSname string = new String();
OSname = System.getProperty ("os.name");
JTextPane tp = new JTextPane();
frame.getContentPane () .add (tp);
tp.setText (OSname);
frame.setDefaultCloseOperation (JFrame.EXIT_ON_CLOSE);
Frame.Pack ();
frame.setSize (400, 200);
frame.setLocationByPlatform (true);
frame.setVisible (true);
}
}I think that Eclipse does not use JEditorPane but own component. GUI editors has monospaced fonts of equal width/height for each tank and fixed a height for all rows. It is much easier to manage several sizes of fonts on the same line.
-
How to change the rows and columns of newtabs?
I can't change the rows and columns to mozilla version 33
From topic: config browser.newtabpage.columns shows 5 by default, but these 5 columns appear not only 3 as before. Don't know why, but I use generally not even the default new tab page in my profile daily.
Still works this - https://addons.mozilla.org/en-US/firefox/addon/new-tab-tools/ - extension to change the page of newTab via a user accessible interface name in the Addons, rather than routing autour Manager inside Firefox. I use this add-on in a second profile that I use for my favorite sites
-
How to change the cell height in the apex 5, g-> o, j.-i.
Hi all
When I type a g in the inputfiled, I see o and when I type a j in the inputfield, I see that I have.
My settings:
Type: Text fieldWhen I save the data, the g and j are registered oke in the database.
How can I change the height of the cell in the apex 5?
Thanx.
Best regards
Vinay
Why would you use javascript?
@OP go to the definition of your page > css inline and copy this
input[type="text"] {
   height: 20px !important;
}
Adjust the height of your taste.
There is a chance that you have tried to adjust the font size. This could be the reason why you can not see the parts of letters.
-
How to change the row of a table at the click of a button in the adf 12.1.3
Hello
I can't change a line in a table by clicking on the button Edit using adf 12.1.3.Could you help me please on this issue.
-
Select your table and look in the property inspector window there you will see an editingMode, here property to set its value to clickToEdit
Ashish
-
How to change the runtime of height and width of the front panel
How to change the front height and width during execution. Basically, I want to decide height or width according to some parameters that I'm in the moment of execution.
Ed johnsold was first

-
Modify the script to the row height
Years, they gave me this script:
myDoc = app.activeDocument;
myStyle = myDoc.paragraphStyles.item ("•Price");
app.findPreferences = null;
app.changePreferences = null;
myParas = myDoc.search("",false,false,undefined,{appliedParagraphStyle:myStyle});)
for (var j = myParas.length - 1; j > = 0; j-) {}
. parent.width myParas [j] =. 33;
}Anyone know how to change it if I can change the row height to heights specific at least in my table according to character styles? I have only three character styles. All three would have a different height. Using CS3. Thank you.
In CS3 / Windows / Javascript
Without any errors, the following code end.
myDoc = app.activeDocument;
app.findTextPreferences = null;
app.changeTextPreferences = null;
app.findTextPreferences.appliedCharacterStyle = myDoc.characterStyles.item ("type 1");
myParas = myDoc.findText ();
for (var j = myParas.length - 1; j > = 0; j-) {}
. parent.width myParas [j] =. 8382;
}
Kind regards
Sudar
-
How to change the background color of some rows in a Datagrid?
How to change the background color of some rows in a Datagrid?Hee is an excellent example:
http://www.CFLEX.NET/showfiledetails.cfm?channelId=1&object=file&ObjectID=487Tracy
-
How to change the t0 ' topic: host ' search engine
How to change the t0 ' subject: Home "search engine (for the moment it is yahoo), but I want to google. If I search from the address bar, then it is google. but I want to google on the home page for: (.) Thank you
@cor-el: this would probably work if you want to restore the default value.
I have changed my encrypted google search engine on "subject: House" with these steps:
1. download sqlite browser.
(I used this: website (sqlitebrowser.sourceforge.net) / victory of direct download)2 extract the zip file
3. run ' SQLite Database Browser 2.0 b1.
4. open the "chromeappsstore.sqlite" file in your profile folder
5. click the Browse data tab and double-click the value in the first row. (see screenshot below)
6. Insert the desired value.
As you will see the values in the example below, you can use any search you want and you can insert a "_searchTerms_" instead of the term research.
I have these values:- Standart (google):
{'name': 'Google', "searchUrl" ': "_ http://www.google.com/search?q=_searchTerms & ie = utf - 8 & oe = utf-8 & aq = t & rls = org.mozilla: en - org.mozilla & client = firefox-a" "}
- Encrypted Google:
{'name': 'Google', "searchUrl" ': "https://encrypted.google.com/search?q=_searchTerms _" "}
- Yahoo:
{'name': 'Yahoo', "searchUrl" ': "http://search.yahoo.com/search?p=_searchTerms _" "}
- Bing:
{'name': 'Yahoo', "searchUrl" ': "http://www.bing.com/search?q=_searchTerms _" "}
-
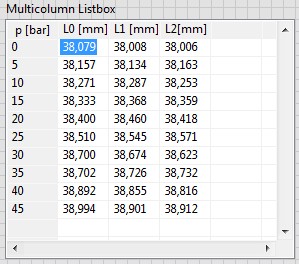
How to change the upper-left corner of the multicolumn listbox?
Can I change the properties of the cell (-1, -1), but I don't know how to change the text.
Is it too simple or impossible?
Kind regards
Ljubo.
In Excel, you cannot change the headers of columns (A, B, c...) and headers of lines (1, 2, 3,...).
I have a 2D data table Y a 1 d of data table X. data of X are the same for all the columns of Y. The first idea was to use X values as row headings to give him special attention. There should be a header above the data of X (name, quantity, unit,...). See the example below.
The solution is very simple: I created a label and put it on the upper left corner of the listbox.
Good day
Ljubo.
-
Another user changed the row with a primary key oracle.jbo.Key]
I see many discussions about this error, but still cannot understand the difficulty that I need in my scenario.
I am an Oracle Developer and completely new to ADF, please bear with me.
I use JDeveloper 11.1.1.9.0
My scenario:
Creates an object editable view (UVO) with sub selects in the query, which is from several db tables.
Creating a table using the UVO
When I try to update a field in the table, and then click the validate, I get the error message:
Another user changed the row with a primary key oracle.jbo.Key]
Can someone explain in what scenarios I see this error and how do I solve this problem?
Try the viewObject execution after validation and reQueryOnCommit set to true
For details see - binary: a reason more for "Houston-25014: another user has modified the line containing oracle.jbo.Key primary key '
Ashish
-
Hello
Happy New Year to ALL
On the Login area:
I would like to know how to change the size of the region of Login and its place.
For example: Login area should have a = 600 height and width = 100 and should be on the right side, not in the center of the screen.
This problem concerns oracle12, apex 4.2 and html5 theme.
Ziut
Ziut wrote:
Hello
for example: apex.oracle.com
workspace: tb2, tb2/tb2
App = 23705
My comp (for example):

style = "height: 600px;" Width: 100px; »
This is only an example. Theme 26.
Ziut
Ziut,
This is the closest I could come to your comp. The simplest implementation, I found was:
- A region has added to the Information
- Place the Login area in a Sidebar area model
- Kept the two regions in the same Point on the screen and the same grid.

I have attempted to substitute the CSS for the Login region but made very little progress and make a slurry in a perspective of support. You should always keep in mind that another person will have to support your claim, a day, and play the more you with him, it may be more difficult to maintain if it is not well documented.
Here's my demo:
Username and password are all two - demo
https://Apex.Oracle.com/pls/Apex/f?p=11956:101
Jeff
-
How to change the Spry CSS tab
I like to use these old screens provided with the former DW Spry tab. I just looked in DW CC and it looks like they aren't there and more. But anyway, I made one for my client. Now, they want to get one of the tabs on the far right of the margin. See the image below:

I don't know yet if it's possible to do and if someone has done this before, can you tell me what code I need to change in the CSS? I would have joined the CSS file, but it seems that you cannot attach files in this forum, so I've copied below.
Please offer any means to change the color of the tabs, etc. - I just need to know how - or at all - this tab can be moved to the right.
Thanks, Guy deaf
PS I'm sorry that the CSS code does not correctly appear in this forum. When I type this message, looks like it will display line-by-line, but it's not. I'm sorry.
---------------------------------------------
@charset "UTF-8"; /* SpryTabbedPanels.css - version 0.6 - Spry Pre-Release 1.6.1 */ /* Copyright (c) 2006. Adobe Systems Incorporated. All rights reserved. */ /* Horizontal Tabbed Panels * * The default style for a TabbedPanels widget places all tab buttons * (left aligned) above the content panel. */ /* This is the selector for the main TabbedPanels container. For our * default style, this container does not contribute anything visually, * but it is floated left to make sure that any floating or clearing done * with any of its child elements are contained completely within the * TabbedPanels container, to minimize any impact or undesireable * interaction with other floated elements on the page that may be used * for layout. * * If you want to constrain the width of the TabbedPanels widget, set a * width on the TabbedPanels container. By default, the TabbedPanels widget * expands horizontally to fill up available space. * * The name of the class ("TabbedPanels") used in this selector is not * necessary to make the widget function. You can use any class name you * want to style the TabbedPanels container. */ .TabbedPanels { overflow: hidden; margin: 0px; padding: 0px; clear: none; width: 100%; /* IE Hack to force proper layout when preceded by a paragraph. (hasLayout Bug)*/ } /* This is the selector for the TabGroup. The TabGroup container houses * all of the tab buttons for each tabbed panel in the widget. This container * does not contribute anything visually to the look of the widget for our * default style. * * The name of the class ("TabbedPanelsTabGroup") used in this selector is not * necessary to make the widget function. You can use any class name you * want to style the TabGroup container. */ .TabbedPanelsTabGroup { margin: 0px; padding: 0px; } /* This is the selector for the TabbedPanelsTab. This container houses * the title for the panel. This is also the tab "button" that the user clicks * on to activate the corresponding content panel so that it appears on top * of the other tabbed panels contained in the widget. * * For our default style, each tab is positioned relatively 1 pixel down from * where it wold normally render. This allows each tab to overlap the content * panel that renders below it. Each tab is rendered with a 1 pixel bottom * border that has a color that matches the top border of the current content * panel. This gives the appearance that the tab is being drawn behind the * content panel. * * The name of the class ("TabbedPanelsTab") used in this selector is not * necessary to make the widget function. You can use any class name you want * to style this tab container. */ .TabbedPanelsTab { position: relative; top: 1px; float: left; padding: 5px 20px; margin: 0px 1px 0px 0px; font: bold 12px sans-serif; background-color: #f1c185; list-style: none; border-left: solid 1px #CCC; border-bottom: solid 1px #999; border-top: solid 1px #999; border-right: solid 1px #999; border-radius: 5px 5px 0px 0px; -moz-user-select: none; -khtml-user-select: none; cursor: pointer; } /* This selector is an example of how to change the appearnce of a tab button * container as the mouse enters it. The class "TabbedPanelsTabHover" is * programatically added and removed from the tab element as the mouse enters * and exits the container. */ .TabbedPanelsTabHover { background-color: #ffd197; } /* This selector is an example of how to change the appearance of a tab button * container after the user has clicked on it to activate a content panel. * The class "TabbedPanelsTabSelected" is programatically added and removed * from the tab element as the user clicks on the tab button containers in * the widget. * * As mentioned above, for our default style, tab buttons are positioned * 1 pixel down from where it would normally render. When the tab button is * selected, we change its bottom border to match the background color of the * content panel so that it looks like the tab is part of the content panel. */ .TabbedPanelsTabSelected { background-color: #ffe9cd; border-bottom: 1px solid #EEE; } /* This selector is an example of how to make a link inside of a tab button * look like normal text. Users may want to use links inside of a tab button * so that when it gets focus, the text *inside* the tab button gets a focus * ring around it, instead of the focus ring around the entire tab. */ .TabbedPanelsTab a { color: black; text-decoration: none; } /* This is the selector for the ContentGroup. The ContentGroup container houses * all of the content panels for each tabbed panel in the widget. For our * default style, this container provides the background color and borders that * surround the content. * * The name of the class ("TabbedPanelsContentGroup") used in this selector is * not necessary to make the widget function. You can use any class name you * want to style the ContentGroup container. */ .TabbedPanelsContentGroup { clear: both; border-top: solid 1px #999; background-color: #FFF; } /* This is the selector for the Content panel. The Content panel holds the * content for a single tabbed panel. For our default style, this container * provides some padding, so that the content is not pushed up against the * widget borders. * * The name of the class ("TabbedPanelsContent") used in this selector is * not necessary to make the widget function. You can use any class name you * want to style the Content container. */ .TabbedPanelsContent { overflow: hidden; padding: 4px; } /* This selector is an example of how to change the appearnce of the currently * active container panel. The class "TabbedPanelsContentVisible" is * programatically added and removed from the content element as the panel * is activated/deactivated. */ .TabbedPanelsContentVisible { } /* Vertical Tabbed Panels * * The following rules override some of the default rules above so that the * TabbedPanels widget renders with its tab buttons along the left side of * the currently active content panel. * * With the rules defined below, the only change that will have to be made * to switch a horizontal tabbed panels widget to a vertical tabbed panels * widget, is to use the "VTabbedPanels" class on the top-level widget * container element, instead of "TabbedPanels". */ .VTabbedPanels { overflow: hidden; zoom: 1; } /* This selector floats the TabGroup so that the tab buttons it contains * render to the left of the active content panel. A border is drawn around * the group container to make it look like a list container. */ .VTabbedPanels .TabbedPanelsTabGroup { float: left; width: 10em; height: 20em; background-color: #EEE; position: relative; border-top: solid 1px #999; border-right: solid 1px #999; border-left: solid 1px #CCC; border-bottom: solid 1px #CCC; } /* This selector disables the float property that is placed on each tab button * by the default TabbedPanelsTab selector rule above. It also draws a bottom * border for the tab. The tab button will get its left and right border from * the TabGroup, and its top border from the TabGroup or tab button above it. */ .VTabbedPanels .TabbedPanelsTab { float: none; margin: 0px; border-top: none; border-left: none; border-right: none; } /* This selector disables the float property that is placed on each tab button * by the default TabbedPanelsTab selector rule above. It also draws a bottom * border for the tab. The tab button will get its left and right border from * the TabGroup, and its top border from the TabGroup or tab button above it. */ .VTabbedPanels .TabbedPanelsTabSelected { background-color: #EEE; border-bottom: solid 1px #999; } /* This selector floats the content panels for the widget so that they * render to the right of the tabbed buttons. */ .VTabbedPanels .TabbedPanelsContentGroup { clear: none; float: left; padding: 0px; width: 30em; height: 20em; } /* Styles for Printing */ @media print { .TabbedPanels { overflow: visible !important; } .TabbedPanelsContentGroup { display: block !important; overflow: visible !important; height: auto !important; } .TabbedPanelsContent { overflow: visible !important; display: block !important; clear:both !important; } .TabbedPanelsTab { overflow: visible !important; display: block !important; clear:both !important; } }!-[CodeBlockStart:dffe5525-a787-4a98-a87f-f24554b12141]-->@charset 'UTF-8'; / * SpryTabbedPanels.css - 0.6 - pre-release Spry 1.6.1 version * / / * Copyright (c) 2006] Adobe Systems Incorporated. All rights reserved. * / / * Horizontal tabbed panels * the default style for a TabbedPanels widget puts all the tab buttons * (stalled left) above the content panel. * / / * This is the selector for the main container of TabbedPanels. For our * style by default, this container does not contribute anything visually, * but it is floated to the left to ensure that all floating or compensation done * with any which of her children the elements lie entirely within the limits the * TabbedPanels container, in order to minimize any impact or unwanted * interaction with other floating elements on the page which may be used * for page layout. * If you want to limit the width of the widget TabbedPanels, define a * width of the container TabbedPanels. By default, the widget TabbedPanels * extends horizontally to fill the available space. * The name of the class ("TabbedPanels") used in this selector is not * necessary to make the widget service. You can use a class name, you * want to style the TabbedPanels container. */ . TabbedPanels {overflow: hidden;} margin: 0px; padding: 0px; Clear: none; Width: 100%; / * Hack IE to force the layout correct when preceded by a paragraph. (hasLayout bug) * /} / * this is the selector for the TabGroup. The container of TabGroup houses * all buttons on the tab for each tabs in the widget panel. This container * does not contribute to what both visually in the appearance of the widget for our * default style. * The name of the class ("TabbedPanelsTabGroup") used in this selector is not * necessary to make the widget service. You can use a class name, you * want to style the TabGroup container. */ . TabbedPanelsTabGroup {margin: 0px;} padding: 0px; } / * This is the selector for the TabbedPanelsTab. This container houses * the title of the Panel. It is also tab 'button' that the user clicks on * to activate the corresponding content panel so that it appears on top * of the other tabs in the widget panels. * For our style by default, each tab is positioned relatively 1 pixel down from * where it would normally. This allows each tab overlap content * panel that renders underneath. Each tab is rendered with a background of 1 pixel * border which has a color that corresponds to the upper edge of the current content * panel. This gives the appearance that the tab is drawn behind the * content panel. * The name of the class ("TabbedPanelsTab") used in this selector is not * necessary to make the widget service. You can use any class name you want * to style the tab container. */ . TabbedPanelsTab {position: relative;} Top: 1px; float: left; padding: 5px 20px; margin: 0px 1px 0px 0px; Police: bold 12px without serif. background-color: #f1c185; list-style: none; border-left: 1px solid #CCC; border-bottom: 1px solid #999; border-top: 1px solid #999; border-right: 1px solid #999; border-radius: 5px 0px 5px 0px; -moz-user-select: none; -khtml-user-select: none; cursor: pointer; } / * This selector is an example how to change the appearance of a button in the tab * container as the mouse enters in the it. The class is "TabbedPanelsTabHover" * programatically add and remove the element tab as the mouse between in * in and out of the container. */ . TabbedPanelsTabHover {background-color: #ffd197 ;} / * this selector is an example how to do to change the appearance of a button in the tab * container after the user has clicked on it to activate a content panel.} * The 'TabbedPanelsTabSelected' class is programmatically added and removed * the tab element as long as the user clicks button tab containers in * the widget. * As mentioned above, for our style by default, the tab buttons are positioned * 1 pixel down where he would normally. What is the tab key * selected, we change its bottom border to match the background color of the * content panel so that it looks like the tab is the content panel. */ . TabbedPanelsTabSelected {background-color: #ffe9cd;} border-bottom: 1px solid #EEE; } / * This selector is an example of how to make a link inside a tab button * look like normal text. Users may want to use the links within a tab button * so that when it gets the focus, the text * inside * the tab button gets a focus * ring around it, instead of the ring around the whole tab. * /. TabbedPanelsTab a {color: black;} text-decoration: none; } / * This is the selector for the ContentGroup. The ContentGroup container houses * all panels of content for each tabs in the widget panel. For our * style by default, this container provides the background color and borders that * surround content. * The name of the class ("TabbedPanelsContentGroup") used in this selector is * not necessary to make the widget function. You can use a class name, you * want to style the ContentGroup container. */ . TabbedPanelsContentGroup {clear: both;} border-top: 1px solid #999; background-color: #FFF; } / * This is the selector for the content panel. The content panel contains the * content for a single panel tabs. For our default style, this container * provides some padding, so that content is not pushed upward against the * widget borders. * The name of the class ("TabbedPanelsContent") used in this selector is * not necessary to make the widget function. You can use a class name, you * want to style the content container. */ . TabbedPanelsContent {overflow: hidden;} padding: 4px; } / * This selector is an example of how to change the appearance of the currently * active panel container. The class is "TabbedPanelsContentVisible" * programatically added and removed from the content as the Panel item * is enabled/disabled. */ . TabbedPanelsContentVisible {} / * vertical tabbed panels * following rules override some of the default rules above so that the * TabbedPanels widget is rendered with its buttons on the tab on the left of * the active content panel. * With the rules defined below, the only change that will be made * to move a widget panels to horizontal tabs to vertical tabbed panels * widget, is to use the 'VTabbedPanels' class on the top-level widget * element container, instead of "TabbedPanels. */ . VTabbedPanels {overflow: hidden;} Zoom: 1; } / * This selector floats the TabGroup so that the tab buttons it contains * make left of active content panel. A border is drawn around * the group container to make it look like a container from the list. */ . VTabbedPanels. TabbedPanelsTabGroup {float: left;} Width: 10em; height: 20em; background-color: #EEE; position: relative; border-top: 1px solid #999; border-right: 1px solid #999; border-left: 1px solid #CCC; border-bottom: 1px solid #CCC; } / * This selector disables the float property that is placed on each button of the tab * by the rule above TabbedPanelsTab default selector. He also draws a background * border for the tab. The tab button will get his left and right border of * the TabGroup and its superior border of the tab above it or button TabGroup. */ . VTabbedPanels. TabbedPanelsTab {float: none;} margin: 0px; border-top: none; border-left: none; border-right: none; } / * This selector disables the float property that is placed on each button of the tab * by the rule above TabbedPanelsTab default selector. He also draws a background * border for the tab. The tab button will get his left and right border of * the TabGroup and its superior border of the tab above it or button TabGroup. */ . VTabbedPanels. TabbedPanelsTabSelected {background-color: #EEE;} border-bottom: 1px solid #999; } / * This selector fleet contained signs of the widget while they * make it to the right of the tabs buttons. */ . VTabbedPanels. TabbedPanelsContentGroup {clear: none;} float: left; padding: 0px; Width: 30em; height: 20em; } / * Printing styles * / @media print {.} TabbedPanels {overflow: visible! important;}. TabbedPanelsContentGroup {display: block! important;} overflow: visible! important; height: auto! important; } . TabbedPanelsContent {overflow: visible! important;} display: block! important; clear: both! important; } . TabbedPanelsTab {overflow: visible! important;} display: block! important; clear: both! important; } }
Add the class like below:
- Open Ocean
-
How to change the default orientation?
Hello
I am new to Adobe Flash Builder and am currently a mobile application for a school project. I was wondering how to change the default application in landscape mode orientation. I tried to go into my app.xml and change the proportions in mode landscape with no luck, and it is very difficult to find answers on the internet. I would greatly appreciate your help.
Code HomeView.mxml:
<? XML version = "1.0" encoding = "utf-8"? >
" < = xmlns:fx s:View ' http://ns.Adobe.com/MXML/2009 "
xmlns:s = "library://ns.adobe.com/flex/spark".
actionBarVisible = "false" tabBarVisible = "false" title = "HomeView" >
< fx:Declarations >
< / fx:Declarations >
< s:Image left = "0" right = "0" top = low "0" = "0" scaleMode = 'zoom' smooth = 'true '.
smoothingQuality = 'high' source="@Embed('file:///C:/Users/Owner/Downloads/48127-solarsystem-teaser.jpg')" / > "
< s:Button = "-5" x = "0" width = "410" height = "1504.
skinClass = "spark.skins.mobile.TransparentNavigationButtonSkin" click ="navigator.pushView (Sun)" / > "
< s:Button = "444" x = "852" width = '80' height = '80 '.
skinClass = "spark.skins.mobile.TransparentNavigationButtonSkin" click ="navigator.pushView (Mercury)" / > "
< s:Button "628" = x y = "742" width = "120" height = "124".
skinClass = "spark.skins.mobile.TransparentNavigationButtonSkin" click ="navigator.pushView (Venus)" / > "
< s:Button "836" = x y = "632" width = "127" height = "117".
skinClass = "spark.skins.mobile.TransparentNavigationButtonSkin" click ="navigator.pushView (Earth)" / > "
< s:Button "994" = x y = "506" width = "99" height = "96".
skinClass = "spark.skins.mobile.TransparentNavigationButtonSkin" click ="navigator.pushView (March)" / > "
< s:Button "1255" = x y = "464" width = "298" height = "279".
skinClass = "spark.skins.mobile.TransparentNavigationButtonSkin" click ="navigator.pushView (Jupiter)" / > "
< s:Button "1626" = x y = '302' width = '274' height = '270 '.
skinClass = "spark.skins.mobile.TransparentNavigationButtonSkin" click ="navigator.pushView (Saturn)" / > "
< s:Button "1965" = x y = "196" width = "175" height = "174".
skinClass = "spark.skins.mobile.TransparentNavigationButtonSkin" click ="navigator.pushView (Uranus)" / > "
< s:Button "2201" = x y = "66" width = "175" height = "174".
skinClass = "spark.skins.mobile.TransparentNavigationButtonSkin" click ="navigator.pushView (Neptune)" / > "
< / s:View >
App.xml code:
<!-the original proportions of the application at the launch ('portrait' or 'landscape').
As an option. Mobile only. By default, it is the natural orientation of the device->
<!-landscape < aspectRatio > < / aspectRatio >->
<!-if the app will start to auto-orienter the launch. As an option. Mobile
only. Default value false->
<!-false < autoOrients > < / autoOrients >->
I need to make sure the app is constantly in the landscape.
Thanks again.
8 student
In XML, while is a comment. You must remove the :
landscape fake -
How to change the length of line objects
Hi all
How to change the length of the line objects.
I know how to change the width or height of the elements.
Utils < Facade::IGeometryFacade > ()--> (ResizeItems)
itemList,
Transform::PasteboardCoordinates (),
Geometry::OuterStrokeBounds (),
refPoint, Geometry::ResizeTo (newWidth, newHeight)
);I know the new length and PMrect of the line item before moving.
What I want to know is how to get the new width and height of this.
Thank you.
Fujimori - Satoru
Find your old address of trigonometry and read the part about the Pythagorean theorem. This will give the scale factor you need to get the old PMRect to the new


Delete the following in your css spry as file its in the ' query print media "and has no effect on the screen - have added you it to the wrong place."
{.alignRight}
position: relative;
Top: 1px;
float: right! important;
padding: 5px 20px;
margin: 0px 1px 0px 0px;
Police: bold 12px without serif.
background-color: #f1c185;
list-style: none;
border-left: 1px solid #CCC;
border-bottom: 1px solid #999;
border-top: 1px solid #999;
border-right: 1px solid #999;
border-radius: 5px 0px 5px 0px;
-moz-user-select: none;
-khtml-user-select: none;
cursor: pointer;
}
Add the below css just above the press query written:
{.alignRight}
float: right! important;
}
/ * Print styles * /.
@media print {}
Maybe you are looking for
-
We could overclock the CPU of the Satellite A200 - 1 GB?
Hi all How I see the temperature of the CPU of my A200 - 1 GB.I can't see it in the bios. Is there any application provided by Toshiba or Vista. Another thing, it is that we can over clock the CPU of the A200 - 1 GB?IF it is possible, which is the wa
-
Hi all I was trying to restore the configuration to a TFTP server, but it fails. VIC-acs01 / admin # repository restore ACE-Config-160922 - 1542.tar.gpg repository acsRestore requires a restart of the ACS services. Continue? (yes/no) YesStart the res
-
Unable to create the new project for the new society without existing systems
I'm unable to create a new project for a new society. There is no existing systems, and I can't go beyond the selection screen. I first put in place a new collector, registration of the database and start collections? Or y at - there a step I'm m
-
Save the exception error message
Hi allTake into consideration the following:create table WXX_TEST ( ID NUMBER, COL1 VARCHAR2(5), COL2 VARCHAR2(25), ERRMS VARCHAR2(4000) )create table WXX_TEST2 ( ID NUMBER, COL1 VARCHAR2(25), COL2 VARCHAR2(4) )insert into wxx_te
-
Air on Android: ANR keyDispatchingTimedOut
HelloFirst of all, I would like to say GREAT JOB ADOBE, AIR is the only TRUE cross-platform platform available today that allow you to target multiple devices (now I know there are too many problems, but I could not find any other appropriate technol