Measure highlights in the image
Hello world.
I was presented with a challenge.
Our team of mechanics built a machine that randomnly erodes the surface of a test tube.
It is an image of a specimen captured at the beginning of a test:

As you can see four white lines are present in the image, the lines are caused by the reflections of the lamps.
And this is a picture of a similar specimen at the end of a test.

We already found a satisfactory means to measure areas of erosion  and it seems to be robust for all colors of possible test specimen
Now they decided they wanted the machine to measure the length of the white reflection lines (online), because the erosion to some materials only causes the surface to become tangled.
And not necessarily give obscurity eroded area above.
an example of such a case of use can be seen below:

I tried several approaches without success.
Ideally I would like to isolate the highlighted lines, so that the system could identify almost the same lines as those which is hand painted below

Tried methods:
1)
IMAQ find Edge, to get the endless lines that best described the lines of reflection highlighted.
Then using an binning method, the line is segmented, in the place where there is enough light in the picture.
This method is, however, very sensitive to the horizontal change in lighting and usually either find endpoints, or frosted and middle section correctly.
2)
Tuning IMAQ detect lines
It gives me:

Which is exactly what I want, as I hoped that the lines on the left of the eroded area would also include, and lines lie above and below the highlights would have been excluded, but getting close.
3)
High pass filter of the image to improve the edges and remove the effects of the quality of variable light.
The built-in methods had tend to reinforce the edge of erosion more or equal to the highlights, so I tried to build my own kernel to improve only the horizontal characteristics, but even with a core of 5 x 5 was the best result I got:

Who has not exactly me left to separate the highlights of the eroded area.
4)
Finally, I tried a cross-correlation with an image of a horizontal line with a small width.

Yet once I improved more than eroded area the line feature I was interested.
If you have an idea, that I can use to either improve the highlighted lines, so that the length can be measured I would really appreciate it.
I tried to adjust gamma, contrast and brightness to make the 'white' lines stand out, but due to the change in light, this also gives the bright Center of the image until the lines are increased in the extremities.
Thank you
/ ZcuBa
You can very easily find everything at the top and the bottom line using advanced search of edge. It extracts the values of the pixels form the profile of the line and you should be able to detect all non-uniform pixel values.
There is a screenshot of the result.
Good luck
Dan
Tags: NI Hardware
Similar Questions
-
can I know the reason for the change of color in the image - canon EOS rebel T5
Hi, I am using canon EOS rebel T5... Recently whenver I clicked on an image using this device, I get color variation in the image that I've highlighted in the image below... It's because of the lens or the camera settings... Pls help me to get a clear picture
What are compression of camera settings, for example, I use fat with Fine quality
This 478KO scares me, it's really small for a 4000 x 2000 image. You use too much jpeg compression which is ruining the image. You need to set a level of quality JPEG 9 or 10 - it will result in larger images, but as you can see, throw the data has detracted from your images.
If you want to send pictures, decide first the smaller number of pixels you can hang out with and then use just enough of JPEG compression to get the size you want.
-
Text highlights of an Image list box
Hi all
I have an image of a map of circuit board with many components. I want to help people find these components by having a list of text to the right of the image, and then if you click or hover over the text, the component is highlighted in the image of the printed circuit board.
Another way to put it: I have a map of the United States with an alphabetical list of States to the right. When you click or hover over a name of States, the State is highlighted on the image.
What is important to note, it's that I'm not hovering over the image. I am using string people locate something on the image by an alphabetical list that will focus on something on an image so they can find it.
How can I do this? CS6 product even begin by. I guess that dreamweaver? Can I do this with a CSS instead of JS?
Thank you!
Mike
This image is basically this except with a few components more (about 100).
http://www.hairballaudio.com/blog/wp-content/uploads/2014/07/Elements_PCB.jpg
In fact, I found exactly what I want to do here:
Demonstration of boundList feature - JSFiddle
It looks like I can create the image plane in Dreamwever then control, and make a list with the script.
Mike
-
How to stop IE display text alt as a tool tip when the mouse on the image.
I have random images in echo [B] [/ b] by a PHP script on a page.
[CODE] < img src = "<?" PHP echo $randomImage;? ">" alt = "This is the alternative text" / > [/ CODE]
The problem is whenever you highlight on the image, IE spits out the text.
I understand the alt text are intended for accessibility.So, how can I stop this IE behavior with compromises accessibility?
Thank you all.
Patrick
IE8 never shows the attribute alt as a ToolTip. They finally got this right in the browser.
It would be good if you checked correctly answered thread, so people who don't have no need to keep clicking on it. Thank you.
--

E. Michael Brandt

www.divahtml.comwww.divahtml.com/products/scripts_dreamweaver_extensions.phpStandards-compliant scripts and Dreamweaver Extensions

www.valleywebdesigns.com/vwd_Vdw.aspJustSo PictureWindowJustSo PhotoAlbum, et alia

--
-
Hello
I have a number of images of preparation of animals and they all must be 40mm at 300 DPI from tip of nose to their buttocks. The problem is a bunch of them have antennas, of long ears, long tail, etc. which may not be included in the measure, which prevents me to perform the entire image a certain size. How the entire image would turn so I can be sure that most of the animal measured exactly 40mm? TYIA!
Crop the image for measurement points (do not delete the cropped pixels). Then the Image-> resize to 40 mm wide with 300 dpi. Then select reveals all and crop once again if you want.
-
How to develop Mono with a component of the image highlighted in color?
Is it possible to use Lightroom to develop an image for the most part, in mono, but with a component of the image highlighted in color?
Is that what you are looking for?
-
use the setting shadows / highlights has an effect on the quality of the image?
I love this adjustment and tend to get carried away with it. I have set a lot of images that I put on my blog of photography company . But sometimes clients see results of my "messing around" and prefer the image and want to use it for printing and publication. My concern is that after setting shadows / highlights and then looking at levels that appear to have changed.
With the advent of the cab and it is non-destructive editing, I usually dispense with the mask on dupe layer and use the history brush to make local corrections. If S/H is specified, this is the first step at the exit of the ACR in Psalm
More processed look is in the mind of the Viewer. Generate B & W images at all is overprocessed, except if you're color blind.
I find the surprise that certain piece with S/H interesting and useful images on occasion. Bravo, S/H offers always a spectacular alternative to the simple image, that can be used or not, as desired.
It also lets you set a default value in a different way for S/H as the default values provided with the PS are odious in the extreme to most of the images. Choose an image that has not overexposed areas or heavily clipped shadows, apply the filter, move the sliders until you get what you want, then save it as a new default.
I put dark and light tones in separate operations. Flatten the file after that shadows are twisted to prevent compromises that I find appear when you make the highlights. That's why I my differently defined default values default values of Adobe.
A photograph is meant to be seen and appreciated as any other object, master, if sculpture, a weaving, painting and so on. Attraction of photography, what makes a photo a photo, must be honored at first, but don't be afraid to "depart from the reality", because you are creating a separate reality (no drugs). A photograph can sing, a piano can sing, but both must touch master to do so.
I hope that cs5, S/H would become an adjustment layer, not only because it is non-destructive qualities, but if we can review the settings later in treatment.
-
Color of the image area measurement
HIII
I want commensurate with colours (RGB) of the region of the image and have the result in the table of red, green and blue color samples
and display the histogram
Thank you
If you have the NI Vision Development Module, you should have a "IMAQ ColorHistogram" function available. It should provide what you are looking for.
Again, you must ensure that your images are acquired correctly. This by far isn't a simple thing (refer to this thesis for more information).
Norbert
-
Appearance to highlight the Image of GridListLayout
Hello
Small Question. Try to get a ListView with GridListLayout containing ImageView. When I choose a picture, it does not display automatically a point hard as happens with a standard ListView. Is - not manipulate automatically? If not, what is the best way to deal with? StandardListItem with a container or a CustomListitem with appearance of point high?
Thank you
Finally found one of my old posts which had the answer.
                listItemComponents: [
                   ListItemComponent {
                        type: "item"
                        CustomListItem {
                            dividerVisible: false
                            highlightAppearance: HighlightAppearance.Default
                            Container {
                                layout: DockLayout {
                                }
                                ImageView {
                                    imageSource: ListItemData.image
                                    scalingMethod: ScalingMethod.AspectFill
                                    contextActions: [
                                        ActionSet {
                                            title: "Photographs"
                                            ActionItem {
                                                title: qsTr("Favorite")
                                                imageSource: "asset:///icons/actions/favorite.png"
                                                onTriggered: {
                                                }
                                            }

                                        }
                                    ]
                                    verticalAlignment: VerticalAlignment.Fill
                                    horizontalAlignment: HorizontalAlignment.Fill
                                }
                                ImageView {
                                    id: selectedAppearance
                                    imageSource: "asset:///amd/ImageSelectedAppearance.amd"
                                    scalingMethod: ScalingMethod.Fill
                                    verticalAlignment: VerticalAlignment.Fill
                                    horizontalAlignment: HorizontalAlignment.Fill
                                    visible: false
                                }
                            }
                            ListItem.onSelectionChanged: {
                                if (selected) {
                                    selectedAppearance.visible = true;
                                } else {
                                    selectedAppearance.visible = false;
                                }
                            }

                        }
                    }
                ]
It is the image I've used.
And the file associated with AMD.
#RimCascadesAssetMetaData version=1.0
source: "ImageSelectedAppearance.png"
sliceMargins: 9 9 9 9
This replica of what is in the photos app.
-
I'm thinking GPR profiles which must have the scale placed along the top and side of the image borders. I need to crop the image, given that the existing software has its own scale that I can't use. I need to place the image on a neutral background cultivated have space to add text, such as the direction of the movement, magnetic north, information. Im going to try to * a copy of the image that I have for example. Although I want to learn how photoshop works I need to get this out of the way. You will also need to understand how to assemble the images since some reflection profiles are longer than what can show the soft ware GPR.

I would create a shape layer that contains your ranges. I make a separate scale for each side and have the scale longer that you need so you can use it with different images. Before you crop or resize, I bring in leaders and their reference of scale scale that you ever image before cropping. Then put the scales in a dynamic object and the harvest, ensuring that you remove cropped audited pixels. This will be crop your original image, but areas of scales that fall outside the area of culture will not be deleted, because they are in Society. Once crop you, if the image is a background image, change it to a normal layer by clicking on the lock icon in the layer panel. Now you can use the size of the canvas to add the amount of the borders you want around your image. You can create a United below your main image fill adjustment layer and choose what color you want the background to be. Then, you can move your scales where they should be. Use a mask for the scales if they are too long. Most of this can be implemented in action so that you don't have to manually do each step. The scales are fairly easy to do using the line shape tool. Just create a single line and duplicate many times you need divisions in your balance. One of the fixed lines at the beginning of the scale and the other at the end of the scale and select the layer with the line and use the distribution with the move tool function to space out the lines. Transform a part of the major subdivision to longer lines and add text. Here is an example of a scale, I did for my work:

-
problem with adujstments applied to the image after I click it to preview in Bridge
I used the bridge to view my RAW images and open them in ACR for years... yesterday I downloaded a map full of images in a new folder on my computer and open as usual, bridge view. For some reason any now when I'm in Filmstrip mode and I am interested in the large preview image, and then click on the preview of the image with the magnifying glass tool to display a small area, it seems to apply some sort of adjustment to the image. My pictures you more light in the Center and more dark on the edges, almost like a spotlight/edge Center burn setting... and these changes are carriers through more cab when I open the image there.
I checked to make sure that the automatic adjustment checkbox is unchecked in Bridge and ACR. Everything in ACR seems to be to default settings. I restarted my computer. Don't know what to do, else, I am very frustrated! Hoping someone here might have some ideas for me. I'm under Bridge CS6 and PS CS6 with Camera Raw 8.1. Thank you!
It's so strange, because he has recently started to happen and I didn't modify parameters of any where... camera, bridge, ACR, or CS6.
If something happens out of the blue a reset of the prefs would be an option (bridge of restart now pressed the CTRL key and choose Reset prefs in the menu).
But here are a few observations of your screenshots:
First, you set the option for thumbnails for 'embedded use' (you can see the Council left checker icon used for this parameter is selected). This means that the thumb of your al files show the preview jpeg generated from your DSLR camera, it is also confirmed by the black border showing around thumbs, which means that it only shows embedded. The moment that you select to display in the preview window, he begins to build a preview HQ and applies the default settings of RTAs, hence the difference between the embedded and the HQ preview.
You can use the icon of Council right checker and select always HQ, this begins to build previews HQ for all files, takes some time, but after just as cached, you can easily scroll through all files without problem.
Integrated thumbs (the originals of the camera) also show a beginning of vignetting. Not knowing not the quality of your goal, it seems to be a good but you use the measurement spot and full aperture at F2.8 lens and maximum zoom which could cause a bit of vignetting himself, when the ACR settings are applied a lot of contrast seems to be applied where more facts highlights vignetting and brighter.
You should be aware that Adobe has chosen to use the default settings for each type of camera, but this does not mean that agree you with that
There is always a way to settle in ACR by using different options such as exposure and contrast, etc by image or a series of on the same images.
But you can also watch other tabs of the ACR settings window to create a personal preset of cab. The other with the curves icon has a few options to look at. To the point, you have a few options with different contrast settings, personally I use them, because I find a lot to fort, I put it to linear which gives it a much more neutral appearance (as said personal and I do most of my work in PS itself using adjustment layers and channel masks). If you check under the camera icon (calibration of the camera), you will find versions of various processes (2012 and especially 2010 are advised, 2012 is by default and has its advantages and disadvantages. More big difference is the way in which they handle highlights and shadows in the exposure tab).
A second option to check is the profile of the camera itself with its different options. Here, I also checked the option neutral Adobe who seems a result of dull, but in the end he gives you the closest result of the original raw and a very good start for your personal result, just check all the other profiles one by one and select your choice. If you're happy save it as a new Camera Raw default with a proper name so you can always return to it in the presets window.
-
How to cut and paste the image of the body of the received email
I'm trying to cut and paste an image included in the bottom of an email and insert it into a Word document so that you can size and print. I can highlight, cut it with Ctrl C, paste it into the document Word with Ctrl V, but the image doesn't show, although the picture frame appears when I click on the place where the photo was pasted. Framework, but empty, no image. Any thoughts?
Thanks to everyone for their help.
The problem has been resolved - to try and finally understand everything.
If you encounter this problem, it is perhaps because, unless you know the file format of the inserted picture, programs can not figure it out for you. Place your cursor on the image, right click and save the image under a .jpeg instead of simply copying. Then work with the file .jpeg in any photo management program you use normally - or even insert it in Word.
-
FF 12.0 records the images of every webpage I visit my cache files. Is this a feature or a malware?
12.0 FF is save images at the top of every Web page I visit in my profile cache folders.
I'm on Mac OS X 10.6.8 build 10K 549, MacBook Intel Core 2 Duo 2 GHz, 1 GB RAM, 160 GB HD, and Intego VBX6, updates on a daily basis.
In the Terminal, the command 'file' with the path to an image file, for example shows:
.../Cache/7/63/DB1B8d01: PNG image, 201 x 127, 8-bit/color RGBA, non-interlaced
If the images are small, someone might be able to see, for example, a user-entered credit card number!
In the Finder, quick look shows each image at the top of each visited Web page, but for Web pages external loaded, it is an image of only the portion of the Web page of the window, not the toolbar of the window and the status bar.
The images of Web pages are saved two seconds after the loading of the page (by look which, contrary to get information, watch the time updated, including the seconds).
The problem occurs in Safe Mode even after a reboot.
It is present in FF 12.0 at the level of the user account administrator and 12.0 FF running in standard user accounts.
After saving my profile and remove the update 24/04/2012 installed 12.0 FF (from 11 FF) and download a new version today 04/29 http://mozilla.org/firefox (the cache was already deleted last session of FF), I tested it again, via the Help menu Firefox Help. The page loaded, and cache contained the normal icons of pages and images, AND a picture of the top of this Web page.
The images do not match those used by tab groups, and those that are used when the tabs are moved around each other (by comparing images of shows they are not quite a).
Keeping the width of the window go the same, but by pulling the bottom of the browser window, until only a few inches of the page is visible, the image to show only the upper left corner of the Web page.
If the addons page is also open and another page is visited (when a new tab is created), a picture of the newly created page AND an image of the Add-ons is created also, but NOT the page, the user sees, but instead the Firefox window more old style with the color tab buttons gray in the toolbar list 4 tabs "Get Add - ons. ", Extension, themes, Plugins (which is depressed). In the toolbar of the window to the left are the three normal buttons, each gray, as if the window is inactive, then the Add-ons title, with the touch of the pill on the right. Here are some plugins that you have installed with the icons of blue lego block to the left and their related text, listed below in the rows. The top row is highlighted in yellow and that only the row has a button "disable." This image includes even a white background around the window. Yet this image does NOT match what the user displays, which matches the style full-page new modules, where the tabs are in a column on the left side and Add-ons are listed in the right column with a hardware button above, on a blue background.
BTW: I just pasted the data of the troubleshooting information in the field below, but copy and paste does not show legs between preferred names and their values, or return characters, while everything works together.Which will probably not help.
Firefox has coded a minimum of 50 MB for the cache.We put a lower limit of 50 MB and an upper limit of 1 GB.
You can create a new pref Boolean browser.pagethumbnails.capturing_disabled on the topic: config page and set to true if you want to disable thumbnails altogether.
-
How to stop the Image of Canon to launch browser?
When I plug my CF card reader into a Firewire port on my iMac, it insists on opening the Canon's Image browser. It was very well in the past, but since I installed Adobe Lightroom CC - I want the application to open. In the preferences of LR CC, I checked the button for it to 'See' the import dialog when a memory card is inserted, but the system insists on giving me that Canon's Image browser. If LR CC is already running, the import dialog box appears, but does the Image browser. Could be a problem for Adobe, could be a problem of Cannon, could be a problem with OS X. thinking I'd start here - ideas, until I visit the other sites?
Thanks, Jim
As usual, five minutes after the announcement of this question, I found an answer - on the website of DPreview.com. And the answer was NOT very intuitive. Open the image transfer application, highlight of the CF card, click on the small icon in the lower left and tell him "other application". You can then choose which application you want. In my case, it was Lightroom CC. Good grief - who would have thunk it would be here!
So, question answered.
-
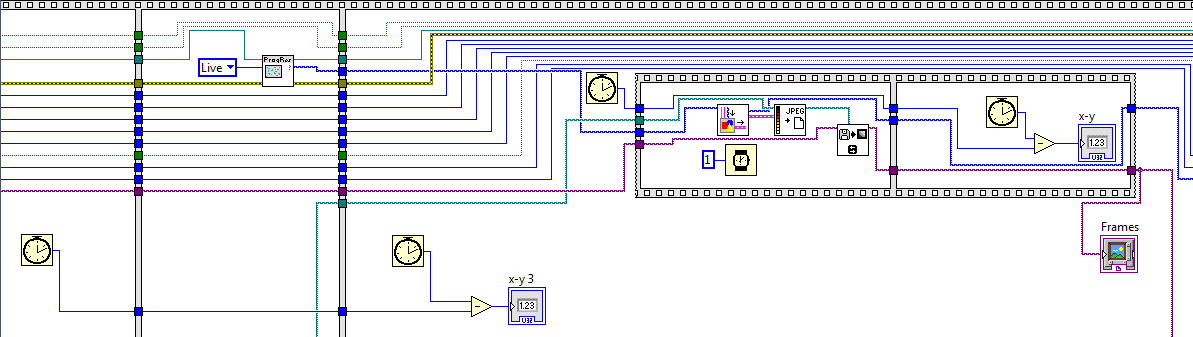
Huge delay during the image transfer
Hello
I use jenoptik radars XT 5 core with labview. I would like to take the image data and make an image processing. Unfortunately, I have only one option using its library in labview. Here it is:
I measured the execution time of the GetAcquiredImage function at the beginning of my code and I saw that time approximately 1 second. He is far behind for my task. May I ask how I can reduce the execution time?


Maybe you are looking for
-
Satellite 1110-Z20 - Power button broken
Hello the power button on my Satellite 1110-Z20 is lost. It seems that the button must only be fixed with spring and will work again. However, I don't know how to open the case without making any damage. Does anyone know how to open the laptop to fix
-
Any way to replace usb 2.0 to 3.0?
OK so odd question my lenovo g70-80 has 1 usb 3.0 port and 2 usb 2.0 ports. Is there a way to replace the 2.0 to 3.0? Would like to have more than 1 usb 3.0 port. Thank you Robert
-
The call for a Subvi without providing a reference to the objects inside the Subvi?
Hi all Suppose I have a Subvi, which trace Y1 vs X 1 and Y2 X 2 vs on the same XYGraph. See attachment. XYGraph the property node is linked to the XYGraph. It sets the style width and point line for each curve on the XYGraph. If I call this Subvi 4 t
-
email from 20/11/12 to 12/01/12 HELP is not found!
My emails to the Inbox from 20/11/12 until 12/01/12 disappeared all of a sudden... just like that!
-
I downloaded photos on a CD _ Walgreens, how to remove?