Resize the Bitmap image in the image control in flex3
I'm loading an image in the image at the start control. Then I am a color transformation applying to this image and want to load this bitmap in flex3. That works, but automatic resizing does not work then. If I load another image, then AutoSize works well. Image control does not support resizing of the same bitmap object image?.Here is the part of the code:
< mx:Image source = "{imgpath}" id = creationComplete = "imageCompleted ('MyImage'); "x ="20"y ="30"width ="365"height ="440"maintainAspectRatio = 'true '.
/ >
private void applyColor(event:Event):void {}
myBitmapDataObject = new BitmapData (myImage.height, true, myImage.width, 0x00CCCCCC);
myBitmapDataObject.draw (myImage.content);
myBitImage = new Bitmap (myBitmapDataObject);
myBitmapDataObject.colorTransform (myBitmapDataObject.rect, new ColorTransform (1, 1, 1, 1, 39, 76, 135, 100));
myImage.removeChildAt (0)
myImage.load (myBitImage);
}
Any help is appreciated.
You must create the BitmapData as the size of the original loaded image, not mx:Image height and width. Simply convert you / copy only a portion of the original size that matches the size of the Image. That is to say. whether you have a picture of 400 x 400 and your Image is 100 x 100. Your BitmapData is created at 100 x 100, NOT 400 x 400, you need to do. Everything simply because you resize the Image, does not mean that the underlying BitmapData is also resized.
Also, in general, addChild would serve after removeChild, never used charge myself. Not sure if this is important.
Tags: Flex
Similar Questions
-
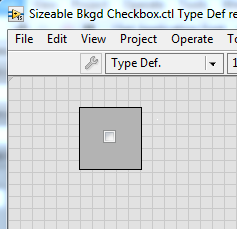
Resize the Checkbox control to the Center
I am trying to create a typedef of checkbox corresponding to a checkbox system at the center of a resizable rectangle. At the moment I have a flat box aligned on the box, but when I resize the control, the box remains in the same place. How can I get the checkbox to automatically align the centre when the control is resized? Thanks for the help!
I know that this probably isn't the right way to do it, but I created an array of clusters, in which I put in place a couple flat Boolean as left and top of the page buffer, then the checkbox. With the help of a simple VI, it calculates the correct size of the two buffers to center the checkbox in the space.
So the end result of an element of the table looks like this (with everything except the transparent box).
-
How to resize the activex control?
I want to dynamically resize an ActiveX control in LV 7.0. How can I do?
I tried to manipulate the container manually, using the HWND parent, but although the ActiveX think than its resizing it na not really. Looks like the window is to be rigged and then the image is cut off?
Anyway, if there is a solution, I would greatly appreciate knowing.
Thank you
Adrian
Don't know if this can help, but...
Try right - click at the end of the container on the FP and select Create the property node >...
If your ActiveX control is like mine which should give you the properties of the container.
Ben
-
Hi, when I copy paste or open a new image in photoshop (cs6), I'm not able to find the arrows of resizing the image I used above. What should I do? Help, please. I clicked on the selectool tool, but I simply can't resize my image more.
I think you can see the "controls turn Show" You Move tool settings...

-
Resize the Image with the wheel causing exception 1502
Description:
I load an image inside a container of border and when I Zoom out, scroll bars disappear as expected. Now, when I resize the image to exceed the limits of the boarder container I get exception below. In my view, the exception is thrown when the scroll bars are reactivated but I could be wrong. Someone has seen this before
Exception:
Error: Error #1502: A script has executed for longer than the default timeout period of 15 seconds.
at spark.components.supportClasses::ScrollBarBase/get viewport()
at spark.components::VScrollBar/updateMaximumAndPageSize()[E:\dev\4.0.0\frameworks\projects\spark\src\spark\components\VScrollBar.as:123]
at spark.components::VScrollBar/http://www.adobe.com/2006/flex/mx/internal::viewportResizeHandler()[E:\dev\4.0.0\frameworks\projects\spark\src\spark\components\VScrollBar.as:390]
at flash.events::EventDispatcher/dispatchEventFunction()
at flash.events::EventDispatcher/dispatchEvent()
at mx.core::UIComponent/dispatchEvent()[E:\dev\4.0.0\frameworks\projects\framework\src\mx\core\UIComponent.as:12266]
at mx.core::UIComponent/dispatchResizeEvent()[E:\dev\4.0.0\frameworks\projects\framework\src\mx\core\UIComponent.as:9641]
at mx.core::UIComponent/setActualSize()[E:\dev\4.0.0\frameworks\projects\framework\src\mx\core\UIComponent.as:9172]
at spark.components::Group/setActualSize()[E:\dev\4.0.0\frameworks\projects\spark\src\spark\components\Group.as:891]
at mx.core::LayoutElementUIComponentUtils$/setLayoutBoundsSize()[E:\dev\4.0.0\frameworks\projects\framework\src\mx\core\LayoutElementUIComponentUtils.as:497]
at mx.core::UIComponent/setLayoutBoundsSize()[E:\dev\4.0.0\frameworks\projects\framework\src\mx\core\UIComponent.as:13069]
at spark.components.supportClasses::ScrollerLayout/updateDisplayList()[E:\dev\4.0.0\frameworks\projects\spark\src\spark\components\supportClasses\ScrollerLayout.as:546]
at spark.components.supportClasses::GroupBase/updateDisplayList()[E:\dev\4.0.0\frameworks\projects\spark\src\spark\components\supportClasses\GroupBase.as:1224]
at spark.components::Group/updateDisplayList()[E:\dev\4.0.0\frameworks\projects\spark\src\spark\components\Group.as:899]
at spark.skins::SparkSkin/updateDisplayList()[E:\dev\4.0.0\frameworks\projects\spark\src\spark\skins\SparkSkin.as:191]
at mx.core::UIComponent/validateDisplayList()[E:\dev\4.0.0\frameworks\projects\framework\src\mx\core\UIComponent.as:8531]
at mx.managers::LayoutManager/validateDisplayList()[E:\dev\4.0.0\frameworks\projects\framework\src\mx\managers\LayoutManager.as:663]
at mx.managers::LayoutManager/doPhasedInstantiation()[E:\dev\4.0.0\frameworks\projects\framework\src\mx\managers\LayoutManager.as:736]
at mx.managers::LayoutManager/doPhasedInstantiationCallback()[E:\dev\4.0.0\frameworks\projects\framework\src\mx\managers\LayoutManager.as:1072]
at flash.utils::Timer/_timerDispatch()
at flash.utils::Timer/tick()
MXML code:
<?xml version="1.0" encoding="utf-8"?>
<s:Application xmlns:fx="http://ns.adobe.com/mxml/2009"
                  xmlns:s="library://ns.adobe.com/flex/spark"
                  xmlns:mx="library://ns.adobe.com/flex/mx"
                  xmlns:ns1="com.adobe.wheelerstreet.fig.panzoom.*"
                  pageTitle="FileNet Flex Viewer"
                  minWidth="955"
                  minHeight="600"
                  creationComplete="init()">
     <fx:Style>
          @namespace s "library://ns.adobe.com/flex/spark";
          @namespace mx "library://ns.adobe.com/flex/mx";
          /*
          s|Application {
          backgroundGradientColors: #000000, #222222;
          }
          */
          s|Button#zoomInButton {
               skinClass: ClassReference("skins.ZoomIn");
          }

          s|Button#zoomOutButton {
               skinClass: ClassReference("skins.ZoomOut");
          }

          s|Button#fitToWindowButton {
               skinClass: ClassReference("skins.FitToWindow");
          }

          s|Button#fitToWidthButton {
               skinClass: ClassReference("skins.FitToWidth");
          }

          s|Button#fitToHeightButton {
               skinClass: ClassReference("skins.FitToHeight");
          }

          s|Button#rotateRightButton {
               skinClass: ClassReference("skins.RotateRight");
          }

          s|Button#rotateLeftButton {
               skinClass: ClassReference("skins.RotateLeft");
          }

          s|ToggleButton#rubberBandZoomButton {
               skinClass: ClassReference("skins.RubberBand");
          }


     </fx:Style>

     <fx:Declarations>
          <!-- Place non-visual elements (e.g., services, value objects) here
          <s:Rotate id="rotator" angleFrom="{angle-90}" angleTo="{angle}" target="{img}"/>
          -->
          <s:Resize id="resize" target="{img}"/>
          <s:Rotate id="rotate" target="{img}"/>
          <!--<s:Resize id="contract" target="{img}"/> -->
     </fx:Declarations>


     <fx:Script>
          <![CDATA[

               import flash.net.navigateToURL;

               import mx.controls.Alert;

               [Bindable]
               private var _imageURL:String = "images/earth-map_small.jpg";

               [Bindable]
               public var angle:Number = 0;

               [Bindable]
               private var borderHeight:Number;

               [Bindable]
               private var borderWidth:Number;

               private var effectDuration:Number = 250;
               private var defaultRotation:Number = 90;

               private var profits:Array;
               private var dragStart:Point;
               private var dragEnd:Point;
               private var zoomingEnabled:Boolean;

               public var originalHeight:Number;
               public var originalWidth:Number;

               public function init():void{
                    originalHeight = img.height;
                    originalWidth = img.width;
                    borderHeight = borderContainer.height - 5;
                    borderWidth = borderContainer.width - 5;
               }


               public function fitToWindow():void{
                    resize.end();
                    resize.duration = effectDuration;

                    if(img.rotation == defaultRotation || img.rotation == -defaultRotation){
                         resize.heightTo = borderWidth;
                         resize.widthTo = borderHeight;
                    }
                    else{
                         resize.heightTo = borderHeight;
                         resize.widthTo = borderWidth;
                    }

                    resize.play();
               }

               public function fitToWidth():void{
                    resize.end();
                    resize.duration = effectDuration;

                    if(img.rotation == defaultRotation || img.rotation == -defaultRotation){
                         resize.heightTo = borderWidth;
                    }
                    else{
                         resize.widthTo = borderWidth;
                    }

                    resize.play();
               }

               public function fitToHeight():void{
                    resize.end();
                    resize.duration = effectDuration;

                    if(img.rotation == defaultRotation || img.rotation == -defaultRotation){
                         resize.widthTo = borderHeight;
                    }
                    else{
                         resize.heightTo = borderHeight;
                    }

                    resize.play();
               }

               public function zoomIn():void{
                    resize.end();
                    resize.duration = effectDuration;
                    resize.heightTo = img.height*2;
                    resize.widthTo = img.width*2;
                    resize.play();

               }

               public function zoomOut():void{
                    resize.end();
                    resize.duration = effectDuration;
                    resize.heightTo = img.height/2;
                    resize.widthTo = img.width/2;
                    resize.play();
               }

               public function rotateRight():void{
                    rotate.end();
                    rotate.duration = effectDuration-200;
                    rotate.angleFrom = angle;
                    rotate.angleTo = (angle += defaultRotation);
                    rotate.play();
               }

               public function rotateLeft():void{
                    rotate.end();
                    rotate.duration = effectDuration-200;
                    rotate.angleFrom = angle;
                    rotate.angleTo = (angle -= defaultRotation);
                    rotate.play();
               }


               private function initRectangle(e:MouseEvent):void{

               }

               private function showShowRectangle(e:MouseEvent):void{

               }

               private function clearRectangle(e:MouseEvent):void{

               }


          ]]>
     </fx:Script>

     <s:Panel
          id="mainPanel"
          left="5"
          right="5"
          top="5"
          bottom="5"
          title="FileNet Flex Viewer"
          fontWeight="bold">


          <mx:ApplicationControlBar dock="true" top="0" left="0" right="0">
               <s:Button
                    id="zoomInButton"
                    toolTip="Zoom In"
                    click="{zoomIn();}"
                    />
               <s:Button
                    id="zoomOutButton"
                    toolTip="Zoom Out"
                    click="{zoomOut();}"
                    />
               <s:Button
                    id="fitToWindowButton"
                    toolTip="Fit To Window"
                    click="{fitToWindow();}"
                    />
               <s:Button
                    id="fitToWidthButton"
                    toolTip="Fit To Width"
                    click="{fitToWidth();}"
                    />
               <s:Button
                    id="fitToHeightButton"
                    toolTip="Fit To Height"
                    click="{fitToHeight();}"
                    />
               <s:Button
                    id="rotateRightButton"
                    toolTip="Rotate Right"
                    click="{rotateRight();}"
                    />
               <s:Button
                    id="rotateLeftButton"
                    toolTip="Rotate Left"
                    click="{rotateLeft();}"
                    />
               <!--<s:ToggleButton
                    id="rubberBandZoomButton"
                    toolTip="Rubber Band Zoom"
                    click="{}"
                    />
               -->
          </mx:ApplicationControlBar>

          <s:BorderContainer
               id="borderContainer"
               right="5"
               left="5"
               top="40"
               bottom="5">

               <s:Scroller
                    width="100%"
                    height="100%">
                    <s:Group>
                         <mx:Image
                              id="img"
                              maintainAspectRatio="false"
                              maintainProjectionCenter="true"
                              source="@Embed('images/earth-map_small.jpg')"
                              verticalCenter="0"
                              horizontalCenter="0"
                              horizontalAlign="center"
                              verticalAlign="middle"/>
                    </s:Group>
               </s:Scroller>
          </s:BorderContainer>
     </s:Panel>

</s:Application>
I think that this smaller version shows the consisently (attached JPG) question:
xmlns:s = "library://ns.adobe.com/flex/spark".
xmlns:MX = "library://ns.adobe.com/flex/mx" >
public function fitToWindow (): void {}
IMG. Height = borderContainer.height;
IMG. Width = borderContainer.width;
}
]]>
horizontalCenter = red '0' = '0' / >
Looks like the interaction of Red/horizontalCenter with the add/remove scroll bars causes a loop. Can you please fill a bug report and post the link here? (Or let me know if you prefer that I have put it).
The workarounds are:
1. in the fitToWindow() method to subtract enough pixels to consider both sides of the border, for example:
public function fitToWindow (): void {}
IMG. Height = borderContainer.height - 2;
IMG. Width = borderContainer.width - 2;
}2. always keep the scroll bars displayed, for example:
3. instead of use BorderContainer use SkinnableContainer/group and draw the border outside the container, for example:
horizontalCenter = red '0' = '0' / >
Let me know if these solutions of workaround for the case also reduces work for your application.
-
Displaying the same Image in two different Image controls
We use 2 Flex to dynamically display a large image (2 MB +) that is downloaded from an external web server on a different domain. We would like to take that same image, to scale down and post it in along side the version full size of the image in a thumbnail viewer bit that we wrote. This works very well that if I put just the attributes of the source on the two controls Image to the same URL, however, this results in the Image being uploaded twice. Since the image is so large, it is not very desirable behavior.
Another option that we tried is cloning the bitmapData after one of the images has finished loading and then put back the clone for the second image.
private void image1Loaded(e:Event): void
{
var bmp1:Bitmap = Bitmap (image1.content);
Image2.source = new Bitmap (bmp1.bitmapData.clone ());
}
The problem with this method is that, since the image is downloaded from a server with a different area of our web server, a security sandbox exception is thrown. Because we have no access to this web server, using a crossdomain.xml file is not an option. We looked at the image transmission by proxy through our web server, but given the size of the image, this isn't the best solution either.
Does anyone know how to do what we try to do without generating a security exception? We don't need to change the image anyway, we just want to display it inside two different Image controls without having to download it twice.The image must not be downloaded twice. Flash Player is very picky about it because of the problems you mention. If you download an image from a specific URL and then try to do it again, the image will be have been cached.
However, if you do this:
If you have a large image to display, wait for it to load once before the second request. Complete event of the Image will tell you when its bytes have been received.
-
the protection of the KING region in the image control.
I use the return on investment on an image rectangle.
As you well know, the KING can move or change the size by clicking and moving the mouse.
But when the user clicks a position outside the KING, the current KING will reset and disappeared from the image control.
Is there an idea on how to get information about the event or property to protect the KING?
(Region KING detects the manipulation of the mouse event).
I just wanted to keep, move or translate the present KING with the handling of the mouse.
My application must have an entry a consistent ROI in real time.
labmaster.
I just put extra code to check if the current KING is valid or not to cash the size of the table of the global rectangle.
Invalid KING means no size of table or the same position of x 1 and x 2 (for y, the same thing.) of the rectangle.
I know this isn't a perfect way to keep the KING, but it is OK for me virtually.
labmaster
-
Set the image of the 2d image control
I do a few installers of pallet for ease of distribution for some libraries that I wrote. I'm following the example of screw (search finder example "palette API").
I feel a certain sense of frustration by defining the new icon from the palette; the constant of the icon is a 2d image control, but I can't find a way to put my picture in there, and I can't put it programmatically as the image 2d screw control let me just draw shapes in there.
Oh for a constant of comics, a little unusual, but just for the heck of it.
(1) unpack attachment and save to disk.
(2) If you use open LV10 photo Constant_Tree.vi or mass compile directory.
(3) drag the file image Constant.xnode your DB.
(4) drag a PNG/JPG/BMP file to the constant and take advantage of the results
(5) right-click to "Flatten" to a constant of the normal image if you want to use the VI on a machine without this XNode.
(6) If you wish, add photo Constant.xnode to your Palette, be sure to select all the files so that the .xnode files are visible when you add a VI.
Yet, you don't want your users to be mucking with the cover and not the block diagram?
-
Missing screws in the 3D 2010 image control?
Hey everybody,
I tried to follow this guide to the developer for visualization of Labviews functions:
http://zone.NI.com/DevZone/CDA/tut/p/ID/7664
I discovered that many screws shown here for 3D picture control are not available for (free) module in Labview 2010, even with the control and simulation tool. What is the case for other users?
Examples of 3D picture control screws that I can't find in Labview 2010 block diagram functions are:
'building of toroid.vi '.
'create model.vi '.
'Add a material.vi '.
'Create transform.vi '.
'Add a model.vi '.
'create camera.vi '.
«camera look at.vi»
'create positional light.vi '.
"make scene.vi".
"to scene.vi".
However, I can find the following screw:
Geometry menu
'create cone.vi '.
'create cylinder.vi '.
'create box.vi '.
'create the height field.vi '.
'create mesh.vi '.
'create sphere.vi '.
'create text.vi '.
Object Menu
'create object.vi '.
'find the object.vi '.
Transformations menu
"to rotation.vi".
"set rotation.vi".
"rotation object.vi.
"to scale.vi".
"set scale.vi".
"Object.vi scale".
"to translation.vi".
"set translation.vi".
"translate object.vi.
'clear the transformation.vi '.
Menu of aid
"color change.vi".
"configuration window.vi".
'create a clip plane.vi '.
'texture.vi '.
"new light.vi".
"sensor mapping.vi.
File loading menu
«load ASE geometry.vi»
'load the file.vi vrml ".
"load STL geometry.vi".
So my question is why can't I access the first list of the screws in 2010, are hidden with screws again features somehow? Or am I missing a library or where these functions abandoned for the 2010 version? If they have been abandoned, is it possible to build a scene and drawing from scratch in the 2010 version?
Thank you very much!
Hello
Control of the 3D image is natively available for LabVIEW 2010. The question that you are running is because you try to open a VI that uses the first NOR-Labs 3D Picture Control, which was replaced by the native 3D image control. These functions are "obsolete" and manually replace your code with new API of navigation. You can also try using the old Toolbox, but keep in mind that this is not supported:
http://zone.NI.com/DevZone/CDA/tut/p/ID/4411
Examples of the new API is located in:
C:\Program NIUninstaller Instruments\LabVIEW 2010\examples\picture\3D Picture Control
and you should be able to find most of the VI need to change your old Toolbox to the new.
I hope this helps...
-
property of the mouse to the image control
In LV 8.5 I noticed that if you reset your image to the default control (using the menu drop-down), the position property of the mouse no longer works, it will always return 0.0 no matter where the mouse is in control. You must destroy and recreate your image control to fix right here.
Perhaps this problem has been fixed in later versions of LV but I didn't know any documentation of the present.
Good afternoon Garvacious,.
When you say that the pop-up menu, I guess you want to tell the menu that is displayed if you right-click on the control.
I just tried this in LabVIEW 8.6.1. My position of mouse cursor reads 0.0 when the mouse is over the control and -1, -1 when the mouse is not over the control. It is a bug. I have filed the appropriate internal documentation (Corrective Action Request #167102), while R & D is aware of the issue.
Thanks for letting us know about this behavior. I'm sorry for any inconveniencce this bug you has done.
-
How to center an image in the tab on the front control in LabVIEW 10 (Mac Version)?
Hello
I would like to center an image on the front panel. The image is on a tab control that is suitable to the pane. I can't find a way. I work with LabVIEW 10 on Mac. Any suggestions would be very much appreciated.
Thank you
Michelle
You will need to do a bit of math. Download the locations of the edges of the tab control and image control. The centers are unlike most high or left half. I'm not sure without checking, but I think that the values are with respect to the angle of the screen. Be careful about the origin if you have several displays. If the differences are odd, you have an error of half of the pixels. From the positions of the centers, you work towards the positions of the top and left edges. It may take a few tries. The rectangle Bounds includes the label (I think), so keep that in mind also.
Lynn
-
marquee selection in the drawing image control
I would like a vi that draw a marquee selection with the mouse in a control program image.
This works so far if the user begins to drag inside the image control. The code is actually robust against
start the image and entering again. Unfortunately this isn't the case if someone starts to slip outside
peak control. then drags succeeding is arrested after the mouse moving a few pixels (about 1 to 10) and the
rect selection gets fixed.
No idea what could be wrong with the vi? Thank you!
Your problem is with the fact that you have a structure of the event inside the other. This is generally a no-no and should be mentioned in the help (there is a warnings section).
Specifically, the structure is part to begin to get events when the VI goes into run mode. This means that from then on, the internal structure will start enqueueing mouse all events on the image, so that when you start outside and go inside, structure remembers this event, but won't have to deal with until he actually runs. When she is not running (because there was a supported external mouse event), it will load the mouse previous event immediately.
The basic solution is to use a unique event structure. You can use a cluster and a registry change to keep state data and don't forget what state you're in, if you need a timeout, etc., so that you know how to respond to each event.
-
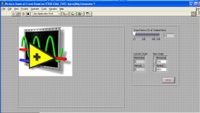
3D image control does not display the full image.
I'm having a problem with the control of 3D image not showing my entire 3D model.
At first, I thought it was 'FOG', but when I put the SceneObject Fog.Function to 'No. Fog' he has no effect.
I tried several settings, but I can't seem to find anything that affects what I'm looking for.
I included some photos to show what it is I'm looking for.
If I Zoom in control of the 3D image, I see more of the image in the background.
I don't know if this is a limitation of the 3D image control or a setting I can change.
It seems to be your plan of demarcation.
I forgot how to set it up, but there is a property somewhere node that defines a cup for youi view plan implemented. There might be a function of the camera, I'm not quite sure...
EDIT: Found, is as follows:
Note To prevent objects 3D appear deformed, avoid the scaling of items not in the plans of delimitation. Near demarcation plan, which defines the nearest plan of the Viewer, the default value is 0 units. The extreme demarcation plan, which defines the demarcation plan further from the Viewer, the default value is 10000 units. You can use the Projection
 erspective method to set the values for the plans of delimitation by program
 -
How can I determine the position of the mouse in a 2D image control
I have an app where I would like the user to be able to interact with objects in a 2D image control with the mouse. To do this, I need to translate between the screen coordinates, which are transmitted with the events of mouse and in the control of 2D image.
The problem that I am running is that I can't find a way to determine the screen coordinates of the top left corner of the drawing/client of the 2D image control area. I tried to use the 'Position' of the image control property, but this results in a mismatch because of the difference between the upper-left corner of the image control (including the label, etc.) and the upper left corner of the drawing area. See attached VI.
Does anyone know how to get the coordinate of the screen from the corner of the drawing of the control of the photo area?
Mark Moss
I tend to use the mouse in the image control property to get the position. Deals with things like the passage of origin for you.
-
How could I possibly remove the default image in the image control?
I use the image control and a bit of code to create a zoom on a picture effect. Everything works fine however I get a picture of labview when the Vi is loaded for the first time. I'm trying to get a blank area instead cause it looks like not really tidy!
I have attached a picture and my code.
Thanks for your help
The image is configured to be the default value of "Photo". In other words: you must get rid of the default value. You can do this either by:
(a) 'Image' of delete and recreate. Disadvantage: You have to re-create all the nodes property associated with this control.
(b) load an image empty and select "data operations > use current default value.
hope this helps,
Norbert


Maybe you are looking for
-
How to recover deleted messages, I really need to have access to thank you legal purposes
How to recover deleted messages, I really need to have access to thank you legal purposes
-
When I try to right click on a bookmark to open in a new tab, the menu appears, but only 'open' is "BOLD", the other choices are no longer available. Please notify.
-
LaserJet 1020: Custom page size that partially prints
I have a number of Word documents that I customized the size. All this allows to print ok before the upgrade to windows 10. (I just used to cut the paper down set the charger on the printer & print or I used before paper-cutting). I tried to do it t
-
My computer has been attacked by an application called Disk Doctor
Hello This application, Disk Doctor, wants to run a defragmentation and possibly scan and erase my HARD drive. I have F-Secure installed, and when he warned me, I blocked the software, but apparently the disc cleaner and bit Scanner Defrag of it are
-
question about the torch slider 9800
package mypackage; import java.io.IOException; import java.io.InputStream; import java.util.Hashtable; import javax.microedition.lcdui.Font; import net.rim.device.api.system.Bitmap; import net.rim.device.api.ui.Color; import net.rim.device.api.ui.Ui;