Top paintings photo alignment
Hey there...
I recently started working with InDesign, and I have a question about images placed above a table.
I'm looking for an easy way to align the pictures placed directly above the columns in a table. I don't know if there is a way to do it and I'm not super well-known, but I'm looking for shortcuts or processes.
I have a table with columns and I have images placed above each column. I can't align the images proportionally above each column. InDesign will help me to align the images with the same space between them, but this is still not the columns. Am I doing this wrong, there at - it an easier way?
Thanks for the advice, help or points in the right direction.
InDesign CC has a graphic called newish cells feature.
Place your cursor in a cell, and then choose table > convert graphic image. This adds a graphic image in the cell, to the same size. If you resize the columns or rows the frame will follow you.
You can change the image regardless of the structure to keep the image inset on all four sides.

Tags: InDesign
Similar Questions
-
By matching SQL reports in a region so that all the top edges are aligned
I have 3 parts of SQL report in column 2. I want to display so that their top edges are aligned.
Approved 40 report conditional Tests (column 2)
60 unlicensed tests conditional statement (column 2)
80 approved count by Build report (column 2) conditional
What actually happens is that the reports are all centered vertically towards the middle of the largest report (above). Here's a raw ASCII picture:
Tests approved
Category #.
Area 1 100
Area 2 100 * unapproved Tests *.
Category in box 3 100 # * approved number of construction *.
Area 4 100 area 1 50 11.0.1 700
Box 5 100 area 2 50
Field 6 100
Area 7 100
As the report the leftmost is the highest, two other reports eventually centered vertically in the middle of the report to the left.
Instead, I would like that all the top edges lined up like this:
Approved tests Trials not approved Number approved by build
# Category 11.0.1 # 700
Area 1 100 area 1 50
Area 2 100 area 2 50
Area 3 100
Field 4 100
Field 5 100
Field 6 100
Area 7 100
Nothing I have tried so far has worked. Someone has an idea how to do this? Thank you...You could try to wrap areas in the regions of html that essentially give you the ability to specify a valign = top for parts of report.
Thus, your zones to look like this:30 report start - contains source = (div) region
Approved 40 report conditional Tests (column 2)
Contains 45 report 2 - Start
60 unlicensed tests conditional statement (column 2)
Contains 65 report 3 - Start
80 approved count by Build report (column 2) conditional
85 end - report ".
Replace the rafters of)
There may be a more elegant solution with models or level of CSS page or something...
But it should work.Published by: Bob37 on Sep 17, 2010 15:33
Published by: Bob37 on Sep 17, 2010 15:33
-
I'm trying to align my photos on the left side of the preview screen. In this way, I'll be able to easily add text to the right. How to achieve this?
Thank you very much for the help!
Align your photos to left is to use the split function on a black background (or whatever color), with text superimposed on the background. Scrolling title can be adapted to write the text and then you can take a screenshot of it for a static effect, import the screen shot in your project and then superimpose your photo, above, then split screen by selecting the text overlay function (the button that looks like to the overlap of the places in the toolbar at the top of your screen).

-
BlackBerry Smartphones top loading photos on my pc - Help?
Hello
I am trying to download photos taken on my BB storm without real success.
I tried to use the storm as a mass storage device, but the only folder that it displays is the music.
I tried media synic, but once again all it shows are music files.
If you have any ideas that can help please drop me a line until I get out my hair.
Thank you
Glenn
Good deal, please solved this thread as well.
-
Paragraph on top of left-aligned paragraph Center
Hello
My question is relatively simple (I think) that I'm sure was answered here before I can't answer because I don't know how it the phrase in the search.
In Dream Weaver, in design mode (don't know anything about HTML), I need to make sure there is a highlighted title "BOLD" directly above a left-aligned paragraph (no space between the two).
What is the best way to achieve this? Everything I do it seems to group the title and paragraph together and align the same.
-KiSS
Not being able to work with HTML and CSS code is a huge obstacle to the success of your projects.
I invite you to spend a weekend of basic learning. You'll be glad you did.
- http://www.html.NET/
- http://w3schools.com/
- http://www.csstutorial.NET/
- http://phrogz.NET/CSS/HowToDevelopWithCSS.html
- http://webdesign.tutsplus.com/sessions/Web-design-theory/
Inline CSS used here by opportunism. Ideally, these styles go inside your stylesheet.
style = "margin: 0;" padding: 0; text-align: center; text-decoration: underline"> This topic is centered.
This paragraph is aligned to the left
And here's what it looks like:

Nancy O.
-
Page numbers to sit on top of photos
I created a document with page numbers included in the Master pages, when I place a picture full page in - it obscures the page number. How much better to have the page numbers of graphic files first and foremost place in my document?
Thank you
Open the layers panel and place the numbers below the slide show or slide show above the numbers.
Be aware that the layers are at the level of the site not pagewide.
-
Why does text not show up on top of the photo?
I'm trying to type a name on a picture. When I type in the text box and move it to the top of photo, text disappears.
Someone asked a text wrapping to the photo. Select the photo and disable the text wrapping in the text wrapping Panel or use the Options of text block to tell the text in your context of legend to ignore the text get dressed.
-
AppleTV is sharing all of my iPhone photos and not my album shared?
My model A1625 AppleTV running 9.2.1 and I am logged into my iCloud account and you want to simply display the photos uploaded to an album shared with iCloud photo library, which is turned on. This shared album works really because I'm interested in it through the Photos app on my iPhone and also to access the shared album on an old AppleTV running an older operating system (not even sure what version). I have turned off sharing photos iCloud and home sharing is turned off.
When I go into the Photos on the AppleTV (A1625) application it has options at the top, for Photos and Albums. There is no option for shared albums, and when I select all Photos or Album option at the top, it seems to be sharing EVERYTHING from my iPhone (all photos and videos).
1. why he shows all the pictures and videos from my iPhone here? I don't have icloud, photo sharing is turned off and I do not think I PhotoStream on.
2. why can I not access the shared album I'm looking for?
I've disabled the AppleTV and off to iCloud, photo sharing and turned it back, and it still does not work. Y at - it another option somewhere that I need?
Thank you!
It is hard to tell from your description, that you have shot and where the parameters.
You need iCloud photo sharing turned on on the Apple TV.
If the shared album is new you need to disconnect to iCloud on Apple TV and sign my insert the again.
-
Display images in the top-left-alignemnt
Whenever I opened a link to an image, there was formerly a top display left aligned page. MaintenantAutres, whenever I open a link to the image, the image appears in the Center-paged-alignment, with gray background. Somene could provide assistance, in order to define the display of the image in the top left alignment?
Just install https://addons.mozilla.org/en-US/firefox/addon/old-default-image-style/, it should return this change for you.
-
Problem by dragging photos in a book
For some odd reason, I can't drag photos in an album in a book project which is almost finished. Dragged photos several times before. What could be the problem? I tried to use the option key and bringing to the top two photos and making them drag, but they will not remain in the book project.
Help! Don't want to start from scratch...
Always work in Yosemite... now on!
Try to identify the problem:
- This applies to any photo or just special photos?
- You can drag photos to a new book created to test?
- If this isn't the case, you can drag photos to a new book project in a created Aperture library to test?
You use Aperture 3.6?
-
New videos appears in the Photos, but not in iMovie
Already when I imported video clips in iPhotos, the clips were made automatically available in iMovie so. Now, when I import video clips in Photos, it is made available in Photos but not in iMovie. Old clips still appear in iMovie, but not the new clips. It is not possible to import new clips with iMovie import function as iMovie cannot locate the file. Photo library only appears as a file in the Finder, and it cannot be opened with any program other than pictures.
How can I get the clips in iMovie?
OS X El Capitan 10.11.1 (B 15, 42)
Version 1.2 (340.4.0) of the Photos
iMovie 10.0.9
Hi a random string,.
The workflow I've always used is to create a folder for the videos and photos that I use in my video project and export (or drag) according to Photos or Aperture or iPhoto library in the folder. Then use the Finder application to import the files into iMovie.
The following resources explain why you can't see the Photos in the media browser:
If the media browser shows all your photo library
https://support.Apple.com/en-us/HT204669Sometimes the media browser, which allows applications like iMovie or Pages use images, pictures, shows all the available photos to your photo library.
This happens when you use iCloud photo library with the preference to optimize Mac storage enabled.
The media browser shows pictures that have the original image or a full preview size stored on your Mac. You can make a photo available temporarily for the media browser by double-clicking on it. This will download the original to your Mac, where it will be available in the media browser so that Photos optimizes still to save disk space.
If you want to take pictures in permanently available Photos in the media browser, follow these steps:
- Select file > New Album... from the menu bar of Photos. Name the new album.
- Click on the photos you want to make available in the media browser.
- Click the Add button.
- Click on the Albums tab at the top of Photos and find the new album you created.
- CTRL-click (or right-click) the album, then select Download this Mac originals.
This will download the full resolution of the images you have selected for your Mac, which makes them available at all times in the media browser.
Note: You can do all the photos in your photo library available at all times for the media browser allowing to download the originals of the Mac in the preferences of Photos, but you will lose the benefits of clutter in preference to optimize Mac storage.
Last modified: June 1, 2015
Take a look at this section of the iMovie User Guide:
Import on your Mac media
http://help.Apple.com/iMovie/Mac/10.0/#mov6fa10197dSometimes the media browser, which allows applications like iMovie or Pages use images, pictures, shows all the available photos to your photo library.
This happens when you use iCloud photo library with the preference to optimize Mac storage enabled.
The media browser shows pictures that have the original image or a full preview size stored on your Mac. You can make a photo available temporarily for the media browser by double-clicking on it. This will download the original to your Mac, where it will be available in the media browser so that Photos optimizes still to save disk space.
If you want to take pictures in permanently available Photos in the media browser, follow these steps:
- Select file > New Album... from the menu bar of Photos. Name the new album.
- Click on the photos you want to make available in the media browser.
- Click the Add button.
- Click on the Albums tab at the top of Photos and find the new album you created.
- CTRL-click (or right-click) the album, then select Download this Mac originals.
This will download the full resolution of the images you have selected for your Mac, which makes them available at all times in the media browser.
Note: You can do all the photos in your photo library available at all times for the media browser allowing to download the originals of the Mac in the preferences of Photos, but you will lose the benefits of clutter in preference to optimize Mac storage.
Last modified: June 1, 2015
Import media by dragging it from the Finder
Select a file, command-click to select several files, or select a folder of files and do drag the selection from the Finder to the event in the list of libraries in iMovie.
The clips appear in the event.
Import using the import window media
If the media you want to import is on an external hard drive, connect it to your Mac and turn it on.
Click Import on the toolbar.

In the devices section of the sidebar of the import window, select the drive or device you want to import media.
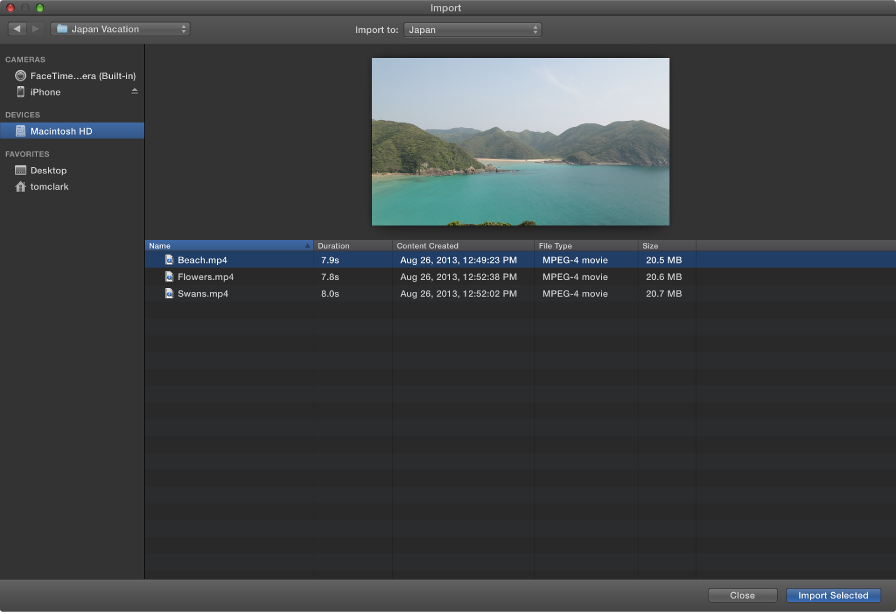
The contents of the drive or device is displayed in a list at the bottom of the import window. You can individually select the clipsin the list view, and a preview of the selected item appears at the top of the import window.
You can perform the following actions:
To sort videos in the view of list data such as time, creation date, size and so on: click on the column at the top of the display of the list headers.
To add a folder of press frequently used in the Favorites folder: drag a folder from the list on the right of the 'Favorites' header in the sidebar.
To remove a folder from the favorite section: Ctrl-click on the folder and select Remove from the context menu in the sidebar.
To quickly navigate between the clips, fast forward or rewind, move the pointer over the preview at the top of the import window, and do one of the following:

To play or pause the selected clip: click on the Play button (or press the space bar).
To access the next or previous item: click the next or previous button.
Note: If you are at or near the end of the selected item, you can click the back button to return at the beginning of the clip.
For fast forward: move the pointer over the following button and hold down the mouse or trackpad button.
To move backward: move the pointer on the back button and hold down the mouse or trackpad button.
Do one of the following:
Choose an existing event to import clips in: select the event in the context menu "import to" at the top of the import window.

To create a new event to import clips in: choose new event from the context menu "import to", type a name for the new event and click OK.
To learn more about the events, see organize the library.
Do one of the following:
To import all plans: click all import.
To import only some of the clips: command-click on each clip that you want to import, then click Import selected (the button import changes its name).
Close the import window, and your clips appear in the event. According to the length of each element and the number of clips that you import, you can see a progress indicator in the upper right of the window, while the clips are imported.

You can continue working in iMovie, then import finishes.
-
The ink dry up after 7 photo papers
I just got a DeskJet 1050 A, although now that I printed the 12 pages of top quality photo paper, it is dried up. I bought a new, 301, but he ran dry after 7 photo papers.
The printer should really use much ink to empty in the 7-12 photo papers?
Hello
Normally we can get in about 70 to 80% of the quotation of the seller for a 5% coverage. Based on this, the quotation is 165 pages, which means that we can get around 130 pages (still 5% coverage). In your case, you printed using high quality and you can cover 100% of your papers or 20 times 5% so 7-12 pages are just.
I never printed pictures at home, using laboratories normal picture is much, much, much less expensive.
I hope this helps.
-
Hello
I want centered vertically align something (for example, a label) on a page with the qml following, but it is not aligned properly on the keyboard BB (720 x 720), it aligns on the contrary always on top. It aligns not centered vertically as expected on BB 10 all touch (1280 x 768).
import bb.cascades 1.0

Page {
    titleBar: TitleBar {
        title: "Title"
    }
    Container {
        layout: DockLayout {
        }
        background: Color.create("#444444")
        verticalAlignment: VerticalAlignment.Fill
        Label {
            text: "label"
            verticalAlignment: VerticalAlignment.Center
        }
    }
}
I realize also realize that if I remove the title bar, and then it snaps as I want. Anyone have a solution this? Thank you.
Try with this:
titleBar: TitleBar { title: "Title" scrollBehavior: TitleBarScrollBehavior.Sticky } -
Gallery of photos and Android phone suddenly won't connect
I've been to download photos from my Android phone to my Dell computer for several months. Both were new items. I've never had problems connecting. Tonight when my memory phone am weak, I knew that it was once more time to put my pictures in the photo gallery. As always, I connected the phone to my laptop. I pulled the top of photo gallery, click Import, and out box that says "" If you do not see your device in this list, make sure that it is connected to the computer and turned on and click Refresh".
It isn't even a list of your choice. What is wrong with my phone? or with the photo gallery?
It's very frustrating. I rebooted both my phone and my computer. My phone has a high "USB debugging connected" icon, and I never noticed this before. I don't know who else to ask for help, I am very new to this technology, so I don't know how to fix when something previously worked perfectly now won't work without apparent reason. the question of weak I had with downloading my pictures is that there are always 2 of the same photo, and one of them is sometimes a blank image icon. But I would rather deal with that don't have not downloaded at all.
Thanks for your help.
Thank you for taking the time to help me with this Vijay. I found a solution!
My phone was actually put to 'charge only' in my USB connection settings. Took me a while to find this setting, but once I went there out of media, it worked. He was automatic before, so I didn't even know that was an option setting.
Sorry for the inconvenience. But I hope it helps someone else in the future!
Have a blessed day!
~ Danielle
-
How do I keep content at the top of the table, rather that propagate vertically from top down?
I have very little experience...
I have a simple website that I created in DWCS4 that uses simple tables and nested tables. It's a Web site to display pictures with brief descriptions along the right side. So I have a picture on the left side in one table and then the text on the right side that is contained in another table, divided into several cells. The thing I can't understand, is that all of the text in the cells of the right side are distributed evenly along the vertical axis. Instead, I want the text at the top of each cell. And Yes, in every cell, I put the text must be aligned vertically at the top.
It seems to me that maybe the cell heights are either adjusted automatically to spread evenly along the height of the largest left table cells text. If this is the case, I rather each of those cells to stay static and keep the height that I put for the cells. I put the heights in the cell properties, but this does not change.
Please, be gentle and give me the dummy version and thanks in advance to anyone who can help me.
Create a class for the alignment of things upwards, for example
. Align-top
Add the vertical-align of the css for this class attribute...
{.align-top
vertical-align: top;
}
Then add the class to all
tag you want lined up on...


Happy holidays!
Maybe you are looking for
-
Update i-movie terrible! Cannot remove rejected Clips. Create and name the project issues.
Someone has any idea how to remove rejected in the new update to i-movie clips? Very difficult now to create new projects and name them. Never wearing a name for the project. Project tab does not. Go to the projects through the tab of the window
-
Model number of Board of Directors system satellite 1800 412
What is the model number of Board of Directors of satellite 1800 412 system?
-
Satellite Pro A10-S703 Memory Upgrade
I can't find the specifications for the upgrade memory for the model SA10-S703. Should what memory I buy? Please help, because this is the kind of emergency
-
Outgoing messages of Z10 blackBerry
Hello I have the new Z10, before with my old camera 9370 or something like that... when I send an email from my office, I could see a trace of him on my phone that is no longer the case, this has been very useful for me and it lacks a lot now... can
-
Dear, Can I use two endpoints SX20 with an internal/external road VCS to make calls