Blow-up details in an image creation
Hi all.
Total newbie here Illustrator - I am technical writer who needs a graphic, but not an artist to work with.
I need to create a chart based on a screenshot of a user interface visually busy. To keep his friends on the page, the screenshot should be expanded down too small to be readable, so I want to provide expanded individual details. Like that, but showing a GUI instead of a hardware control panel:

I got halfway to my goal after reading parts of the Illustrator User Guide, watch parts of a video on Lynda.com and try the procedures that I found online. So:
- I placed the screenshot on layer 1.
- I copied the layer 1, so I have two identical layers, each containing the screenshot.
- On layer 2, I created a mask for a detail of the screenshot.
- I stepped up the hidden item.
- Then I saw that the two layers were hidden and entartres. I thought I might have an impact on only Layer 2, but the two screenshots are identically affected.
What Miss me? How to detach the second layer of the first? A single procedure mentioned an icon of the chain in the transparency Panel, but I do not see this icon.
I'm using CS5, in an environment of Win 7.
Thank you for all the suggestions and advice.
-Nancy
Nancy,
I'm afraid you have the selected original work when you put on the scale.
Moreover, there is no need of two layers, you can simply select works of original art, then Ctrl + C + F, and then create the clipping mask and move as you wish, then add the parts needed to connect.
Tags: Illustrator
Similar Questions
-
Problem with Windows XP Movie Maker. You try to view saved WMV format results in arrested image creation, but the music continues. Tried to re-record and solve the problem, no luck. Can properly view in Movie Maker as a project, but not the final version in WMV format.
More details: I saved my Windows XP Movie Maker project in WMV format. I taped 3 ways: at my computer on a flash drive and a CD - r. Everything seemed fine until I try to see the movie. The video freezes on a different image in each of the places I recorded it, but the music continues & it's in the same place every time depending on what I am posting with (the computer it freezes on a certain task, the flash on another, the cd on another), tried re-register but it always does the same thing... gel on a photo but the music continues. Help! I can't find a solution anywhere. PS Please answer me "simply", as I'm not too computer savvy.
===================================
Some experiments to try.(1) create a small project with just a few pictures and see if it will play.
(2) use .bmp photos to create the project instead of .jpg photos.
(3) remove all transitions and resave the project as .wmv and see it it helps.
(4) If your music .mp3 file... try to use .wma or .wav. John Inzer - MS - MVP - digital media experience
-
Hello im new to the Forum and I have adobe photoshop 8.0 elements. and I have some images I'd like to improve. But first how can I put the images in full resolution not to 36% the size and how would I go zooming without pixelation and improvement of details in the picture? What are the best tools to do?
any help appreciated
Thank you
Kevin
For the first, I did the following:
- Improve the menu > unsharp mask. Quantity = 100, radius = 1.2, threshold = 1
- Got the tool sharpness (R) from the Toolbox, force set at 50% on the tool options bar and "painted" selectively the METALLIC looking for emblems
- Air fingers blown, so open a white layer at the top, sampled the color of the skin from an adjacent area with the eyedropper tool, and then with the Brush tool paints bleached-looking fingers.
- Filter > noise > add noise, I added a bit of noise to the layer created to step #3
For the third:
Enhance > adjust lighting > shadows / highlights. He worked the 3 sliders, contrast halftone esp.
Use steps 1 & 2 such as defined above.


-
On the detail page dynamic image gallery
I have a page master listing 8 products. I inserted a picture gallery dynamic on the details page that looks ok, but has a major flaw: when you click on a thumbnail for the main picture opens on the wrong page. for example if you click on the page... dragons.php? id = 3 the main image opens on... /dragons.php/ID=1 and shows the following url:.../dragons.php?image=btf.jpg (or whatever the name of the image file).
I have just started using php and I would appreciate some advice on how to solve this problem.
The following are the relevant sections of the code?
$vardragon_dragons_species = "1";
if (isset($_GET['id'])) {
  $vardragon_dragons_species = $_GET['id'];
}
mysql_select_db($database_cjwebsite, $cjwebsite);
$query_dragons_species = sprintf("SELECT dragons.Order, dragons.family, dragons.Latin, dragons.English, dragons.Img1, dragons.Img2, dragons.Img3, dragons.img4, dragons.Img5, dragons.text, `dragons gallery`.filename, `dragons gallery`.caption, dragons.id, `dragons gallery`.image_id, dragons.id FROM dragons, `dragons gallery` WHERE dragons.id = `dragons gallery`.image_id AND dragons.id=%s", GetSQLValueString($vardragon_dragons_species, "int"));
$dragons_species = mysql_query($query_dragons_species, $cjwebsite) or die(mysql_error());
$row_dragons_species = mysql_fetch_assoc($dragons_species);
$totalRows_dragons_species = mysql_num_rows($dragons_species);

if (isset($_GET['image'])) {
  $mainImage = $_GET['image'];
  }
else {
  $mainImage = $row_dragons_species['filename']; }

<body>

  <div class="main_image"><img src="../images/dragons/<?php echo $mainImage; ?>" alt="<?php echo $row_dragons_species['caption']; ?>" />
  <div class="capt"><?php echo $row_dragons_species['caption']; ?></div>

<ul class="gallery">
        <?php do {

      if ($row_dragons_species['filename'] == $mainImage) {
                 $row_dragons_species['caption'];
               }?>
  <li><a href="<?php echo $_SERVER['PHP_SELF'];?>?image=<?php echo $row_dragons_species['filename']; ?>"><img src="../images/dragons/thumbs/<?php echo $row_dragons_species['filename']; ?>" alt="<?php echo $row_dragons_species['caption']; ?>"  /></a></li>
  <?php } while ($row_dragons_species = mysql_fetch_assoc($dragons_species)); ?>
  </ul>
Thank you very much
CJ
I think I see what is the problem. If I understand correctly, you get the thumbnails to the right when the page is loaded first from the master page, but not when you click on a thumbnail.
What is happening now is that $_GET ['id'] is defined when the page reloads after clicking on a thumbnail. Thus, you must add the correct ID in the miniature link like this:
- ?image=&id=">
- ?image=&id=">
-
Vista creates a system reserve partition and system image creation in Windows Vista?
Original title: on Windows Vista.
Is Vista creates (reserved system) Partition as Windows 7 & 8?
And how to create images for Windows Vista system? To restore the windows of this
Hello
Your computer manufacturer may or may not have imaged a recovery Partition on your hard drive during manufacture to reinstall the operating system back to factory settings, new condition.
Read your manual or contact them.
And read these backup information.
If you want to make a complete PC Backup or a backup file only, buy an external hard drive.
Only Vista professional, comprehensive and company have the opportunity to make complete backups of PC.
All editions of Vista can do backups of files.
Here's how to back up and restore your files:
"How to back up your data.
http://www.wintuts.com/how-to-backup-your-data
http://www.home-PC-help.com/windowsvistabackup.html
"How to restore your files.
http://www.wintuts.com/how-to-restore-files
This is how to do a full backup of the computer and how to restore it (for Vista Business, Ultimate and Enterprise only):
«How to make a backup of the computer in Vista»
http://www.bleepingcomputer.com/tutorials/how-to-use-Vista-complete-PC-Backup/
"How to restore a full backup of the computer.
http://www.bleepingcomputer.com/tutorials/Windows-Vista-complete-PC-Restore/
FAQ from Microsoft about backup and restore:
"Back up and restore: frequently asked questions.
http://Windows.Microsoft.com/en-us/Windows-Vista/back-up-and-restore-frequently-asked-questions
@@@@@@@@@@@@@@@@@@@@@@@@@@@@@@@@@@@@@@@@@@@@@
There are a number of 3rd party programs available for a full backup of the computer; others, you must pay for, some are free.
This program must be purchased:
"Acronis True Image".
http://www.Acronis.com/homecomputing/products/TrueImage/index_gwo.html?utm_expid=4274314-6
These are free programs for the protection of the computer:
"EaseUS Todo Backup free"
http://www.TODO-backup.com/products/home/free-backup-software.htm
"Download Backup & Recovery 2012 free FREE!
http://www.Paragon-Software.com/home/BR-free/download.html
«Macrium Reflect FREE Edition»
http://www.Macrium.com/reflectfree.aspx
See you soon.
-
Details of the image when it is used on a Web site
May the name of the original file, the description and the title be changed to an image purchased through Adobe stock - and intended to be used on a Web site?
Yes, you can edit and rename the file if necessary.
-
Download images, creation of databases.
So, I put together a web page that lists the products and allows a user to buy. I think that since I do the database from scratch, it might be a good idea to actually make a functional page for downloading data: (each product will have a photo, dimensions, price, identification number, description and inventory number). I also need to understand how to keep the photos on the right with the right boxes.
Is it a good idea to try to make a functional page for all my input data, or is it better to enter just on mySQL normally?
Can I upload a photo to a mySQL database? If this isn't the case, I put a tag < img src > in mySQL?
Hello
What you're talking about is a CMS. Building a (s) functional page to do this is the recommended method, and even if there are many 3rd party and open versions source around my personal opinion is: When can I build myself.
Can I upload a photo to a mySQL database? If not, can I put a
tag in mySQL?
You can upload your images on the database using the sql BLOB, but my personal preference is to just insert the path of the image file in the database.
PZ
-
Lost details and black when you export the final image
Hi guys,.
Recently when I finish editing a picture in LR5, I noticed that the detail of the image have been tarnished down and blurry when it was open in the develop module.
Ive double checked everything from the color space, image format, quality level, even tried to download one of the images exported on my site in the hope that it was something wrong with the preview, but it looks the same.
Only other thing I noticed when I discover the image in 'library' mode, it loses detail as well as the exported version. Only when its in "develop" mode is when it shows the real detail and treated quickly blacks I upgraded. And it didn't used to do this. So Im hoping that I've accidentally changed a button and it didn't...
If anyone has information or can point me in the right direction of something that can help solve the problems or solve this problem, I would really appreciate any info!
-Max
Maxtson wrote:
The only other thing I noticed is when I discovered the image in 'library', he loses the details as well as the exported version. Only when its in "develop" mode is when it shows the real detail and treated quickly blacks I upgraded.
The library and export modules use a more accurate algorithm that the module development of resizing. Normally the previews of module development and library will look nearly identical to the less than 1:1 Zoom mode (i.e. Fit view). When they are not it is generally an indication that excessive sharpening and/or insufficient Luminance Noise Reduction is applied to the image. This causes the image to appear "lighter" and "weaker" in the library module and files for export because of excessive noise. The overview of the develop module uses a faster (less accurate) resizing algorithm in order to avoid the 'delay' when the adjustment slider. This can cause the image to appear sharper and less noisy that the library module overview to the Zoom display settings lower than 1:1 Zoom.
As Jao vdL mentioned, 'ONLY to touch the sliders detail with zoom 1:1 to develop. ' The library module previews need to be "rebuilt" after setting in the development of a set of images module. You can do this by clicking on the image in the library module (Zoom 1:1 mode) or by selecting ALL images edited using menu library > previews > Build Standard or 1:1 previews.
Maxtson wrote:
And he's not used to do this. So Im hoping that I've accidentally changed a button and it didn't...
This set of pictures were probably shot with an higher in the camera ISO setting (> 800 ISO). High ISO images usually require a 25 Luminance Noise reduction setting, or even higher if the image file is underexposed.
What is ISO for these image files display.

-
Can you do two images of different computer on a single hard disk drive if you have the room?
Hi Milo,The technical answer is Yes. But... you need to have a custom boot or USB (using Windows PE) disk to boot from and scripts of the installation of the desired image.
Vista... and 7 for this issue using Windows Imaging, creation of WIM files to store the largest part of which is necessary. You can use the Windows Automated Installation Kit to make what you need.Here are a few good resources:Download WAIK:There is a different if you have SP1 + integrated version. Link at the bottom of pageTechNet articles on deploying VistaGood third tutorialThere is a small learning curve, but if you have a business need, it can save you a lot of time in the long run.I hope this helps.Mark <> Microsoft Partner
-
I record in JPEG, large file size, but the file saves about 3 MB? Then, when my clients want to put my images on a canvas, etc. image false. But when I use to shoot just JPEG saving used to increase the size of the file and the photos were very good to put on a canvas, etc.
Please help and thanks in advance.
Mark
I'm not a user of the Canon system, so I'm not familiar with their cameras. But I googled your resolution and found a link.
http://www.learn.USA.Canon.com/resources/articles/2011/eos_qt_small_raw_images_article.htm lp
Apparently, you pull something Canon mRAW calls, which is a 10.5MP raw file designed for 4 K devices. In other words, you set your camera to produce small size raw files, less than half of a JPEG full size. Then you use Camera Raw to artificially enlarge these files in order to compensate by using a workflow setting widens. I hope that I don't need to explain the futility in this!
You need to go back to your camera settings, consult the manual and find out how to produce full raw files standard size. This way you do not throw in detail and then the creation of extensions pixelated.
In short, your camera settings are wrong to produce raw files full size. You are then enlarge the images of 2.4 times and that is why they have air c * p.
You must change the setting of the camera RAW, and therefore you should not expand in Camera Raw.
-
Loading GIF animations only first image
GIF animations appear as still images. Animation load only after a right click and will image info.
You have the image.animation_mode set to none as you can see in the list of system details.
- image.animation_mode: no
You need on the other (normal or once)
-
TC520: HPDM 4.7.3610.23043 - cannot deploy images... error message 1080320
Hello world
We have not deployed any image TC520 for a few months. I tried for a few days now, and we get an error.
Nothing has changed (as far as I can see) in the past months.
Deposits are still there and can connect on the TEST page.
The images are still there... and have not been changed.
TC520 are the same machines TC520
The HPDM and the client, the version numbers match...
I can reboot/update etc customers... just imaging that is a failure
So, fundamentally, nothing has changed.
But when I deploy an image, I get
Refusal to execute the task DeployImage.
2016-08-15 16:20:44 [error details]: deploy the image by using the master repository repository.
Failed to deploy T520_Vanilla_2k7.ibr/Repository/Images/T520_Vanilla.
Cannot run the task DeployImage.
Error code: 1080320, error Info:...... \Task\wins\ImageTask_XPE.cpp@392: cannot run the script to repack wes.
.. \.. \Task\wins\ImageTask_XPE.cpp@2416: error running script to repack
.. \.. \Task\wins\ImageTask_XPE.cpp@2414: run = - 200 process return code. Command = C:\repack\Wes7ImageTool\bin\ImageTool.exe f C:\repack\Wes7ImageTool\Config.iniAny ideas?
TIA
Craig
I suggest that you use 4.7 SP2 or later version. From SP2, we use the PE of the DM repository instead of the local device.
This should be able to resolve the problem that you are experiencing.
-
How to find the image of an image file type
This has been posted on the LabView forum by mistake yesterday, please excuse the double post.
I am trying to open a JPEG image. If I don't know the type of image (8U, 16I, GrayscaleSingle,... etc)... is it possible to find this information?
If you open the file using IMAQ ReadFile... you will need to provide an Image create to allocate space... the entry specifies a type to read... but if the type of the stored data is not the type specified in the read file that is read the file as type specified, or the file does not all input values... (and no error is produced).
Examples:
Store a JPEG image single Percision floating point.
Use a Creat file to specify that the file is read with the following types... with the following results
Specified type Type reading resulting image
U8 U8 8 bit image appears
16I 16I
Hummer1,
There are two methods to achieve this:
(1) IMAQ GetFileInfo, who has quite a few outings involving details of the image.
(2) read the JPEG file, which you can ungroup the image data to obtain the depth of the image, or other attributes of output.
I would recommend the IMAQ function, because it is more detailed.
Hope this helps
-
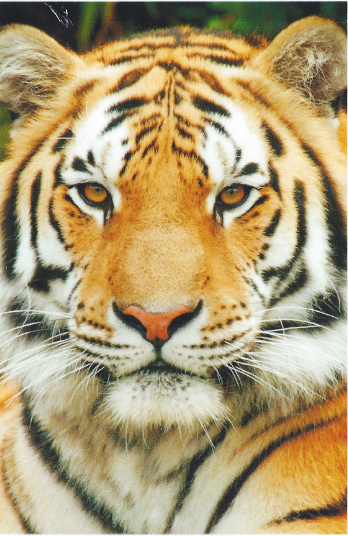
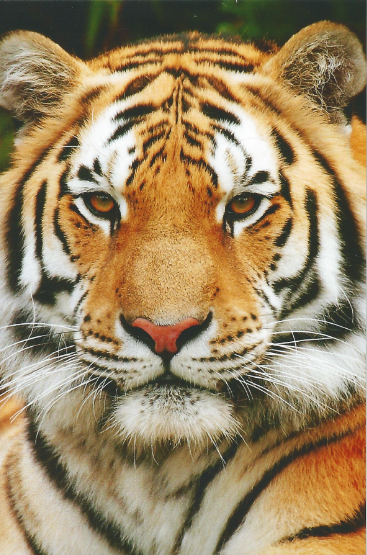
Sometimes, you will notice that when you print an image it does not appear as expected, the colors are just a little off - step as vibrant as you want it to. There is a reason for that, and that's because when you transfer an image on your computer the colors for the image change slightly.
In the real world and in printing, the colors come from three primary colors - Cyan (light blue), Magenta (Pink) and yellow. Then there is black which gives depth and a sound signal (CMYK). However, on your computer screen, you're dealing with a different method. Most of the screens are made up of small LEDs that flash at very high speed to give you the colors you see. These diodes are blue, red and green (RGB).
Now, these two color combinations are very similar, this is why there is not a radical change, and for some, this change might not be noticeable. Here is an example of printing from the computer-
While this image is superb, the tones in some areas are a little more muted due to how the file was subtly shifted from CMYK to RGB. Now, you can find the details of this image by carefully creating presets for photo through various programs that essentially make up for this change, but there are other easier methods, I found.
The first of them is to use ePrint. If you have a printer with web functionality, send the photo via email diretly to the printer cancels the transition and renders the image as it was originally. Not all printers have this feature, but it is becoming more common on many newer models often.
The other method is one that you can use your printer directly if you have a card reader / USB port. Imbernon or load the image on one of these devices you can print again directly avoiding the color conversion. This will give your images a more pristine quality. Take a look at the same image printed directly from a USB key.
Just a little more dynamic and has just a touch more in detail. To get the best quality and results, sometimes it requires outside the box thinking. Generally this method will provide you with great results without any necessary error.
However, it is important to note that if you want to convert or use a format other than .jpg, it won't work, and you try to change the settings on the program that you use to compensate for the shift in color.
I hope this information is useful to you guys, if you have any questions contact me for more help!
Here's a cute baby tiger too!
-
Image recording is not real but device works perfectly on emulator
Hi guys, I use the JDE 4.6.1. I would like to keep an image uploaded to the file system and retrieve it later. Something like a caching option. Everything works perfectly on the Simulator, but when I install it on the device, it does not work. Here's the code,
private StringBuffer Imagedirectory = new StringBuffer(System.getProperty("fileconn.dir.photos"));

FileConnection fc = (FileConnection)Connector.open(Imagedirectory.toString(),Connector.READ_WRITE);

                if(!fc.exists()){
                    Util.getWebData(url, this);
                }else{

                    byte[] data = getData(fc);

                    bitmap = EncodedImage.createEncodedImage(data, 0,
                            data.length);

                    if(this.width !=0 && this.height !=0){
                        bitmap = ScaleImageToSize(bitmap, this.width,this.height);
                    }
                    setImage(bitmap);
 }
This is where I get the data of the file
private byte[] getData(FileConnection file)
    {
        byte[] data = new byte[0];
        try
        {
             InputStream input = file.openInputStream();
                          //////////
             int SIZE = 100000;
             ByteArrayOutputStream byteArrayOutputStream = new
                                ByteArrayOutputStream();
             byte[] buffer = new byte[SIZE];
             while (true)
             {
               int bytesRead = input.read( buffer, 0, SIZE );
               if (bytesRead == -1) break;
               byteArrayOutputStream.write( buffer, 0, bytesRead );
             }
             data = byteArrayOutputStream.toByteArray();
             byteArrayOutputStream.flush();
             byteArrayOutputStream.close();

        }
        catch(Exception e)
        {
            System.out.println(e.toString());
        }
        return data;

    }
This is where I write the image to a file,
private void writeFile(byte[] data, String fileName)
    {
        FileConnection fconn = null;
        try {
            fconn = (FileConnection) Connector.open(fileName,
                    Connector.READ_WRITE);
        } catch (IOException e) {
            System.out.print("Error opening file");
        }

        if (fconn.exists())
            try {
                fconn.delete();
            } catch (IOException e) {
                System.out.print("Error deleting file");
            }
            try {
                fconn.create();
            } catch (IOException e) {
                System.out.print("Error creating file");
            }
            OutputStream out = null;

            try {
                out = fconn.openOutputStream();
            } catch (IOException e) {
                System.out.print("Error opening output stream");
            }

            try {
                out.write(data);
                out.flush();
            } catch (IOException e) {
                System.out.print("Error writing to output stream");
            }

            try {
                fconn.close();
            } catch (IOException e) {
                System.out.print("Error closing file");
            }
    }
Help, please.
Thanks much for the reply.
I found the problem, the byte array which I was the analysis was not proper, so I created the image first and after that used the information bytes of that to save the image. Here is the solution.
 public void callback(final String data)
    {
        if (data.startsWith("Exception")) return;

        try
        {

            byte[] dataArray = data.getBytes();
            bitmap = EncodedImage.createEncodedImage(dataArray, 0,
                    dataArray.length);

            if(this.width !=0 && this.height !=0){
                bitmap = ScaleImageToSize(bitmap, this.width,this.height);
            }
            setImage(bitmap);

            if(isWriteImage()){

                System.out.println("Before writing the image");
                writeFile(bitmap.getData(), Imagedirectory.toString());
                System.out.println(Imagedirectory);
                System.out.println("Image written - Operation Successful");
            }

        }
        catch (final Exception e){
            System.out.println("Image Creation Failed");
        }
    }
The problem was because I was the array of bytes of the string of variable data analysis. No idea why this caused a problem?


![<?php echo $row_dragons_species['caption']; ?>](../images/dragons/thumbs/<?php echo $row_dragons_species['filename']; ?>)

Maybe you are looking for
-
iTunes 12.5.1 Massive view artist?
Since the update that the size of the Album cover and the massive obtained text in view of the artist, is there a way to reduce this back to its small original size?
-
Why Divx won't play video with sound on Firefox, but will play with sound on Chrome?
DivX will play movies based on the web in both sound and audio on Chrome. DivX will play only video on Firefox. I've deleted and reinstalled Divx on my computer. I have a desktop running Vista. I just became aware of this problem yesterday. In the pa
-
Portege M300 installation order
Does anyone have the installation order of drivers for Portege M300?I am trying to install a new HD on my own and can't find my recovery CDI have a copy of my windows XP PRO cd and downloaded all the drivers on the Toshiba site, but need to know the
-
I'm unable to install whatsapp on the slate of HP 7 hd
Dear I bought a HP slate 7 and I want to install whatsapp on it but will not install Please suggest me what to do to install whats app on HP slate ony 7 Feroz khan.
-
ORIGINAL TITLE: Herald says not avilbale 0x80ee000c
ORIGINAL TITLE: ORIGINAL TITLE: Herald says not avilbale 0x80ee000c