How to change the width of the line after the line is drawn?
In Flash CS4, I'm changing the line of my line width or shape, he chose, but the stroke width slider is grayed out (so unadjustable). Is it possible to change a width of line after something has been created? If so, how is that possible? I tried selecting the line in all sorts of crazy ways, but still can not change it.
I have CS4, but in CS3, as long as you select the object you draw raw, you can use either the slider or enter a new value in the box. When you select the shape and line, it is not all cross-hatched/speckled or is it a blue line that surrounds all of this? If it's the blue line, then you have not down to the crude graphics yet. You can also check that the layer is unlocked.
Tags: Adobe Animate
Similar Questions
-
How to change the length of line objects
Hi all
How to change the length of the line objects.
I know how to change the width or height of the elements.
Utils < Facade::IGeometryFacade > ()--> (ResizeItems)
itemList,
Transform::PasteboardCoordinates (),
Geometry::OuterStrokeBounds (),
refPoint, Geometry::ResizeTo (newWidth, newHeight)
);I know the new length and PMrect of the line item before moving.
What I want to know is how to get the new width and height of this.
Thank you.
Fujimori - Satoru
Find your old address of trigonometry and read the part about the Pythagorean theorem. This will give the scale factor you need to get the old PMRect to the new
-
How to change the runtime of height and width of the front panel
How to change the front height and width during execution. Basically, I want to decide height or width according to some parameters that I'm in the moment of execution.
Ed johnsold was first

-
How to change the languages of programming or command line
How to change the languages of programming or command line?
Everything you need to go through the control panal do. Click on tab "language". Its pretty self explainable there.
-
How to change the background color of a single line
Hi, OTN,.
I use JDeveloper with ADF faces 11.1.1.2 in the view layer. My question is how to change the background color of a single line in af:table?.Hi idir Mitra
You can use EL to bind column for example inlineStyle (#{row.id == null?' background-color: rgb (255,214,165);':'background-color:red'})})Cordially Abhilash.S
-
How to change the font, color line, column and Grand Total labels in PivotTable
Hello Guru
Can you get it some one please let me know how to change the look and feel of the reports in Pivot table using css files. I want to have the dimension and the measure to be of different color columns and grand total different color. I want to achieve for all pivot table reports instead of manually change each report so I want to do in css files.under s_SRIKI\b_mozilla_4\views.css I've seen a lot of options but nothing has worked. So can you please exactly tell what class we need to change to make changes. Thank you!!!
Thank you
SR
For values
. OORT {}
text-align: right;
vertical-align: top;
color: Red;
}
For the product if you got hyper link
Code OOB is
. PTL {}
color: #039;
text-decoration: none;
cursor: pointer;
}
If brand aid
-
How to change the Spry CSS tab
I like to use these old screens provided with the former DW Spry tab. I just looked in DW CC and it looks like they aren't there and more. But anyway, I made one for my client. Now, they want to get one of the tabs on the far right of the margin. See the image below:

I don't know yet if it's possible to do and if someone has done this before, can you tell me what code I need to change in the CSS? I would have joined the CSS file, but it seems that you cannot attach files in this forum, so I've copied below.
Please offer any means to change the color of the tabs, etc. - I just need to know how - or at all - this tab can be moved to the right.
Thanks, Guy deaf
PS I'm sorry that the CSS code does not correctly appear in this forum. When I type this message, looks like it will display line-by-line, but it's not. I'm sorry.
---------------------------------------------
@charset "UTF-8"; /* SpryTabbedPanels.css - version 0.6 - Spry Pre-Release 1.6.1 */ /* Copyright (c) 2006. Adobe Systems Incorporated. All rights reserved. */ /* Horizontal Tabbed Panels * * The default style for a TabbedPanels widget places all tab buttons * (left aligned) above the content panel. */ /* This is the selector for the main TabbedPanels container. For our * default style, this container does not contribute anything visually, * but it is floated left to make sure that any floating or clearing done * with any of its child elements are contained completely within the * TabbedPanels container, to minimize any impact or undesireable * interaction with other floated elements on the page that may be used * for layout. * * If you want to constrain the width of the TabbedPanels widget, set a * width on the TabbedPanels container. By default, the TabbedPanels widget * expands horizontally to fill up available space. * * The name of the class ("TabbedPanels") used in this selector is not * necessary to make the widget function. You can use any class name you * want to style the TabbedPanels container. */ .TabbedPanels { overflow: hidden; margin: 0px; padding: 0px; clear: none; width: 100%; /* IE Hack to force proper layout when preceded by a paragraph. (hasLayout Bug)*/ } /* This is the selector for the TabGroup. The TabGroup container houses * all of the tab buttons for each tabbed panel in the widget. This container * does not contribute anything visually to the look of the widget for our * default style. * * The name of the class ("TabbedPanelsTabGroup") used in this selector is not * necessary to make the widget function. You can use any class name you * want to style the TabGroup container. */ .TabbedPanelsTabGroup { margin: 0px; padding: 0px; } /* This is the selector for the TabbedPanelsTab. This container houses * the title for the panel. This is also the tab "button" that the user clicks * on to activate the corresponding content panel so that it appears on top * of the other tabbed panels contained in the widget. * * For our default style, each tab is positioned relatively 1 pixel down from * where it wold normally render. This allows each tab to overlap the content * panel that renders below it. Each tab is rendered with a 1 pixel bottom * border that has a color that matches the top border of the current content * panel. This gives the appearance that the tab is being drawn behind the * content panel. * * The name of the class ("TabbedPanelsTab") used in this selector is not * necessary to make the widget function. You can use any class name you want * to style this tab container. */ .TabbedPanelsTab { position: relative; top: 1px; float: left; padding: 5px 20px; margin: 0px 1px 0px 0px; font: bold 12px sans-serif; background-color: #f1c185; list-style: none; border-left: solid 1px #CCC; border-bottom: solid 1px #999; border-top: solid 1px #999; border-right: solid 1px #999; border-radius: 5px 5px 0px 0px; -moz-user-select: none; -khtml-user-select: none; cursor: pointer; } /* This selector is an example of how to change the appearnce of a tab button * container as the mouse enters it. The class "TabbedPanelsTabHover" is * programatically added and removed from the tab element as the mouse enters * and exits the container. */ .TabbedPanelsTabHover { background-color: #ffd197; } /* This selector is an example of how to change the appearance of a tab button * container after the user has clicked on it to activate a content panel. * The class "TabbedPanelsTabSelected" is programatically added and removed * from the tab element as the user clicks on the tab button containers in * the widget. * * As mentioned above, for our default style, tab buttons are positioned * 1 pixel down from where it would normally render. When the tab button is * selected, we change its bottom border to match the background color of the * content panel so that it looks like the tab is part of the content panel. */ .TabbedPanelsTabSelected { background-color: #ffe9cd; border-bottom: 1px solid #EEE; } /* This selector is an example of how to make a link inside of a tab button * look like normal text. Users may want to use links inside of a tab button * so that when it gets focus, the text *inside* the tab button gets a focus * ring around it, instead of the focus ring around the entire tab. */ .TabbedPanelsTab a { color: black; text-decoration: none; } /* This is the selector for the ContentGroup. The ContentGroup container houses * all of the content panels for each tabbed panel in the widget. For our * default style, this container provides the background color and borders that * surround the content. * * The name of the class ("TabbedPanelsContentGroup") used in this selector is * not necessary to make the widget function. You can use any class name you * want to style the ContentGroup container. */ .TabbedPanelsContentGroup { clear: both; border-top: solid 1px #999; background-color: #FFF; } /* This is the selector for the Content panel. The Content panel holds the * content for a single tabbed panel. For our default style, this container * provides some padding, so that the content is not pushed up against the * widget borders. * * The name of the class ("TabbedPanelsContent") used in this selector is * not necessary to make the widget function. You can use any class name you * want to style the Content container. */ .TabbedPanelsContent { overflow: hidden; padding: 4px; } /* This selector is an example of how to change the appearnce of the currently * active container panel. The class "TabbedPanelsContentVisible" is * programatically added and removed from the content element as the panel * is activated/deactivated. */ .TabbedPanelsContentVisible { } /* Vertical Tabbed Panels * * The following rules override some of the default rules above so that the * TabbedPanels widget renders with its tab buttons along the left side of * the currently active content panel. * * With the rules defined below, the only change that will have to be made * to switch a horizontal tabbed panels widget to a vertical tabbed panels * widget, is to use the "VTabbedPanels" class on the top-level widget * container element, instead of "TabbedPanels". */ .VTabbedPanels { overflow: hidden; zoom: 1; } /* This selector floats the TabGroup so that the tab buttons it contains * render to the left of the active content panel. A border is drawn around * the group container to make it look like a list container. */ .VTabbedPanels .TabbedPanelsTabGroup { float: left; width: 10em; height: 20em; background-color: #EEE; position: relative; border-top: solid 1px #999; border-right: solid 1px #999; border-left: solid 1px #CCC; border-bottom: solid 1px #CCC; } /* This selector disables the float property that is placed on each tab button * by the default TabbedPanelsTab selector rule above. It also draws a bottom * border for the tab. The tab button will get its left and right border from * the TabGroup, and its top border from the TabGroup or tab button above it. */ .VTabbedPanels .TabbedPanelsTab { float: none; margin: 0px; border-top: none; border-left: none; border-right: none; } /* This selector disables the float property that is placed on each tab button * by the default TabbedPanelsTab selector rule above. It also draws a bottom * border for the tab. The tab button will get its left and right border from * the TabGroup, and its top border from the TabGroup or tab button above it. */ .VTabbedPanels .TabbedPanelsTabSelected { background-color: #EEE; border-bottom: solid 1px #999; } /* This selector floats the content panels for the widget so that they * render to the right of the tabbed buttons. */ .VTabbedPanels .TabbedPanelsContentGroup { clear: none; float: left; padding: 0px; width: 30em; height: 20em; } /* Styles for Printing */ @media print { .TabbedPanels { overflow: visible !important; } .TabbedPanelsContentGroup { display: block !important; overflow: visible !important; height: auto !important; } .TabbedPanelsContent { overflow: visible !important; display: block !important; clear:both !important; } .TabbedPanelsTab { overflow: visible !important; display: block !important; clear:both !important; } }!-[CodeBlockStart:dffe5525-a787-4a98-a87f-f24554b12141]-->@charset 'UTF-8'; / * SpryTabbedPanels.css - 0.6 - pre-release Spry 1.6.1 version * / / * Copyright (c) 2006] Adobe Systems Incorporated. All rights reserved. * / / * Horizontal tabbed panels * the default style for a TabbedPanels widget puts all the tab buttons * (stalled left) above the content panel. * / / * This is the selector for the main container of TabbedPanels. For our * style by default, this container does not contribute anything visually, * but it is floated to the left to ensure that all floating or compensation done * with any which of her children the elements lie entirely within the limits the * TabbedPanels container, in order to minimize any impact or unwanted * interaction with other floating elements on the page which may be used * for page layout. * If you want to limit the width of the widget TabbedPanels, define a * width of the container TabbedPanels. By default, the widget TabbedPanels * extends horizontally to fill the available space. * The name of the class ("TabbedPanels") used in this selector is not * necessary to make the widget service. You can use a class name, you * want to style the TabbedPanels container. */ . TabbedPanels {overflow: hidden;} margin: 0px; padding: 0px; Clear: none; Width: 100%; / * Hack IE to force the layout correct when preceded by a paragraph. (hasLayout bug) * /} / * this is the selector for the TabGroup. The container of TabGroup houses * all buttons on the tab for each tabs in the widget panel. This container * does not contribute to what both visually in the appearance of the widget for our * default style. * The name of the class ("TabbedPanelsTabGroup") used in this selector is not * necessary to make the widget service. You can use a class name, you * want to style the TabGroup container. */ . TabbedPanelsTabGroup {margin: 0px;} padding: 0px; } / * This is the selector for the TabbedPanelsTab. This container houses * the title of the Panel. It is also tab 'button' that the user clicks on * to activate the corresponding content panel so that it appears on top * of the other tabs in the widget panels. * For our style by default, each tab is positioned relatively 1 pixel down from * where it would normally. This allows each tab overlap content * panel that renders underneath. Each tab is rendered with a background of 1 pixel * border which has a color that corresponds to the upper edge of the current content * panel. This gives the appearance that the tab is drawn behind the * content panel. * The name of the class ("TabbedPanelsTab") used in this selector is not * necessary to make the widget service. You can use any class name you want * to style the tab container. */ . TabbedPanelsTab {position: relative;} Top: 1px; float: left; padding: 5px 20px; margin: 0px 1px 0px 0px; Police: bold 12px without serif. background-color: #f1c185; list-style: none; border-left: 1px solid #CCC; border-bottom: 1px solid #999; border-top: 1px solid #999; border-right: 1px solid #999; border-radius: 5px 0px 5px 0px; -moz-user-select: none; -khtml-user-select: none; cursor: pointer; } / * This selector is an example how to change the appearance of a button in the tab * container as the mouse enters in the it. The class is "TabbedPanelsTabHover" * programatically add and remove the element tab as the mouse between in * in and out of the container. */ . TabbedPanelsTabHover {background-color: #ffd197 ;} / * this selector is an example how to do to change the appearance of a button in the tab * container after the user has clicked on it to activate a content panel.} * The 'TabbedPanelsTabSelected' class is programmatically added and removed * the tab element as long as the user clicks button tab containers in * the widget. * As mentioned above, for our style by default, the tab buttons are positioned * 1 pixel down where he would normally. What is the tab key * selected, we change its bottom border to match the background color of the * content panel so that it looks like the tab is the content panel. */ . TabbedPanelsTabSelected {background-color: #ffe9cd;} border-bottom: 1px solid #EEE; } / * This selector is an example of how to make a link inside a tab button * look like normal text. Users may want to use the links within a tab button * so that when it gets the focus, the text * inside * the tab button gets a focus * ring around it, instead of the ring around the whole tab. * /. TabbedPanelsTab a {color: black;} text-decoration: none; } / * This is the selector for the ContentGroup. The ContentGroup container houses * all panels of content for each tabs in the widget panel. For our * style by default, this container provides the background color and borders that * surround content. * The name of the class ("TabbedPanelsContentGroup") used in this selector is * not necessary to make the widget function. You can use a class name, you * want to style the ContentGroup container. */ . TabbedPanelsContentGroup {clear: both;} border-top: 1px solid #999; background-color: #FFF; } / * This is the selector for the content panel. The content panel contains the * content for a single panel tabs. For our default style, this container * provides some padding, so that content is not pushed upward against the * widget borders. * The name of the class ("TabbedPanelsContent") used in this selector is * not necessary to make the widget function. You can use a class name, you * want to style the content container. */ . TabbedPanelsContent {overflow: hidden;} padding: 4px; } / * This selector is an example of how to change the appearance of the currently * active panel container. The class is "TabbedPanelsContentVisible" * programatically added and removed from the content as the Panel item * is enabled/disabled. */ . TabbedPanelsContentVisible {} / * vertical tabbed panels * following rules override some of the default rules above so that the * TabbedPanels widget is rendered with its buttons on the tab on the left of * the active content panel. * With the rules defined below, the only change that will be made * to move a widget panels to horizontal tabs to vertical tabbed panels * widget, is to use the 'VTabbedPanels' class on the top-level widget * element container, instead of "TabbedPanels. */ . VTabbedPanels {overflow: hidden;} Zoom: 1; } / * This selector floats the TabGroup so that the tab buttons it contains * make left of active content panel. A border is drawn around * the group container to make it look like a container from the list. */ . VTabbedPanels. TabbedPanelsTabGroup {float: left;} Width: 10em; height: 20em; background-color: #EEE; position: relative; border-top: 1px solid #999; border-right: 1px solid #999; border-left: 1px solid #CCC; border-bottom: 1px solid #CCC; } / * This selector disables the float property that is placed on each button of the tab * by the rule above TabbedPanelsTab default selector. He also draws a background * border for the tab. The tab button will get his left and right border of * the TabGroup and its superior border of the tab above it or button TabGroup. */ . VTabbedPanels. TabbedPanelsTab {float: none;} margin: 0px; border-top: none; border-left: none; border-right: none; } / * This selector disables the float property that is placed on each button of the tab * by the rule above TabbedPanelsTab default selector. He also draws a background * border for the tab. The tab button will get his left and right border of * the TabGroup and its superior border of the tab above it or button TabGroup. */ . VTabbedPanels. TabbedPanelsTabSelected {background-color: #EEE;} border-bottom: 1px solid #999; } / * This selector fleet contained signs of the widget while they * make it to the right of the tabs buttons. */ . VTabbedPanels. TabbedPanelsContentGroup {clear: none;} float: left; padding: 0px; Width: 30em; height: 20em; } / * Printing styles * / @media print {.} TabbedPanels {overflow: visible! important;}. TabbedPanelsContentGroup {display: block! important;} overflow: visible! important; height: auto! important; } . TabbedPanelsContent {overflow: visible! important;} display: block! important; clear: both! important; } . TabbedPanelsTab {overflow: visible! important;} display: block! important; clear: both! important; } }
Add the class like below:
- Open Ocean
-
How to change the color of pre-rendered screen.
My question is how to change the color of the page that is displayed before a site is fully charged. So let's say I go to a site where the background color is red. Before the end of Firefox loading it will appear as white. Also yes I have known that I have an add-on which changes the default color of YouTube. However the first picture comes on all websites no matter if their background is white or not.
You can try the userChrome.css code or elegant.
Add code to the file userChrome.css below default @namespace.
@namespace url("http://www.mozilla.org/keymaster/gatekeeper/there.is.only.xul"); /* only needed once */

browser {background-color:#f0f0f0!important}
The file userChrome.css (UI) customization and userContent.css (Web sites) are located in the folder of chrome in the Firefox profile folder.
You can use this button to go to the current Firefox profile folder:
- Help > troubleshooting information > profile directory: see file (Linux: open the directory;) Mac: View in the Finder)
- http://KB.mozillazine.org/Profile_folder_-_Firefox
- Create the folder chrome (lowercase) in the .default < xxxxxxxx > profile folder if the folder does not exist
- Use a text editor like Notepad to create a userChrome.css (new) file in the folder chrome (file name is case sensitive)
- Paste the code in the userChrome.css file in the Editor window
- Make sure that the userChrome.css file starts with the default @namespace line
- Make sure that you select "All files" and not "text files" when you save the file via "save file as" in the text editor as userChrome.css.
Otherwise, Windows can add a hidden .txt file extension and you end up with one does not not userChrome.css.txt file
-
How I change the fonts and colors of default return?
I changed the font and the color of the text through the Tools button and the button options and the tab content. I can't find anything tell me how to change the fonts and colors to the colors and fonts by default. Can you advise me? I use Windows 7 Home Premium OS. Thank you.
Hi Brenda19605,
You can use this article to set the fonts and colors: https://support.mozilla.org/en-US/kb/change-fonts-and-colors-websites-use?esab=a & s = do & r = 0 & s = as
The default settings for the police are in this article:
https://support.Mozilla.org/en-us/KB/some%20text%20shows%20up%20bold%20after%20upgradeUnfortunately for the default color has no good reference. For the text, but it is black (most lower-left), the background is white (color above left). Unvisited links is blue (column 8, line 5) and the visited link is purple (column 9, line 5).
Let me know if you need help more!
Lordfreak
-
How to change the input descriptor of return on investment?
I am a beginner of Labview Vision users. I need to convert a RGB image into binary image and superimpose a few lines on the binary image at random and then measure the length of the ordinate at the origin of the image. I came across the problem of changing of return on investment by incorporating a few random coordinates (by this contact information, I can generate random lines.). But I could not find how to change the coordinates or import data from an excel file coordination.
Any help is appreciated.
Jian
If you have the package of Vision, you can use the line to convert to the KING function and the power cable in the KING of the image property. If you do not, you will need to build your own KING. Given the coordinates of line (X 1, Y1) and (X 2, Y2) the entries in the return on investment are the following.
Global rectangle - table of 4 elements with values [X 1, Y1, X 2 + 1, Y2 + 1]
Countours - single element (table 4 external elements, line [X 1, Y1, X 2, Y2])
-
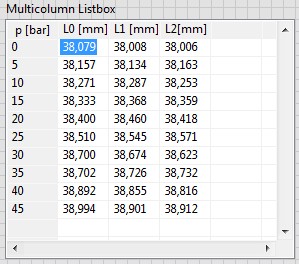
How to change the upper-left corner of the multicolumn listbox?
Can I change the properties of the cell (-1, -1), but I don't know how to change the text.
Is it too simple or impossible?
Kind regards
Ljubo.
In Excel, you cannot change the headers of columns (A, B, c...) and headers of lines (1, 2, 3,...).
I have a 2D data table Y a 1 d of data table X. data of X are the same for all the columns of Y. The first idea was to use X values as row headings to give him special attention. There should be a header above the data of X (name, quantity, unit,...). See the example below.
The solution is very simple: I created a label and put it on the upper left corner of the listbox.
Good day
Ljubo.
-
"How to change the gateway by default from the command prompt"
"How to change the gateway by default from the command prompt"
How to change the default gateway on the windows command line
-
How to change the size of taskbar buttons? I did everything that I've seen proposed in these pages, and nothing works.
The buttons of programs open in the taskbar are tiny and square. I want them to be of normal size (by default). I have locked and unlocked the task bar. I moved the "three vertical lines composed small points." Nothing works.
If you want to enlarge all the icons in the taskbar, and then increase the point size of buttons of legend to a larger number of advanced appearance settings.
Follow these steps:1. click on start, Control Panel, personalization, window color and appearance.
2. on the window color and appearance, click "Classic appearance open for more color options" (link below).
3. in the box "Appearance settings", click on the button "Advanced".
4. in the box "Advanced appearance" under "Item:" dropdown, choose "buttons".
5 set your size
6. click on the OK button.
7 on the "Appearance settings" box, click on the button 'Aplly', wait.
8. click the OK button if you are uncomfortable with the size to change, or just click on the "Advanced" button to set the size.I hope I could help
-
How to change the row height in tableLayoutManager?
HIII all,.
I used TableLayoutManager in my application but don't know how to increase the row height.
I use this reference for the TableLayoutManager link.
How - to create a presentation of the rich UI at TableLayoutManager
Article number: DB-00783and I want to make the size of the entire line 68 px...
any body can help me how to change the RowHeight in tableFieldManager?
@peter
Thank you Peter for your answer.
I solved the problem as you indicate in the Tablelayoutmanager.java change before 5 months.
I asked you our post reply you as soon as possible...
I don't care
Thank you.
regaurds,
Albert_anks
-
BlackBerry smartphone how to change the phone number of a BB 9930
How to change the number on the phone who is delegated by the carrier, are visible at the top of the screen when you make a call... Displays the number of the previous user. You will need to change for my number. Thank you
You use the 9930 on Tmobile? It should work.
- Press digit key and enter # 000000 by pressing the digit key later.
- You will pass the screen change the CDMA Service.
- Modify or change the number on the top line.
- And save.
Don't change anything else.
-
How to change the number of values in the hour that are restricted.
Hello
May I know how to change the number of values in the hour that are restricted.
In fact, we have improved of obiee in obiee 11g 10g. Data base is the same for Both.In 10 g the prompt value is limited to show only 35 records per page. As we passed it shows only 35 Records in 11g also. How can I change this limit to 11g.
Please suggest me! Its urgent!
Thanks and greetings
Navnitha
Hello
In the advance tab we have the XML of the upgraded report, copy it into a Notepad and try to find the line beginning as below
In 10g, we have something like below, simply remove the choicesPerPage = '35' from 11 g OBIEE XML report
Thank you
RAM


Delete the following in your css spry as file its in the ' query print media "and has no effect on the screen - have added you it to the wrong place."
{.alignRight}
position: relative;
Top: 1px;
float: right! important;
padding: 5px 20px;
margin: 0px 1px 0px 0px;
Police: bold 12px without serif.
background-color: #f1c185;
list-style: none;
border-left: 1px solid #CCC;
border-bottom: 1px solid #999;
border-top: 1px solid #999;
border-right: 1px solid #999;
border-radius: 5px 0px 5px 0px;
-moz-user-select: none;
-khtml-user-select: none;
cursor: pointer;
}
Add the below css just above the press query written:
{.alignRight}
float: right! important;
}
/ * Print styles * /.
@media print {}

Maybe you are looking for
-
iMac 27 inch overheats and stops
27-inch iMac processor intel core duo two overheats and stops, what is the best way to clean the dust to cool properly?
-
I just got a new modem (Arris SB6190) and now my Airport Extreme does not connect. It worked fine with the previous modem (a rented one TWC). Help!
-
I have a Dell laptop running Windows XP. This morning our cat sitting on the keyboard (the computer was on and hot, I guess). When I he hunted, display has gone from landscape orientation portrait. How do I go back?
-
SG500 layer 3 - VLAN can see each other devices Vlan9 <>- Vlan13
Hi all! I guess I'm missing something simple here: Basic configuration: two SG500 stacked switches in layer mode 3 who should do the routing. LANCOM WLC with access Internet COOL tied up in the trunk. As for my understanding, I wouldn't be able to se
-
Have HP Photosmart 8450, gave the impression of photos, because after a few months, they have all disappeared. It depends on bad paper, ink or what? I would like to continue to try.