LR CC graduated density filter
When I drag on the image, I can see the effect of the filter. When I let go on the pad, the effect is replaced by your reddish area (I assume that the mask), but doesn't show only not the effect applied.
I don't see the icon of filter on the image (to change etc.)
I've used this for years with no problems. So I guess I'm doing something wrong.
Help, please.
Hi sureshgupta,
If you are using the latest version of Lightroom 6/CC 2015, you can try to reset the Lightroom preferences to default if you have changed any settings...
Press the shift + option keys immediately after you restart Lightroom and select Preferences reset in the dialog box.
Also, to see the effect on the image you have to uncheck the decorative mask and the pines edit show: Auto

Let us know if that helps.
Kind regards
Mohit
Tags: Photoshop Lightroom
Similar Questions
-
Neutral density filter question
LR 6.1.1 on iMac using 5 k. The bluetooth trackpad input device.
Is there a key combination that can be pressed when you place a ND adjustment to keep as horizontal placement? It is difficult to place just because it begins to spin immediately. Then, I spend so much time trying to turn for horizontal or vertical if the case may be. Sensitive trackpad I guess - but I tried to adjust to slow and no help.
Like when we hold down the Option key on Mac for highlights or sharpening mask.
I hope I wrote it correctly?
Thanks for any help.
Press the Shift key.
-
LR is how good to replace the physical ND filter?
What is function of filter ND LR? Can it replace a physical ND filter? Once you blow, point, highlight, I doubt that any software can recover at a decent level. What are the limits of the function of filter ND LR so?
Im guessing you take on the graduated ND filter tool in LR4 (there is no way to emulate a regular ND filter in the software).
Newtonite wrote:
Once you blow, point, highlight, I doubt that any software can recover at a decent level.
You are right...
Newtonite wrote:
What are the limits of the function of filter ND LR so?
.. .and you have already answered your own question. The limitation is that if you blow a great moment, you get back detail. It's really as simple as that.
In short, no.... Function 'filter ND grad' of the LR4, it's not a replacement for a real split neutral density filter. Not by a long shot. The LR4 tool is excellent and very useful in post-processing, but it is not expected to be an effective replacement for a physical split ND.
-
New ND filter wheel has received.
Received the new wheel filter ND of Sony Europe today. Ed according to the instructions:
F i t t e d rather than *.
-
Any way to increase already turned to 1/2000 second in 25 p video motion blur?
I want to turn some DSLR videos in sunny at f1.8 to achieve very low depth of field.
Even at the slower ISO 100 setting it will require a shutter speed of 1/2000 second that will produce a very unstable motion in the region.
Is it possible in FCP X (or elsewhere) that I can introduce blur just for movements in the video without affecting the static parts? (Probably NOT)!
PS I KNOW THAT I CAN USE MY FORT NEUTRAL DENSITY FILTER WHEN SHOOTING BUT WANT TO AVOID IF POSSIBLE.
That's what NDs, exactly. Use the low tech solution. This is the best.
Doing this in post production is a costly and risky operation: you must purchase the software, you must learn how to use it, you can be terribly disappointed with the results.
Or, of course, it may be that you like to watch and learn to rely on your new tools for many more great experimentation as your work on other projects.
I did not follow with pixel-level processors that will create razor sharp images blur. I hope that someone will be back shortly with a suggestion about an effect which can simulate a motion blur.
It is possible to create a model in motion which may be moved to FCPX but it depends actually move when the shutter is opened things, it does not trail behind the pixels.
https://www.YouTube.com/watch?v=UJfrWDkWHE4 & feature = youtu.be
-
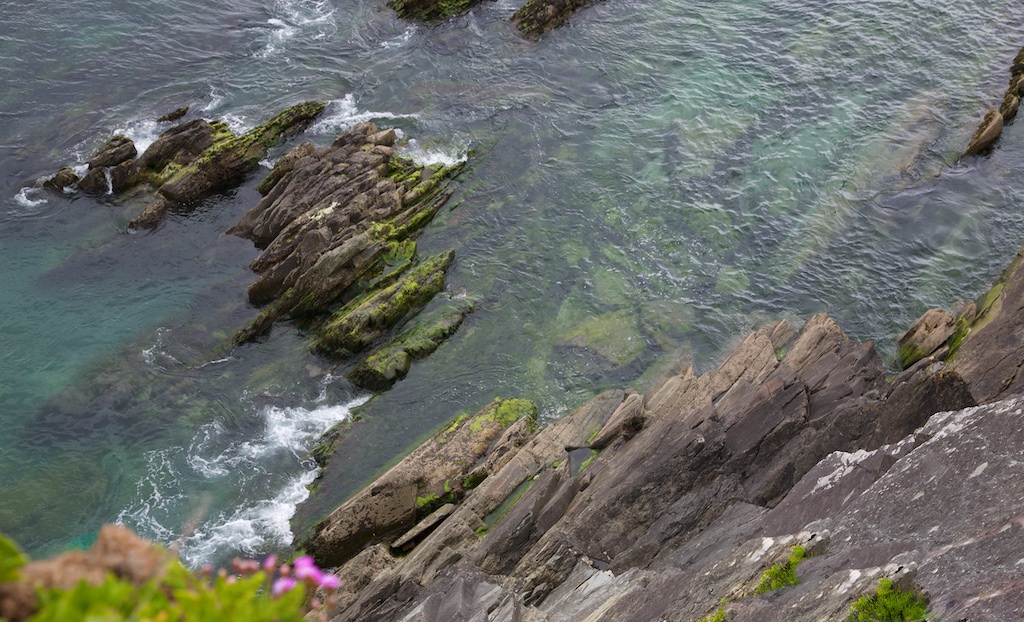
I have attached a few photos taken in Ireland, you can take a peek
Thanks to all who helped me with my problems of lens. I got the Peterson, book and read it carefully. I enclose a photo taken in Ireland last year. Can take you a look? Used my 5DM 3 with lens EF 24-105mm 1.5.
OK, now I understand you are looking for criticism...
To my way of thinking, there are two or three parts of how I criticize. Additionally, when you ask for criticism on the public forum, expect honesty (nobody would do you any favorite if they were dishonest in the hope of not to hurt feelings). Then promise to melt.
If an image is entered in a contest, the judges would not necessarily time to properly evaluate each image. They are looking for 'timeout value. Here's what that means: imagine you're flicking your way through a magazine... looking at the picture after after. They are all "nice"... but then you come across something with impact. It forces you to stop and linger for a while on this image instead of simply continue to turn the page. This 'pause' is what I mean by 'value to stop '. You can shoot a photo fo a sunset Sun, but we have all seen thousands of sunsets so a sunset is unlikely to get anyone's attention (it should really be an amazing sunset).
Normally, I'm looking for bases...
-What is the upgrade to the point?
Is technically correct exposure (not over-exposed or underexposed)?
-And then there is a variation on this... the exhibition is also artistic attractive? Have you used a narrow depth of field to help some element of the image stand out and blur the background & foreground? Have you used a shutter speed to create motion blur and involves a feeling of movement in a photo? These are examples of ways to be not only "technically" correct, but artistically and creatively engaging.
What the composition? You draw look me at something? Doesn't it seem balanced? Is the awkward cropping?
I could go on with more examples, but the point is, I would look for a technically good picture and also an attractive artistic image that draws me in.
While your image is nicefly focused and well exposed, what am I missing, it is a focal point of interest. I guess you could say that these rocks are a focal point, but the framing is random and nothing especially attracts me to this topic.
Shutter speed was fast enough to 'freeze' the movement of water and the water is dramatic (he's not a storm or huge waves, etc.) In other words, is there anything of particular interest in the water. If you want to evoke a feeling or an emotion of tranquility or peace, you could use a neutral density filter (for example 10 stop filter) and take a picture of long exposure (on a tripod) near evening, and also to the low level of water near and it blurs a look almost glass-like water (sometimes if the water is a little more active ", you get a misty look). Use of a circular polarizer (CPL) can help to adjust the reflection of the water and make it easier to see the bottom in the water.
You mentioned that you have the Peterson book (I assume you mean "Understanding exposure" by Bryan). In this book, you will learn how to turn in "manual mode". I think everyone should learn to shoot in manual mode and then learn how to decide when to use fast shutter speed speeds up rather than slow shutter speeds or openings close vs. openness for creative impact. Once you know "how" to control your cmaera for impact, you can't use just 'manual' - I use almost all modes on my camera.
There is a book that I like on the composition of Michael Freeman called "the photographer's eye: composition and Design for better Digital Photos.
Take some time to read... then take a LOT of time to go shoot and practice. Some people are strong supporters of "comes out and shoot". I prefer to shoot with a goal... read something, then go try to apply this thing (instead of justing out aimlessly). This is useful because you can come home, review your shots and decide how well you achieved your goal (doing things of goals that you can achieve with realism).
-
How to change the image at the top of quality, correcting the skin tone?

I want to correct skin tone change it in good quality headshot. I always change, but cannot fix the skin tone. I'm Brown, but the image that it makes my skin very clear and white. And if I try to remedy this, I have make my skin too dark. My goal is to make the head with the correct shade, not making it too dark, but the head is still "bright." Could someone kindly guide me.
There are several ways to do so. Here is one.
The drill is to change the tone of the whole image with an adjustment layer, and then mask the effect where we do not want.
Try this:
- Open image file
- Open a levels adjustment layer to increase the contrast - use the sliders on the left and middle under the histogram.
- Open a layer empty at the top, and then press CTRL + SHIFT + ALT + E to create a visible layer of timbre. It is a layer that combines all the layers underneath.
- Open an adjustment layer Photo filters. In the dialog box, select warming 85 @ 83% density filter, uncheck "keep the brightness.
- The entire image turns tan, not to worry. Left click on the mask (the white rectangle), then paint with a black brush about 15% opacity on the face (since it's now too dark) and on the shirt. If you go too far, correct the effect of mask with a white brush
- Open an empty layer on top. then press CTRL + SHIFT + ALT + E to create another visible layer of timbre. Improve slightly the sharpness with sharpness on this layer, and in addition, sharpen eyes and lips from time to time with the sharpening tool.
Tips: Increase/decrease the size of the cursor brush with the keys of support according to the letter P on the keyboard
You can enable or disable the chips of color between black and white with the letter x. d is the default value.

-
Graduated filter - outside of the lines...
When I apply a filter graduated in the middle of the picture - for example, I want to clear up the middle part of a landscape of exposure setting. I apply the filter and adjust exposure, but adaptation applies since the middle of the filter to the top of the picture: it is not limited at the top and bottom of the graduated filter. It's in Lightroom 2015.6 version and this behavior I don't remember doing so earlier. I tried to 'reset' varios presets to see if I'd put something inadvertently, but nothing has changed that.
Any suggestions are greatly appreciated.
The gradient filter has no options to do what you want (like Photoshop), but there are other suggestions.
He was always so to my knowledge.
1. the brush setting (grand and feathers) as mentioned by BKKDon above.
Note: If you click on the brush once, move the slider, hold the [SHIFT] key, click the brush a second time - you will get a straight brush of the beginning of locations at the ends.

2. the Radial filter can be extended beyond the borders of the image and appropriately adjusted with sliders and the feather.

3. did you know that the gradient filter tool can act as a 'Global' adjustment to the entire image and repeatedly!
Just start the Gradient outside the image and drag it far more away from the image.

-
White and black slider in graduated filter. In addition, no dehaze.
I just purchased Lightroom 6. I noticed on tutorial videos there now access to whites and black in the graduated filter. The sliders are not present in mine. I just bought the latest version. What Miss me? I checked the updates.
The features you mentioned have been added after that LR 6.0 is out while they are only a part of the LR CC 2015 subscription.
What's new in the LR series-number-license series would be part of LR 7 if there is a LR 7.
-
LR not CC 2015.1 to 6 no line or on filter graduated from command
This is identical to a problem reported in Lightroom 5 and fixed. At some point, around 2015.4 she has disappeared. without these guides the graduated filter is useless.
OS X El Capitan on new MBP retina with 16gig ram.
I have reset the preferences and played with the GPU acceleration and I am really frustrated. I uninstalled and went back to 2015 CC/6 and applied updates 1 by 1. no luck.
Someone has AN idea?
My mistake is on the lower left. Even at my age, I tend to get right and left combined.
Sorry about that. Yes: toggles.
-
CS6 Camera Raw 9.1.1 didn't brush filter graduation
Hi all
I found a post similar to my request on this forum but it is 2 years old and ACR 8.6. I am running version 9.1.1 and there is no brush under graduation filter feature. that I'm missing something or because of the CS6?
Thank you
Shad

There are several new features that are not included in Camera Raw 9.1 running Photoshop CS6. The last few updates that apply to Camera Raw for PS CS6 included in favour of new cameras, but no new features. And I think the brushes of the progressive filter is one of the features that has not been available.
-
Graduated filter blending mode
I apply a-2.00 exhibition on the graduated filter tool in Camera Raw and it looks like the blending mode has Darker or multiply instead of the normal. The dark areas to fall a black mess instead of just become progressively darker. Anyone know why this is happening? I use a new installation of CC.
The adjustments that you program in the progressive filter have the greatest effect at the beginning of your selection and decreases gradually throughout the area covered by the progressive filter. If you have areas that are too dark, you can use a brush that is selectable from the progressive filter Panel to erase or lighten the effects in specific areas.

As shown here, the brush with the "-" is selected which means the brush will remove the effect of the brushed area. You can set the bit rate so that as you brush it only partially removes the effect.
-
Graduated filter turn - CC 2015
Hi guys,.
In the most recent version of LR CC 2015, I can't get the graduated filter to turn after you release the mouse. It will turn when I am first of all by drag, but not after.
I did a bit of research, but did not turn anything. Is this a bug or a problem on my end?
Thank you
Benjamin
Windows 7 Pro
Yes, I would like to reset the preferences.
-
After installing Lightroom 6 (6.1.1) the next problem is detected.
Develop module. Graduated filter, centrifugal filter.
The right part of the window is not completely visible.
5 Lightroom doesn't have this problem. It appears on two different
computers running Windows 7 and Windows 10.
How to solve this?
I mean the right-hand side of the Panel
I was not aware of the possibility of the width
Panel to customize.
With me was to reduce the width of the installation,
While the last letters to miss a tekts.
I discovered today that the left side of the Panel
can be moved. Thanks for your quick response.
Frans Jeijsman
-
Graduated filter does not not at the controls
Hello world! The graduated filter tool does not work on my version of lightroom 5. I can move the cursor, but nothing happens on the image. It's very annoying. I tried to reinstall the software 5 times now and are at the end of my intelligence. I did the research for hours on the web and cannot find any info. I wonder if this is a way to make me force using the cloud service?
You do not use the graduated filter to adjust the entire image, you use the BASE Panel. Now, I noticed in your clip to screen your BASE Panel is missing, as the TONE CURVE Panel is the first listed. To get your BASE right click on back panel header of the TONE CURVE and the menu drop down next appears, so that you can re - turn on the BASE Panel. This is another long term glitch/bug in Lightroom that is probably hard to track down anyone found a repetitive sequence why signs accidentally goes off.


Maybe you are looking for
-
How to cancel the composition of Apple's music for which I don't use, so don't want to pay for? Thank you!
-
Vista 64-bit - auto-hide Taskbar does not.
I have updated the drivers for multiple hardware today and now my taskbar is no longer auto-hide. I tried to play with different configurations for the taskbar and to delete the files in the prefetch folder all to nothing done. Any suggestions?
-
Home/Apps screen keep deletion
This happened to me three times now. It is very annoying If all the applications/Widgets/Ect. Will be deleted from the screens (including down call/SMS/settings /.) This happens sometimes after restarting my phone. Is there a way to avoid this? Or a
-
I have a WD NAS, who has worked through my Explorer windows until recently - now I can access only through Internet Explorer 8 using FTP. I use to be able to open the windows Explorer and able to 'network' and click on the NAS and enter my name/passw
-
I use an all-in-one Deskjet 3052 a on Windows 7-64 bit laptop. Whenever I put in Hibernate or stop, when I start again I have to reload the driver for this printer. Does anyone have a solution?