setting the DPI of the image
I am trying to create an image and then that save in a file to print later. I noticed that the photo features seem to default to an image of 96 dpi. Is it possible to increase it? I need to add a nice little text to the image and it turns to be eligible.
Disregard this message. This is supposed to be in the Labview section... not labwindows. I created a new there. I see no way to delete or move this post!
Tags: NI Software
Similar Questions
-
Is true or false. Only windows 7 can set the image of the user that appears in the start menu you can not change it.
Set to false.
Type the user accounts in the start search box.
Press ENTER.
Select change your image.
Browse the picture than what you want.
-
Unable to set the image of the gallery as a backdrop
Hi all
I was able to open the Gallery to choose the picture, but was not able to set the selected as a background image.
Whenever I pick a picture, the default image will set to white.
Here is my code, can anyone know where goes wrong?
Thanks in advance.
Container {

            background: recipeBackground.imagePaint

            attachedObjects: [
                ImagePaintDefinition {
                    id: recipeBackground
                    imageSource: "asset:///images/bg.jpg"
                    repeatPattern: RepeatPattern.XY
                }
            ]
            Container {
                layout: DockLayout {

                }
                opacity: 1.0
                visible: true
                horizontalAlignment: HorizontalAlignment.Center
                background: Color.Transparent
                leftPadding: 0.0
                ImageView {
                    imageSource: "asset:///images/header.jpg"
                    preferredHeight: 150.0
                    opacity: 0.9

                }
                Container {
                    verticalAlignment: VerticalAlignment.Center
                    horizontalAlignment: HorizontalAlignment.Fill

                    layout: StackLayout {
                        orientation: LayoutOrientation.LeftToRight

                    }
                    leftPadding: 200.0
                    Label {
                        text: "Testing"
                        preferredHeight: 100.0
                        verticalAlignment: VerticalAlignment.Center
                        horizontalAlignment: HorizontalAlignment.Center
                        textStyle {
                            base: SystemDefaults.TextStyles.MediumText
                            color: Color.White
                        }
                    }
                    ImageButton {
                        verticalAlignment: VerticalAlignment.Top
                        horizontalAlignment: HorizontalAlignment.Left
                        leftMargin: 150.0
                        defaultImageSource: "asset:///images/Settings.png"

                        onClicked:{
                            picker.open()

                        }

                    }

                    attachedObjects: [
                        FilePicker {
                            id: picker
                            property string selectedFile
                            title: qsTr("File Picker")
                            mode: FilePickerMode.Picker
                            type: FileType.Picture
                            viewMode: FilePickerViewMode.GridView
                            onFileSelected: {
                                selectedFile = selectedFiles[0]
                                recipeBackground.imageSource = selectedFiles[0]
                            }
                        }
                    ]

                }
            }
Well it just add the permission to access_shared bar - descriptor.xml and it works!
-
Set the image of the 2d image control
I do a few installers of pallet for ease of distribution for some libraries that I wrote. I'm following the example of screw (search finder example "palette API").
I feel a certain sense of frustration by defining the new icon from the palette; the constant of the icon is a 2d image control, but I can't find a way to put my picture in there, and I can't put it programmatically as the image 2d screw control let me just draw shapes in there.
Oh for a constant of comics, a little unusual, but just for the heck of it.
(1) unpack attachment and save to disk.
(2) If you use open LV10 photo Constant_Tree.vi or mass compile directory.
(3) drag the file image Constant.xnode your DB.
(4) drag a PNG/JPG/BMP file to the constant and take advantage of the results
(5) right-click to "Flatten" to a constant of the normal image if you want to use the VI on a machine without this XNode.
(6) If you wish, add photo Constant.xnode to your Palette, be sure to select all the files so that the .xnode files are visible when you add a VI.
Yet, you don't want your users to be mucking with the cover and not the block diagram?
-
How to set the Image Point Tool coordinates?
Ladies and gentlemen
I just want to place the Image tool to the point of my image-specific details. The solution is probably trivial if you know how to do (as always), but after looking around in the properties available, I can't find what I'm looking for.
In the hope there is someone who could help me.
Leif Nyholm, consultant Symbio
I found a VI does the job: "IMAQ convert Point to the KING. Exactly what I was looking for, but I do not understand why I couldn't find so far.
-
I run Windows Vista and I tried to change the background affecting a photo of my kids, however, when I put the picture, it shows to start and stop mode? The image is there, but the only thing I see is a blue background. Can you please help?
Hello
Change the image of background to something else entirely, then restart and change it back.
Good luck, Rick Rogers, aka "Crazy" - Microsoft MVP http://mvp.support.microsoft.com Windows help - www.rickrogers.org
-
How to set the image of the project format
Newbie question: I create a video from various sources. Some sequences are 1280 x 720, other clips from old DVD, whose size is 642 x 480. The first clip I have loaded in my project is the old (642 x 480 pixels), it seems because I loaded the small clip in the first place, the whole project is that report width / height. So now when I try to bring new clips, they get cropped. How to set the size to 1280 x 720? It's ok, if there is black bands around the small clips. Thank you
I use first Pro CC on Mac OS 10.9.5
Select your sequence in the project Panel, and then open it by going to sequence/sequence settings in the menu dropdown.
Now change the custom output Format.
Now, you will be able to change the settings.
-
Set the Images to scale with the width of the browser
This appears to have just broken on my Site and I can't understand why?
I thought that if I put an image of "scale to fill" then drag the image to the border of the page margin. Then the image would make the scale with the size of the browser.
I had to work, and then it stops suddenly. I use Muse 7.1? Current? Any help?
When I update my page and I adapt the browser upward I see white margins on both sides of the page - that is not what I want.
Help!
J
I thought about it.
I thought that if the rectangle box was outside of the margin of the page then it would be 100% width.
You must line up exactly with the margin of page until you see "100% width.
Thank you
-
PS Cs6 - set the image at 300 DPI, but the text is always pixelly. Help, please!
I am having trouble with the text tool in Photoshop cs6. I used it in my computer in my class, and it's a little weird. I put my photo at 300 DPI and the resolution is slightly more than 1000 x 1300 pixels. When I use the text tool, words are always pixely, could someone PLEASE tell me why this is happening? I know that PS is not super great text as illustrator is, but when I do the same in Cs4 and set it to actual pixels, the text was not entirely pixely. Help, please.
Select the text and check the setting of the AA in the Options bar. You probably set to None

-
Hand to set the image as desktop disappears in fullscreen
Is it just me, or the option "Set as desktop image" doesn't disappear from the list of options when you click the button share when you enter full screen mode?
No, it's not just you. This menu item is removed full screen mode. I don't know if it is a control is intentional. Tell Apple about the missing features you want restored or new features added in Photos via https://www.apple.com/feedback/photos.html.

-
How to set the image as wallpaper BB10...?
We have all seen textures or commonly say images set as background for applications. In my application, I need to set an image as the background is. I watch in the form of material BB 10 but I couldn't find anything useful. If anyone has an idea please share it. Thanks in advance.
Or this:
[Embed(source='assets/bg.jpg')]       private var bg_img    : Class;
private var bg : Image = new Image();
...

this.bg.setImage( new bg_img() );
this.addChild( this.bg );
This assumes that the resource is the right size. Like the idea of him having greatness adapted, but certain circles are not looking good if reduced too.
-
How to set the Image to the title screen
Hi I'm new to BlackBerry Forum
I want to put my screen as a background Image.
How to write it?
must use CustomeField?
Thanks in advance.
Hi Daniel,.
1. Add line at the end of your method object:
Super.Paint (g);
2. Add the line in your sublayout() method:
Super.sublayout (w, h);
before the line setExtent (w, h);
Concerning
Bika
-
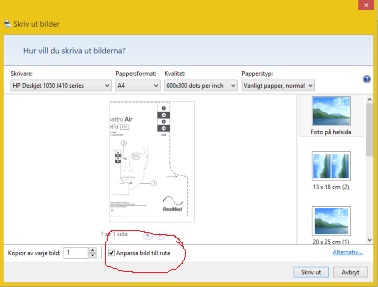
DeskJet 2130: The size of the image on the paper...
When you try to print an image of my Deskjet 2130 I get the following window. On the stands of low (marked): adjust the image in the frame. What this really means? What image is lying?
My problem is: I want to print an image exactly in the size I chose in my program of paint.net. And not on the overall size of the document. How to handle that?
Peter /Hans
Paint.net is perhaps in the control of its installation. If this is the case, you need to make changes of the program from the Paint.net software behavior.
If the operating system can set the defaults outside the program itself, so maybe it's that you can adjust the default settings for which is called print program.
Control Panel > display icon > Default Programs > set your default programs >
Scroll down, find and click on Paint.net > choose defaults for this program >
view the default values and select
Publishes:
I just downloaded the program paint.net, installed and opened a test image.
The program wants to use Windows Photo Viewer, when you click on print from print.net software. Too bad. From now on, I have not found a way to change this unfortunate behavior.
My suggestions you can set the image as you wish, save this image and open the image in MS Paint to set print settings and submit for printing.
Reference:
Paint.NET - User Documentation
When you see a job that can help,
inspires, gives a cool idea
or you learn something new.
Click the 'Thumbs Up' on this post.
Fixed / responded? Click this post accept as Solution to help others find answers.
-
Windows Photo Viewer - full size
Hello
Is there a way to change the default Windows Photo Viewer, so it will open the images directly in 'Real size' rather than the auto zoom?
Thanks in advance, Yoni.
Hi Yonikl,1 let me know the format of the file that is causing the problem?
2. you have any third party photo editing and look at a software installed on your computer?
3. do you have any recent software or the hardware changes on your computer?If there is any third party even software uninstall and check if that helps.You can follow these steps below to set the image at its actual size while watching.To display the image at its actual size, click actual size . To make the entire image enters the Windows Photo Viewer window, click on adjust to the window
 .For more information you can visit this article for assistance below.View and use your pictures in Windows Photo Viewer
http://Windows.Microsoft.com/en-us/Windows7/view-and-use-your-pictures-in-Windows-Photo-ViewerYou can also try to download and install the Windows Live Photo Gallery and check if the problem persists.If the problem persists then you can try these steps below to create a new user account and check if the problem persists.Create a new user profile.Now you must create a new user account and check the question of do you need to follow the stepsbelow.a. open user accounts by clicking the Start button.
b. click Control Panel.
c. click on user accounts.
d. family Safety.
e. click on user accounts.
f. click on manage another account.
g. If you are prompted for an administrator password or confirmation.
h. type the password or provide confirmation.
i. click on create a new account.
j.Type the name you want to assign to the user account.
k.Click an account type.
l.Click create an account.Now search for the question.If you still face the question, then you can follow the link provided below to fix the damaged user profile.Thank you, and in what concerns:
I. Suuresh Kumar - Microsoft technical support.Visit our Microsoft answers feedback Forum and let us know what you think.
-
Set the video file poster frame
Hello!
I would like to know how I can specify a specific image in a video as the poster image that is displayed for the thumbnail in Windows Explorer or Finder window.
Anyone know how I can achieve this?
I tried to export from Quicktime Pro, without the desired effect.
Thanks for your help!
Is not possible. The player sets the image of the poster.
-
FM 12 provides the following procedure (as read in the manual) to see the images in original size in the HTML output. I did and was happy. But now in 2015 of the FM, the operation is no more.
> >
In the Setup file (settings.sts) you can set the image (default size) the parameters width and height to 0pt so that images in the HTML output are displayed in the original format. FM 12 it worked fine. The result was, that the style to the statement tag < img > is deleted in the HTML code output, so that the images keep their original size. But now in 2015 FM it seems there is a bug. The same procedure has the effect that the style statement is in the HTML (is not deleted) and width and height are on 0x0pt. The result is that all the images are invisible. If I disabled 'Preferred size' images in the HTML output are always scaled down in a 'random' size, nobody knows where it comes and how I can trouble or spend that in 2015 scaling of FM.
> >
Anyone who has ever even erperiences with the new 2015 FM?
THX
Hello
There was a bug in the publication process of FrameMaker for which we had planned a work around to set the width and height 0pt. Now we have fixed the issue when you set 0pt as the width images will no longer appear.
Now in your output images will seem to have the same size, such that they appear in the documents of source if preferred size is not defined. If this isn't the case, you can share your example of source document so that we can have a look.
Thank you
Ritesh Kumar


Maybe you are looking for
-
Hey, I'm a student who currently already own a MacBook pro, however, I want to get a smaller and lighter to be able to take classes with me around. Between a MacBook air and macbook what would you suggest for the speed and autonomy? Thank you
-
Satellite P100-276 - 1 pixel vertical line
Help, please. My Satellite P100-276 always shows a white * vertical *, screen of approximately 1/3 from the right side.Changing the resolution of the screen does not change the width of the line.Even at startup before Windows is active.A screenshot d
-
I would like to activate my printer HP connect to HP servers so I can use e-ink HP at home. HP says that my AirPort Extreme does not allow the printer to communicate with the HP servers. The printer is connected via WiFi. Any suggestion would be a
-
The calendar synchronization failure, protocol error: too many files. (4403)
I don't think I have that much. I had to delete all my schedule last year, but now get this error: Failed synchronization schedule Protocol error: too many files. (4403) If anyone can help with suggestion? Thank you... Bill
-
Hello I want to buy WD elements 500 GB 2.5-inch external hard drive, but it has USB 3.0. It will work with the slot USB 2.0 for my laptop Dell inspiron? Thanks in advance...